

Studio Blog
Studio Blog
How An Event Headshot Booth Helps Greater Boston Vendors Pull More Qualified Leads
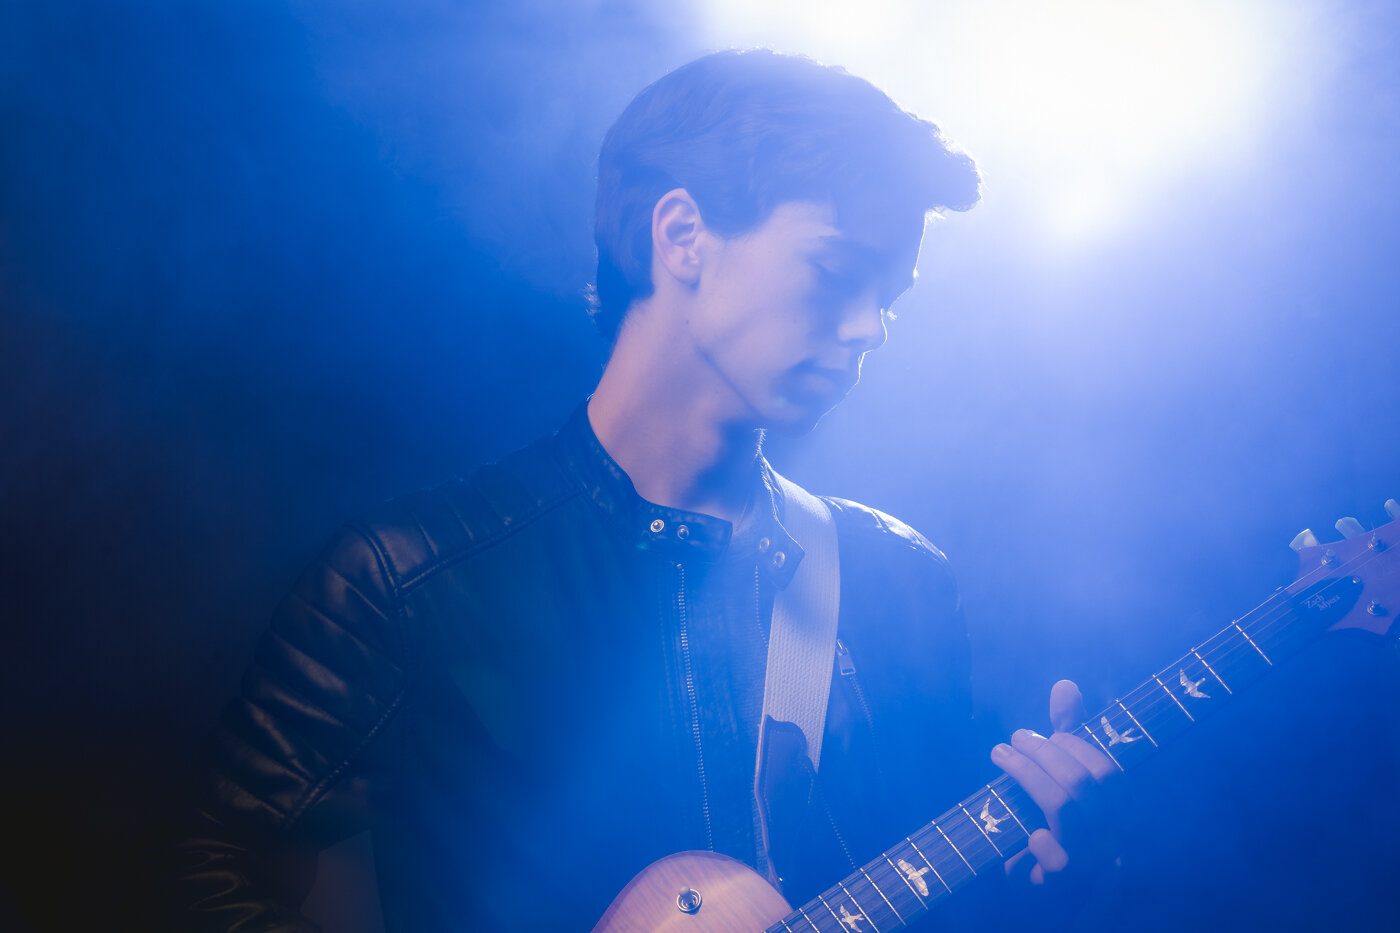
Conferences and trade shows are crowded, competitive spaces. A professional event headshot booth gives your brand a clear edge by attracting the right attendees, increasing booth traffic, and creating natural opportunities for real conversations. Attendees walk away with LinkedIn-ready headshots, while your team gains meaningful engagement that lasts beyond the event.
Conferences and Trade shows are competitive. Every vendor is trying to earn attention, start conversations, and walk away with qualified leads. An event headshot booth helps you stand out with a premium, useful experience—one that draws the right people to your sponsor space and gives your team a comfortable opportunity to start real conversations.
When it’s done well, it also creates a clean, professional follow-up path—That’s exactly what we at Stuart Beeby Photography build for vendors and sponsors: a premium event headshot booth experience that’s easy to run and easy to follow up from.

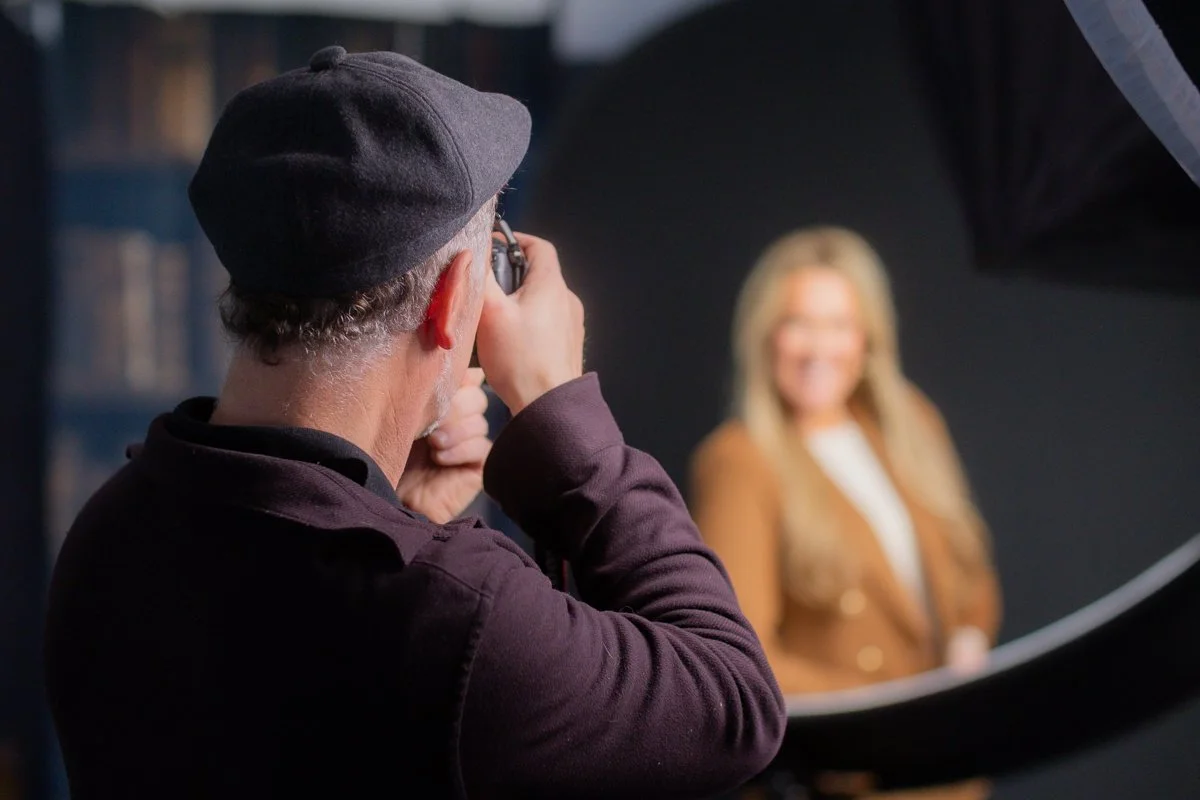
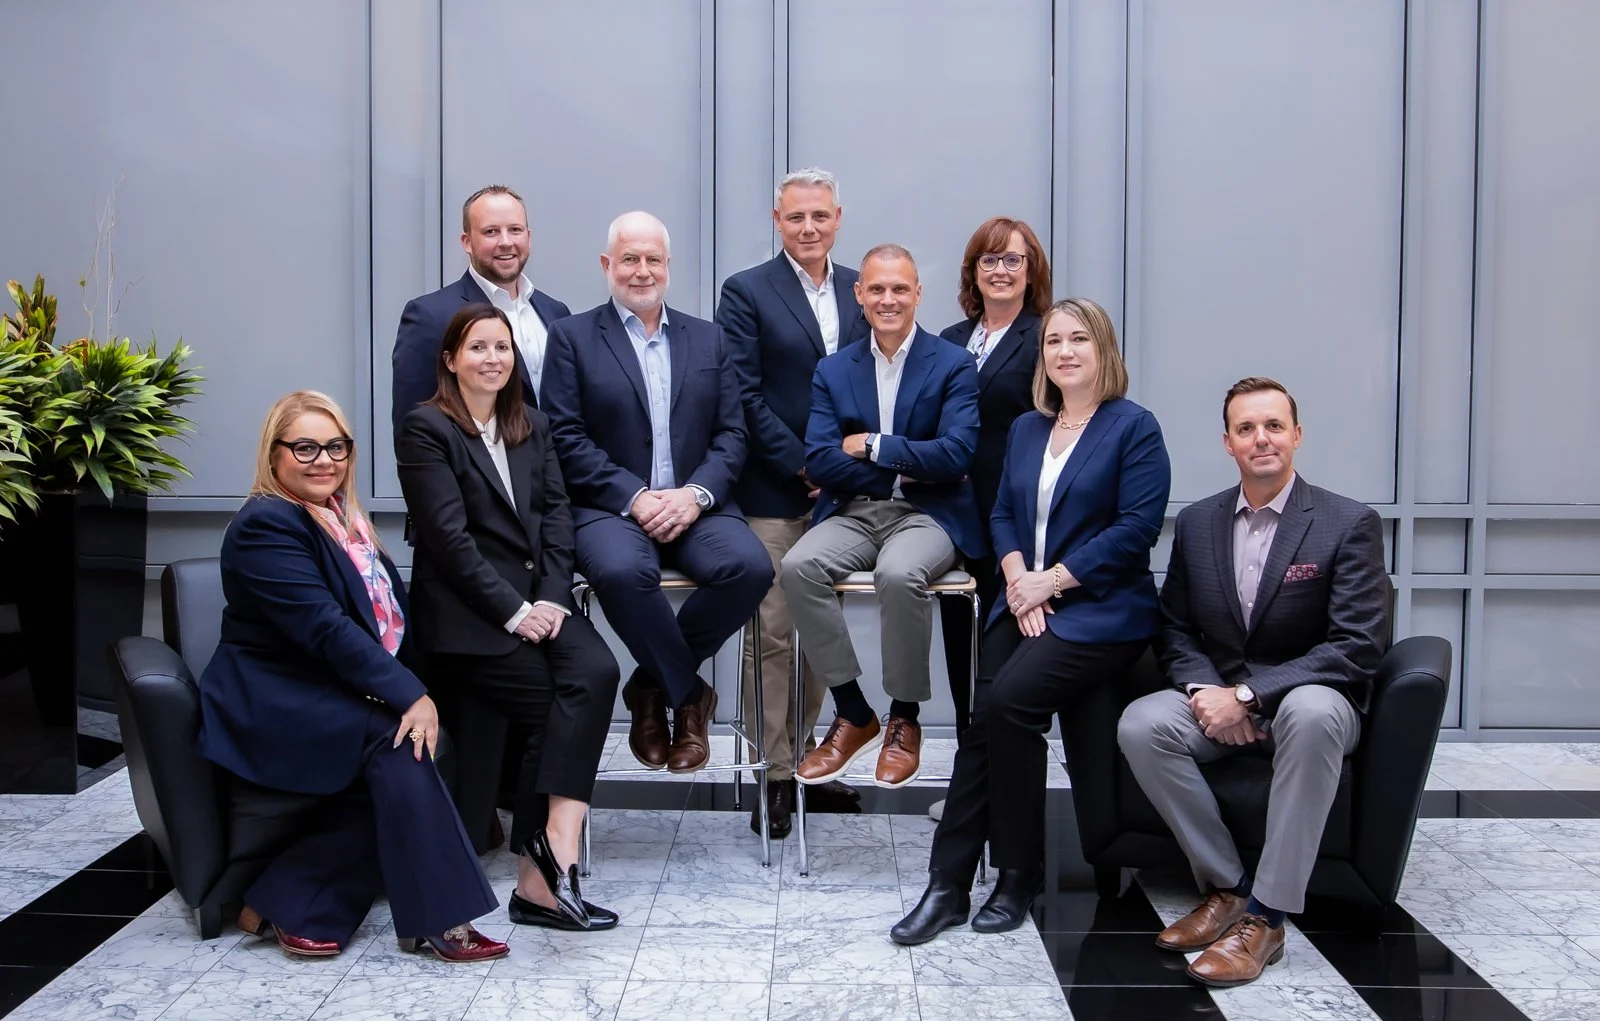
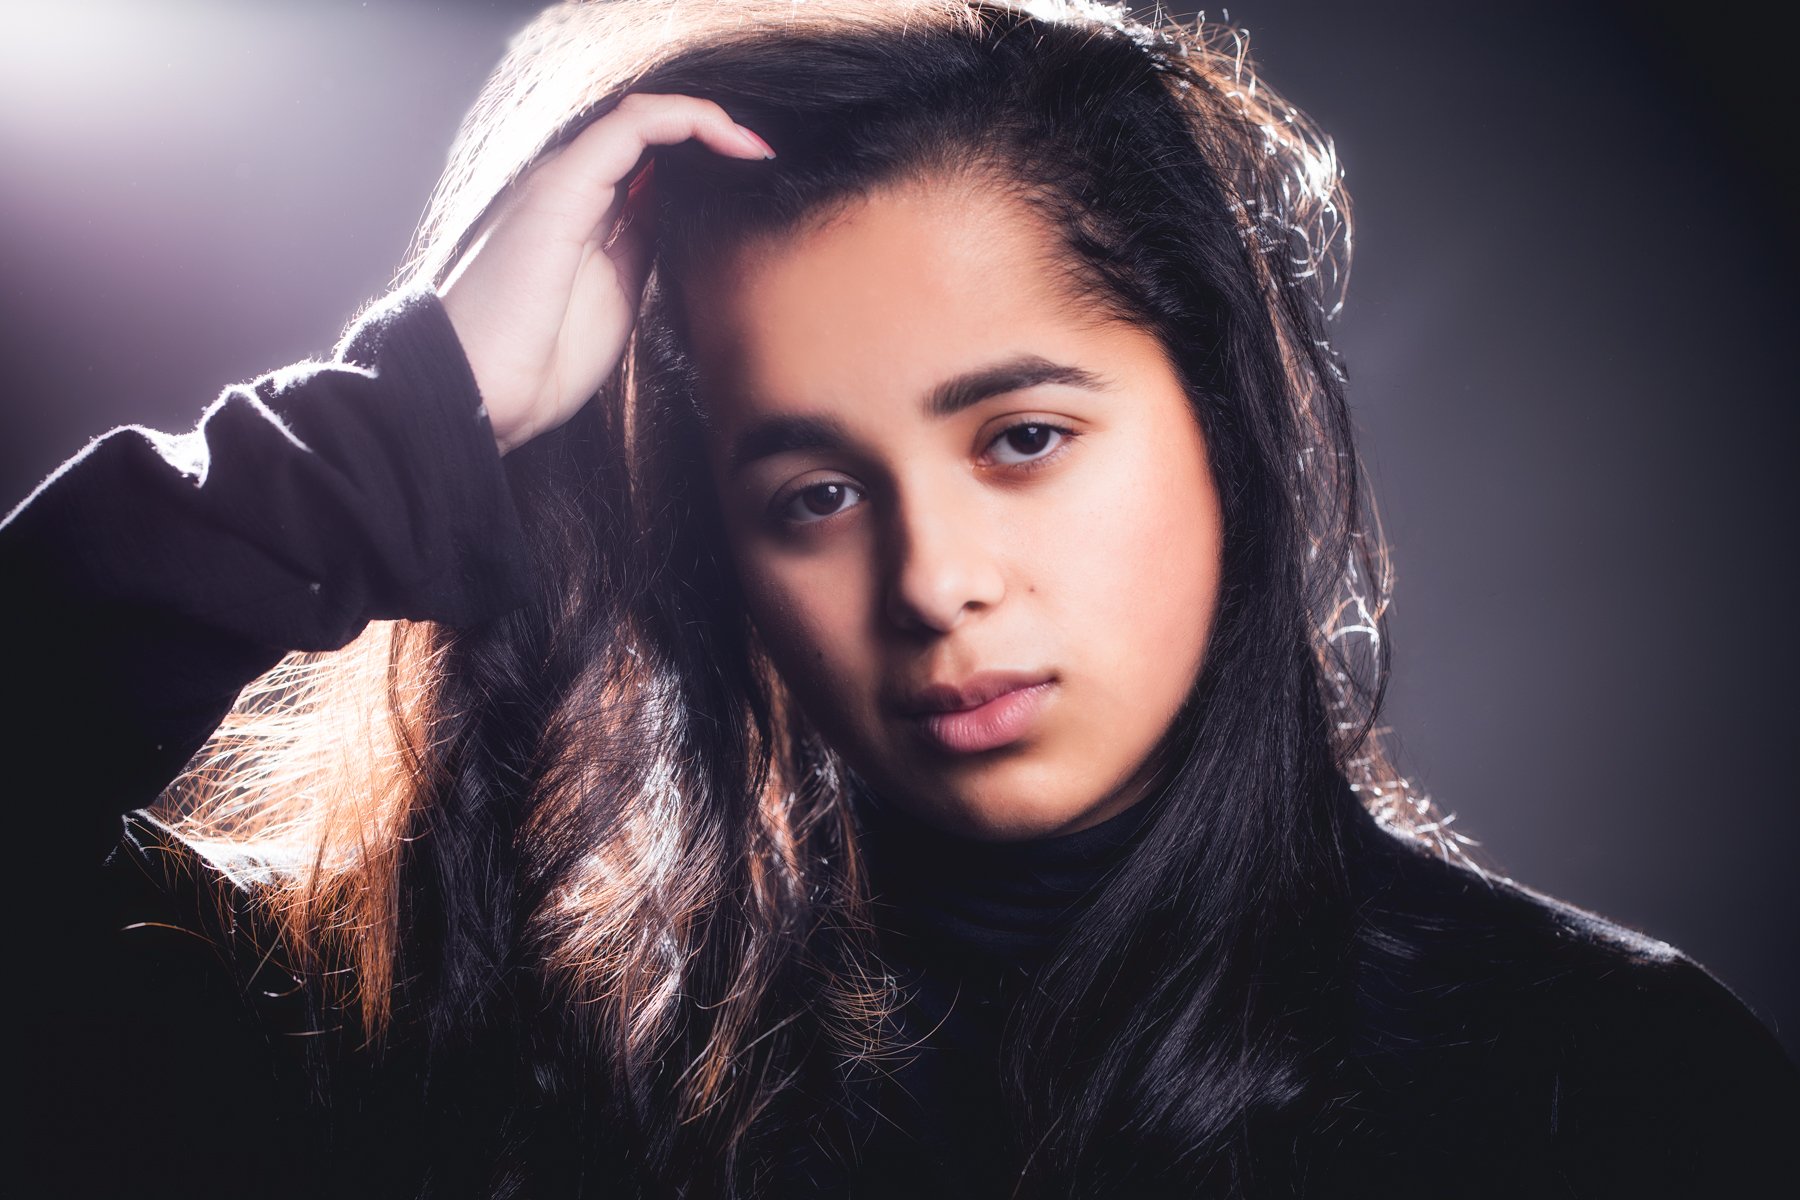
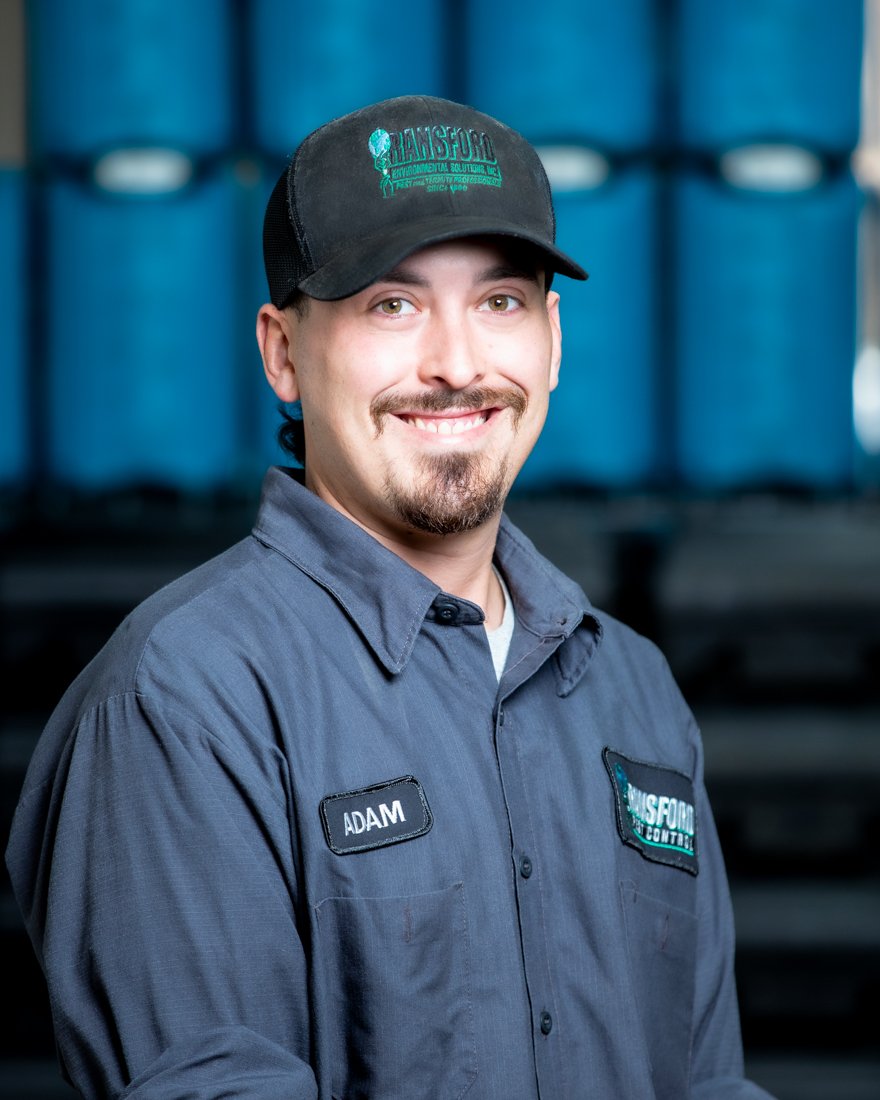
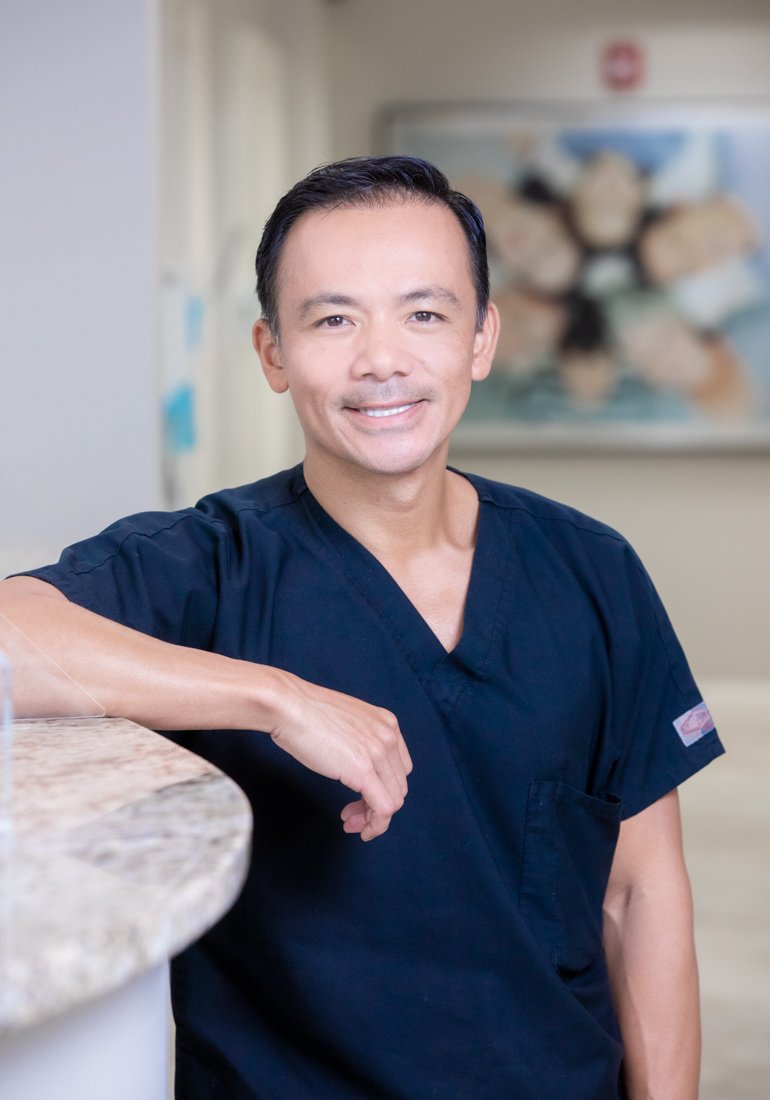
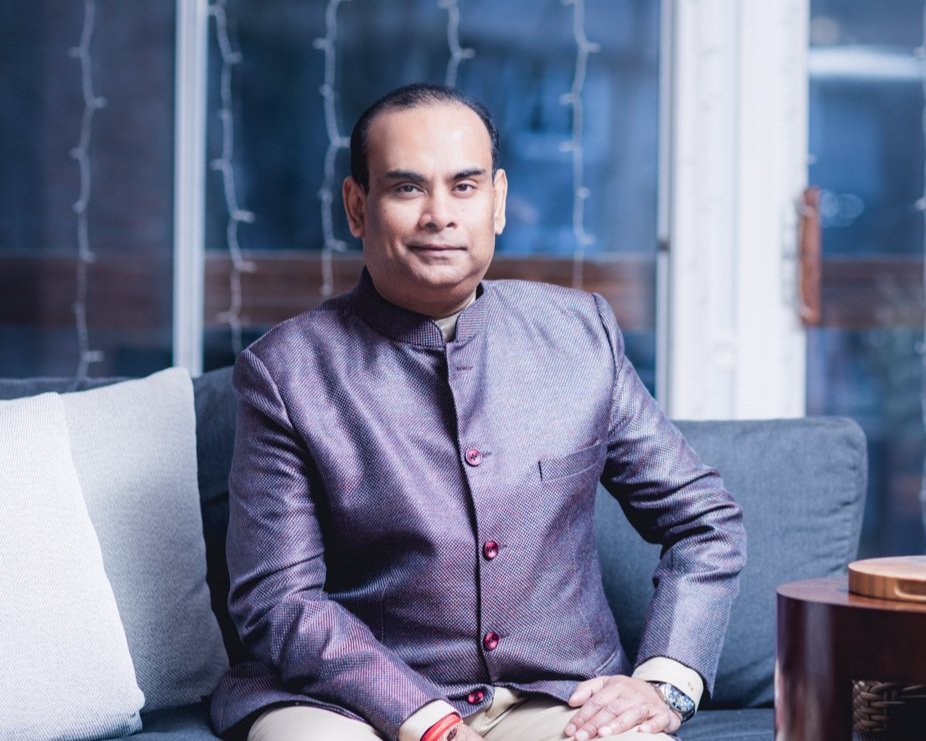
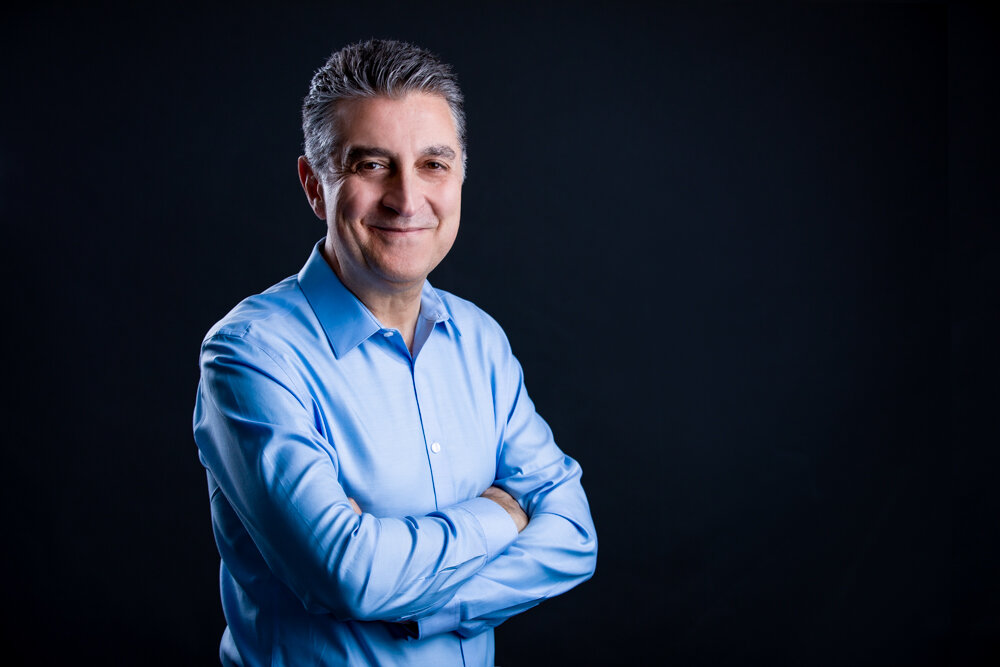
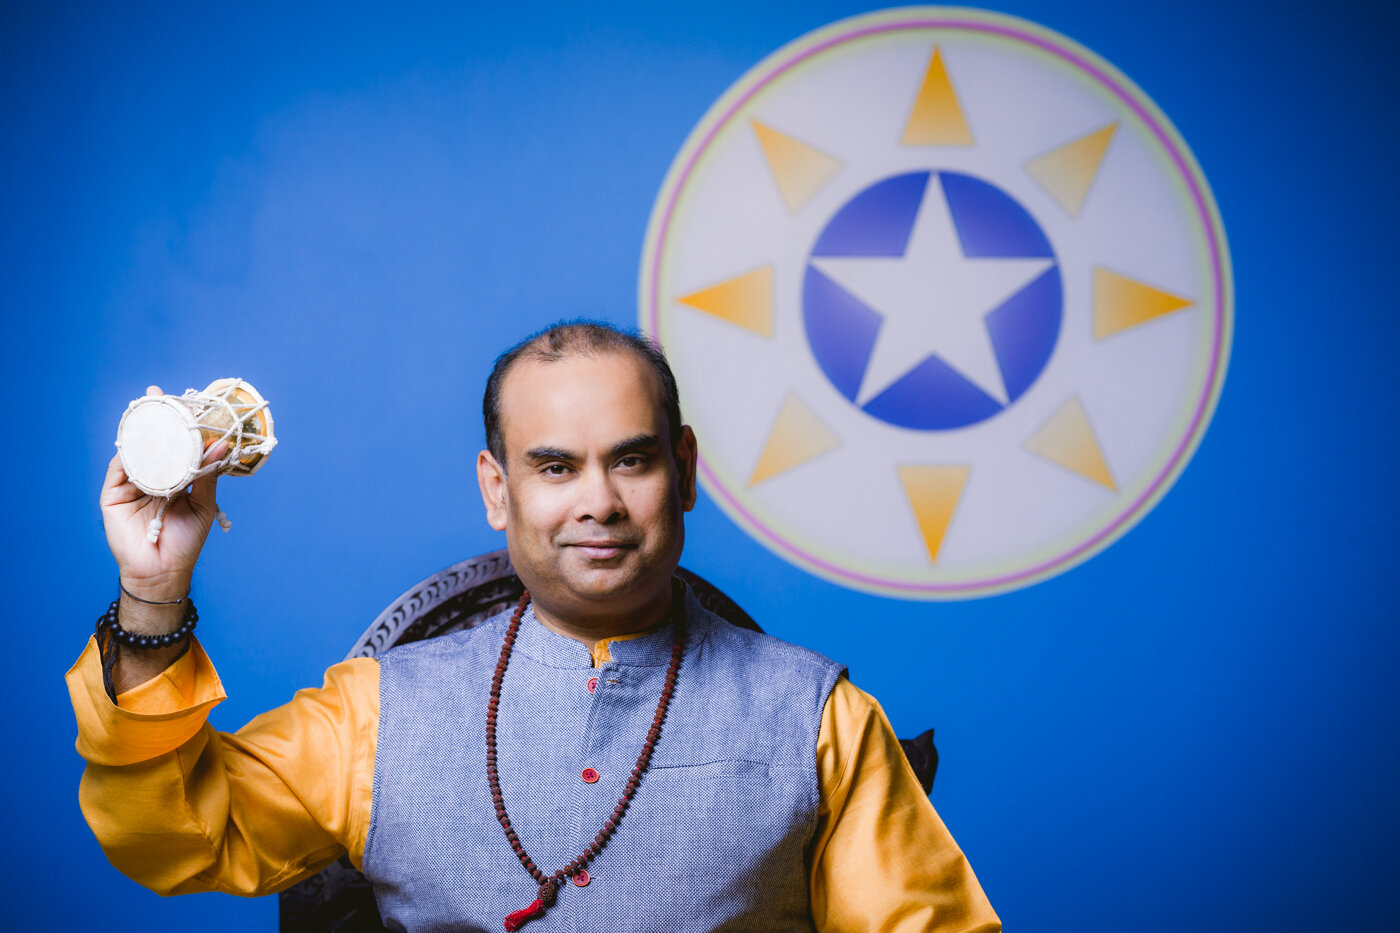
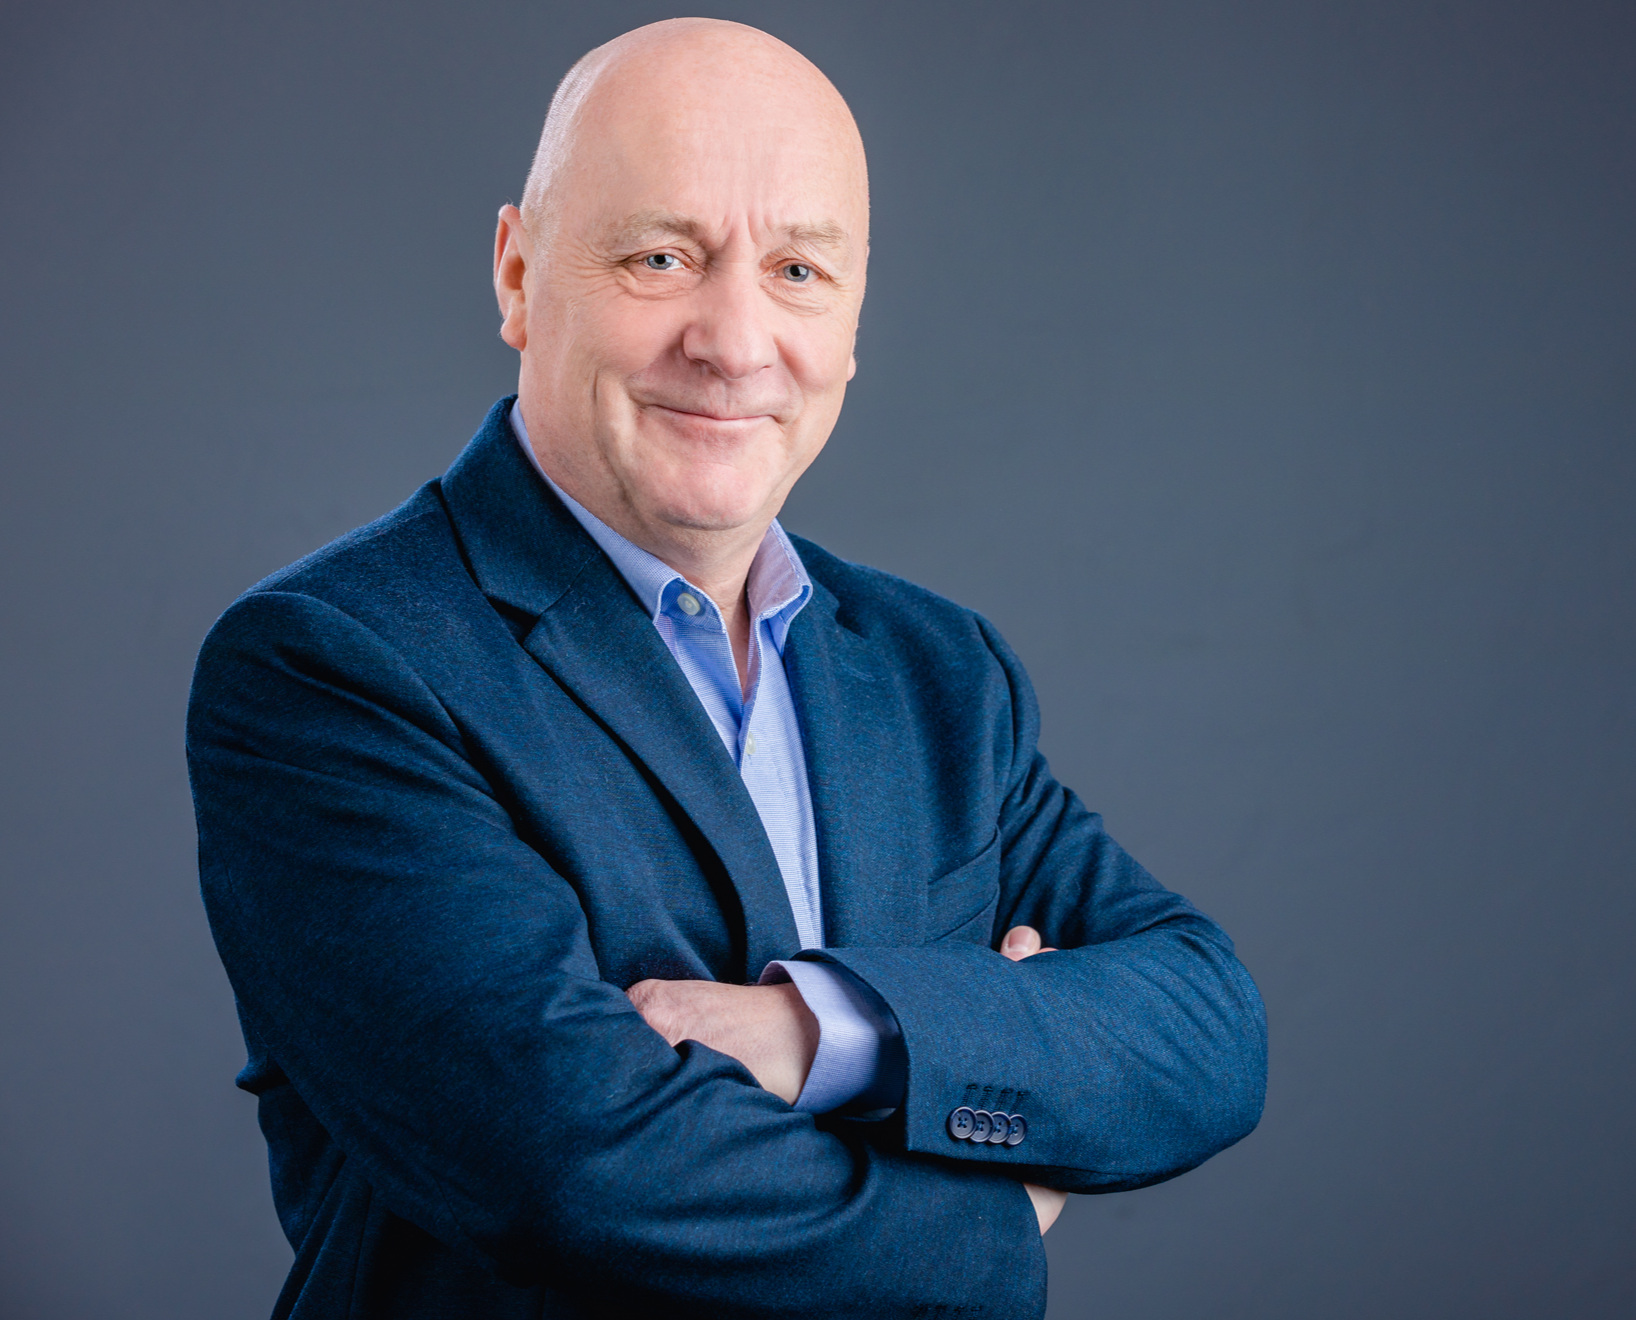
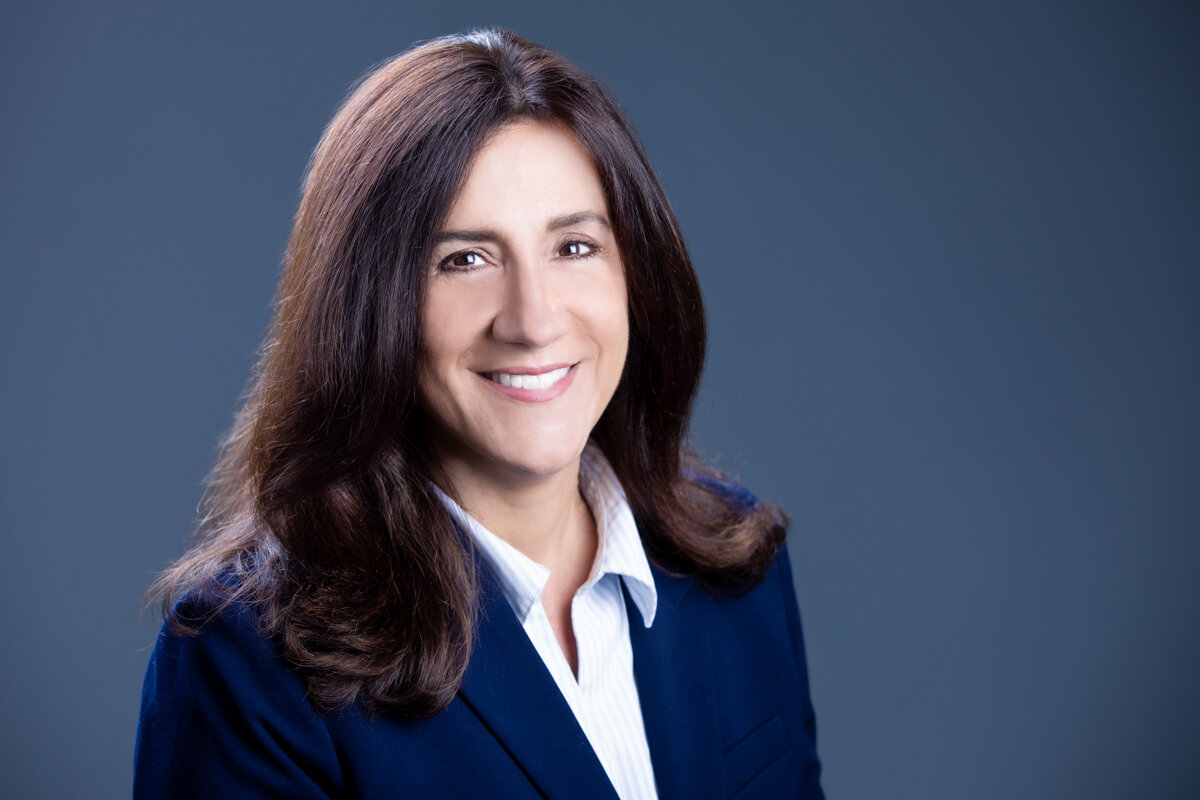
Stuart Beeby Photography styling an attendee with his event headshot booth during a Greater Boston event, showcasing professional headshot services and attendee engagement.
“We hired Stuart Beeby to take photos at our corporate event and to do a Corporate Headshot Booth. The Staff Headshots were available for download immediately to our employees, and that was a super hit! Our group shots came out excellent as well!”
Why an event headshot booth draws the right attendees
Offering professional headshots at your event is a simple way to provide real value—almost everyone can use a great photo, whether it’s for LinkedIn, a website, or to update their profile.
The headshot booth naturally brings in attendees who are truly invested in the event. These are the folks who are tuned in to the speakers, connecting with exhibitors, and genuinely interested in what’s happening.
As a result, the conversations you have at the booth aren’t just casual chats—they’re meaningful interactions with people who are likely to be a strong fit for future follow-up and real opportunities.
How a headshot booth helps vendors collect opt-in contact info
An event headshot booth creates a built-in moment to engage without forcing a pitch.
While someone is getting set up (or reviewing proofs), your team has time to connect naturally and helpfully. You’re not trying to squeeze a conversation into a rushed pass-by—you’re creating a short, comfortable window where you can learn what they are interested in, what they’re responsible for, and whether there’s a real reason to follow up.
How to set up an event headshot booth so it drives your pipeline
If you want the event headshot booth to generate follow-up opportunities, the experience needs a simple, professional flow.
A few best practices:
QR code sign-up so attendees can book a slot quickly
Email/SMS delivery (“Where should we send your gallery link?”) for clean opt-in
Instant viewing and selection so attendees can choose their favorite while they are at the event
When you get this right, you walk away from the event with a list of contacts who actually want to hear from you—and a great reason to follow up that feels personal and welcomed.
What makes an event headshot booth feel premium and reflect well on your brand
A headshot booth for vendors and sponsors should be a premium experience for attendees, handled end-to-end by a professional team, with a clean process that keeps things moving.
At Stuart Beeby Photography, our event headshot booth is designed to run smoothly and deliver a boutique-level experience:
Expert Posing and Direction so people don’t look stiff or unsure
Instant Viewing, Selection, and Delivery so attendees feel confident about the image they choose
Private, Individual Proofing Galleries for professional experience
The result is your event stands out with a polished, personal touch. Attendees leave with photos they’re proud to use, and you leave with genuine connections and a contact list built on real interest, so follow-up feels like a genuine next step.
Quick checklist: A headshot booth for vendors and sponsors is a strong fit for your event if you want:
A premium brand moment that reflects well on your company
More qualified conversations
A permission-based email contact list you can follow up with after the event
Increased attendee interaction at your booth
Frequently Asked Questions - Event Headshot Booth Boston
How much space is needed for an event headshot booth?
Approximately 12 x 6ft is optimal; however, our event headshot booth can be adapted to fit most spaces. We’re happy to work with your venue to ensure a seamless fit, whether you have a spacious conference hall or a smaller space.
How many people can you photograph per hour?
We can work at a rate of around 20 headshots per hour, but you can set your pace to allow for a short conversation, so you can learn more about what they are interested in, what they’re responsible for, and whether there’s an opportunity for follow-up. This flexibility means you get both efficiency and meaningful engagement with each attendee.
How do attendees receive their images?
We provide instant digital delivery of headshot proofs, direct to attendees’ email. Attendees can view and select their favorite images on the spot, making the process smooth and convenient for everyone.
How do you capture email/phone opt-ins?
Our custom scheduling system captures key contact information provided directly by the event attendee. This ensures all data is permission-based and securely handled, so you have everything you need for follow-up after the event.
Can the gallery/delivery be branded for our company?
Yes, we offer a white-label service where the headshot proofing gallery can be customized to reflect your company’s branding with your company’s logo. This helps reinforce your brand’s presence and gives attendees a consistent, professional experience from start to finish.
What about liability insurance?
Our studio is fully insured to work at any establishment, and we can provide insurance/liability confirmation upon request. This gives you peace of mind and ensures we meet all venue requirements for your event.
Ready to make your vendor space work harder?
If you’re looking for an event headshot booth in Greater Boston, we’ll help you build a headshot booth experience that attracts the right people and makes follow-up easy.
We’ll build a smooth, professional experience your attendees will enjoy—and your team will be proud to put your name on.
To get started, schedule a quick planning call or request a proposal using the form below, send: the event date and location, expected attendee count, and whether you want scheduled slots, walk-ups, or both
We serve Greater Boston & Massachusetts events and specialize in corporate events and professional headshots.


Are you planning a business event? We’d love to work with you.
Request a proposal using the form below:
Planning a Company Event? Add Event Photography and a Staff Headshot Booth
Planning a company event in Greater Boston? Pair corporate event photography with an on-site headshot booth to capture the day and update team headshots—efficiently, on-brand, and without disrupting your agenda.
978 261 5661
If you’re planning a company event in Greater Boston, consider corporate event photography and a staff headshot booth to capture the day and elevate your entire team’s company headshots—without disrupting your agenda.
Company events are a big investment—time, budget, planning energy, and (most importantly) your people. Whether it’s an off-site meeting, annual kickoff, leadership summit, or team celebration, you’re already doing the hard part: getting everyone together. With all that investment, why not make your event work for you, too? Here at Stuart Beeby Photography, we can help you capture the energy, excellence, and emotion of your business event with event photography and videography and create a company headshot booth at your event location with stress-free, efficient, professional, on-brand service that reflects your company's professional standards.
A Global Executive Team meeting is a perfect opportunity for a team headshot day


When your team is together, it’s the perfect opportunity to pair event coverage with on-site company headshots—so your event works harder for you:
Professional, candid, posed, and team images that reflect your company culture and your event
Updated, consistent headshots across the team, efficiently captured with instant delivery
Content you can use immediately across LinkedIn, recruiting, internal communications, and PR
Combine corporate event photography and videography with a company headshot booth for a stress-free, efficient service that reflects your company’s culture and professional standards.
Why company events are the most efficient time to update headshots and capture content
It’s one of the simplest ways to upgrade your brand presence and deliver something valuable to your team—without adding complexity to your planning.
One day, two outcomes: authentic event coverage plus consistent, professional company headshots.
Immediate, multi-use assets: LinkedIn, recruiting, internal communications, PR and marketing .
Efficient for your team: a smooth coordinated headshot flow (with optional walk-ups).
Long-term value: one event can create months of usable content and a more current brand presence.
We build the headshot setup around your agenda—so it doesn’t disrupt sessions, speakers, or meals.
And when new hires join, you can keep the look consistent with in-studio matching headshots or periodic company headshot days aligned with your branding.
Why partner with us
We offer corporate event photography and videography plus on-site company headshots—together or separately.
We support any venue and team size team across Greater Boston.
Coverage tailored to your goals: candid moments, posed leadership photos, “all-hands” team images, headshots booth and video.
Fast delivery via secure online gallery with licensed usage rights for immediate posting.
Same-day headshot proofing: each person receives their proofing gallery right after their session.
Efficient headshot flow: scheduling system plus flexibility for “walk-ups” during the event.
Optional professional retouching for a clean, polished, authentic look.
Why we are different
Specialized in corporate events and headshots.
Process-driven, low-disruption execution (setup, flow, delivery)
Consistent look across time: post-event matching headshots in-studio or periodic headshot days.
Local Greater Boston studio and on-location team for ongoing support.
Ready to plan your corporate event and want to learn more about event photography and a corporate headshot booth?
“10 Stars!! We were so pleased with our initial experience with Stuart that we contracted him to take photos at all of our corporate events. Our most recent event was a busy 3-day conference on the Cape with lots of moving parts, break out meetings, and events. He successfully captured the conference throughout. The thing that impresses me most (besides the quality of the pictures he produces) is that he is EVERYWHERE, but you barely notice him. He moves throughout the rooms in stealth mode, so he is never a distraction. He even utilized a drone to capture the beauty of the venue from outside. So impressed.
”
If you’re organizing a company event in Greater Boston, we’re happy to help you map out the best approach—whether you need:
Corporate event photography (and videography) coverage.
A company headshot day (studio-style setup on location).
A company headshot booth.
Reach out to schedule a quick planning call, and we’ll build a smooth, professional experience your team will enjoy.
Are you planning a business event? We’d love to work with you.
Request a proposal using the form below:

Consistent, professional headshots in a stress free setting during you event
“We had our corporate shots done with Stuart Beeby Photography, and we were very pleased with the results! They had to work with a large group and managed to organize appointments in advance. It was painless and very professional, and the shots turned out great! Downloading the final images was easy and secure. I highly recommend their services! Positive, Quality, Professionalism.”

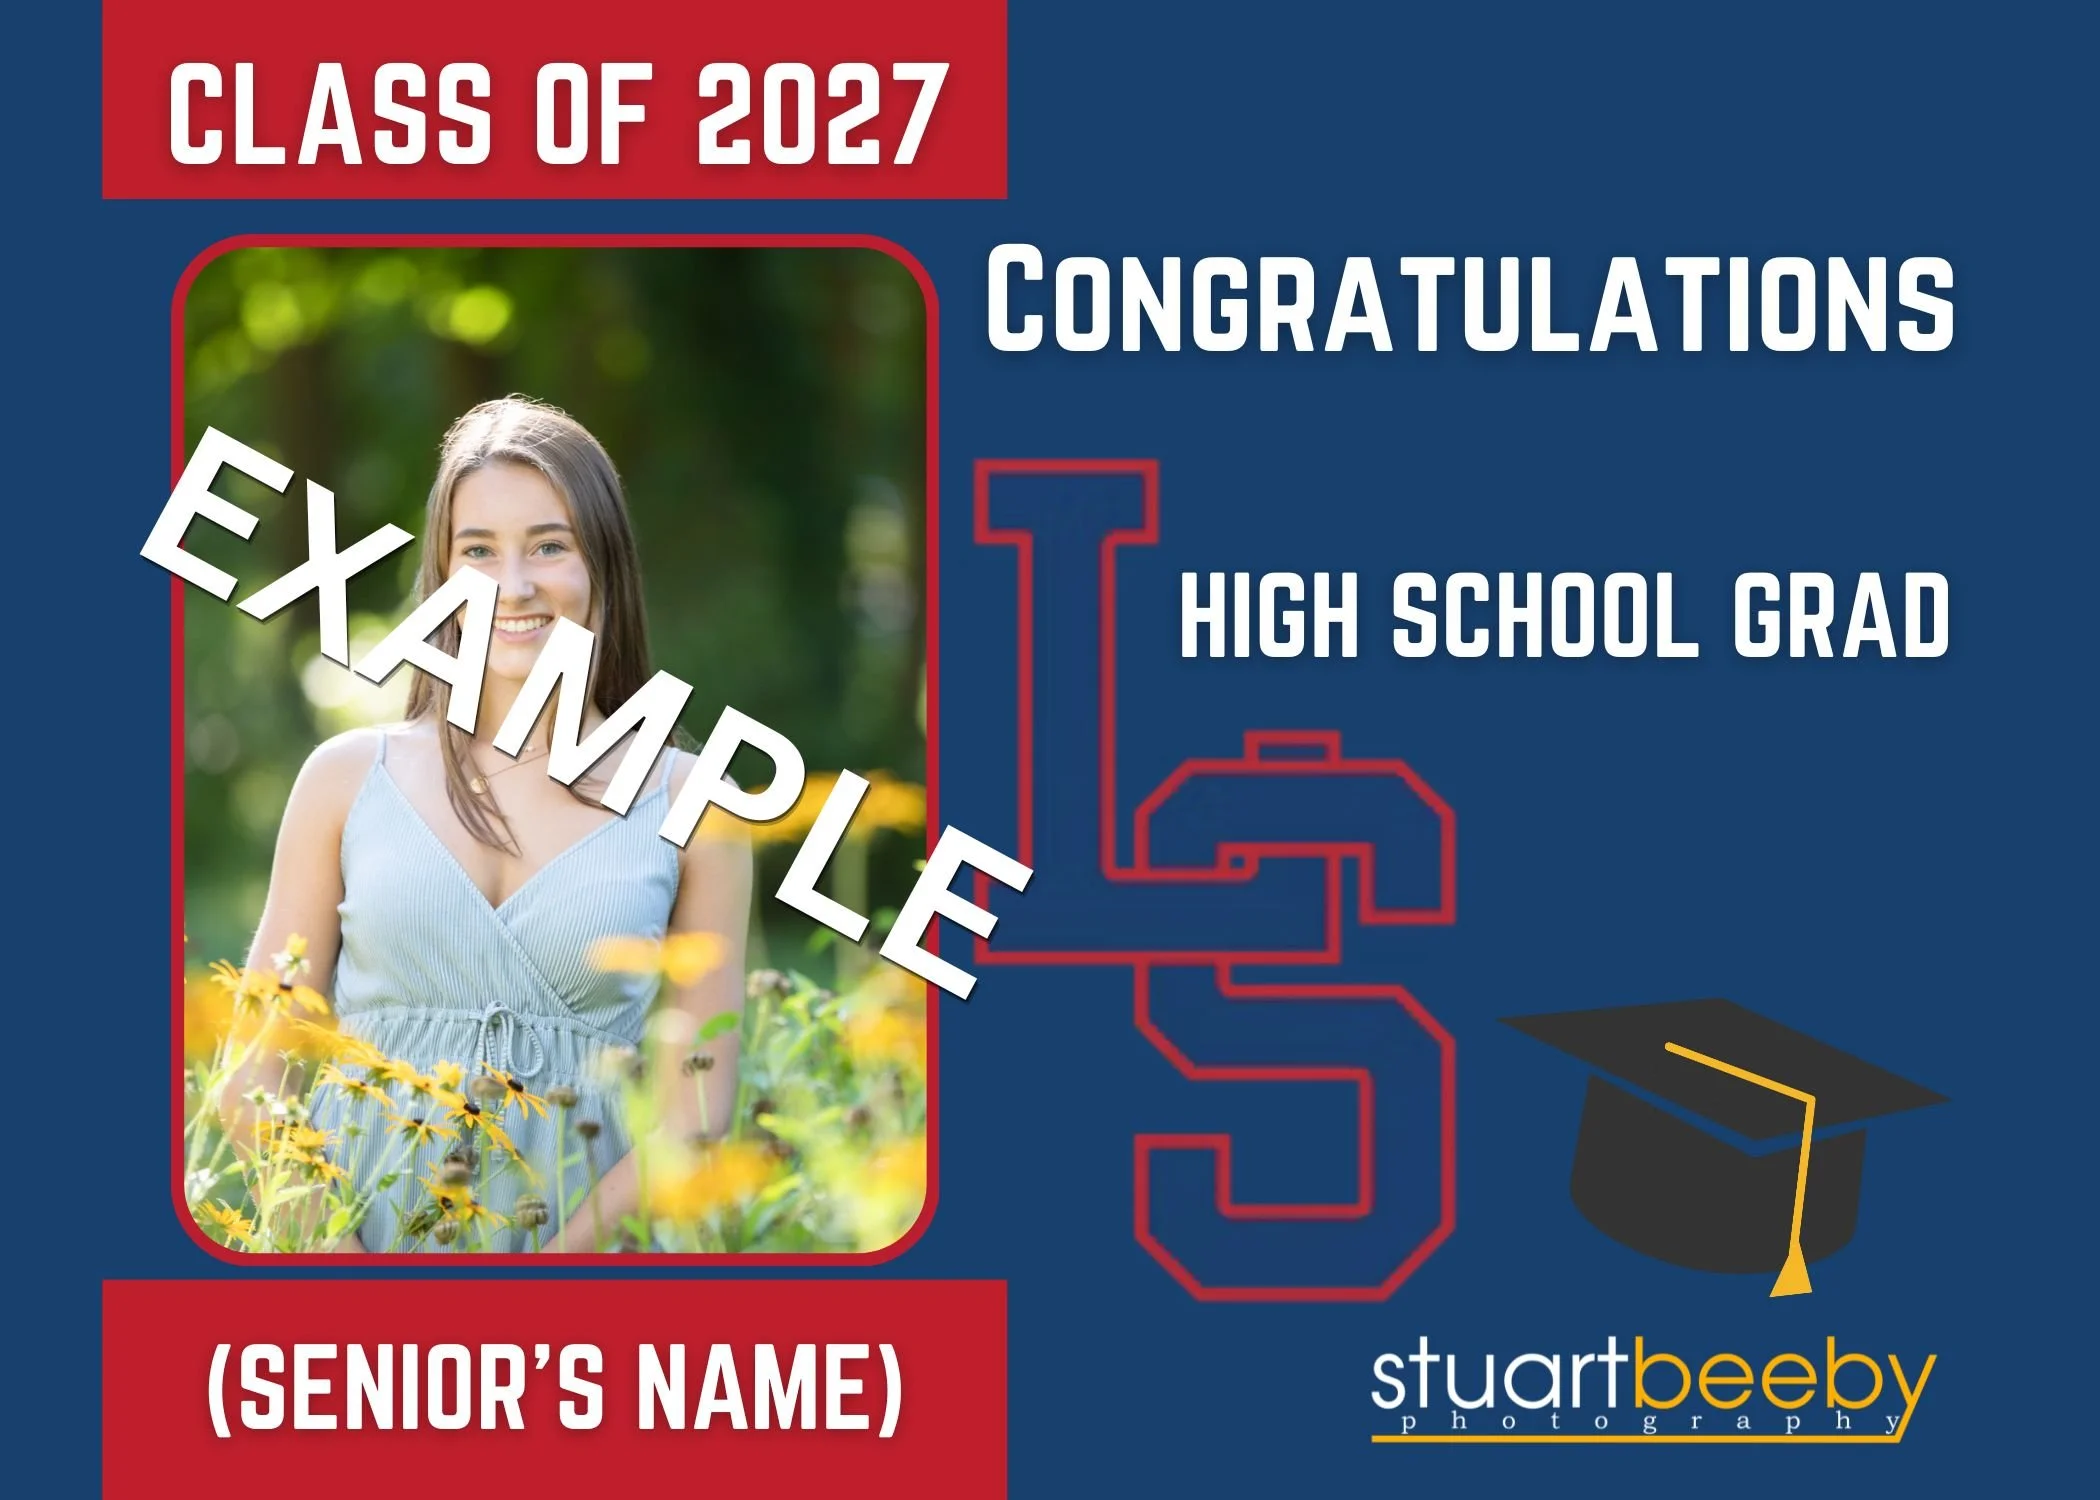
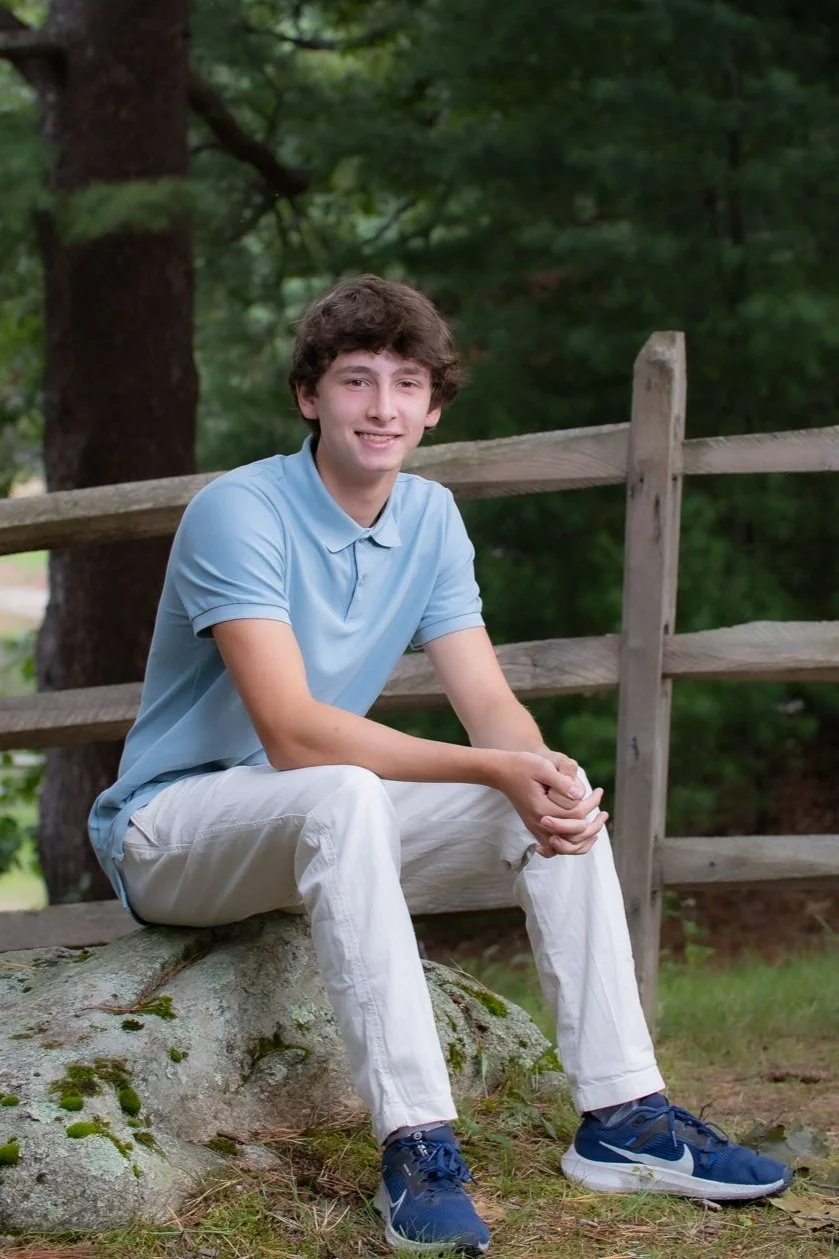
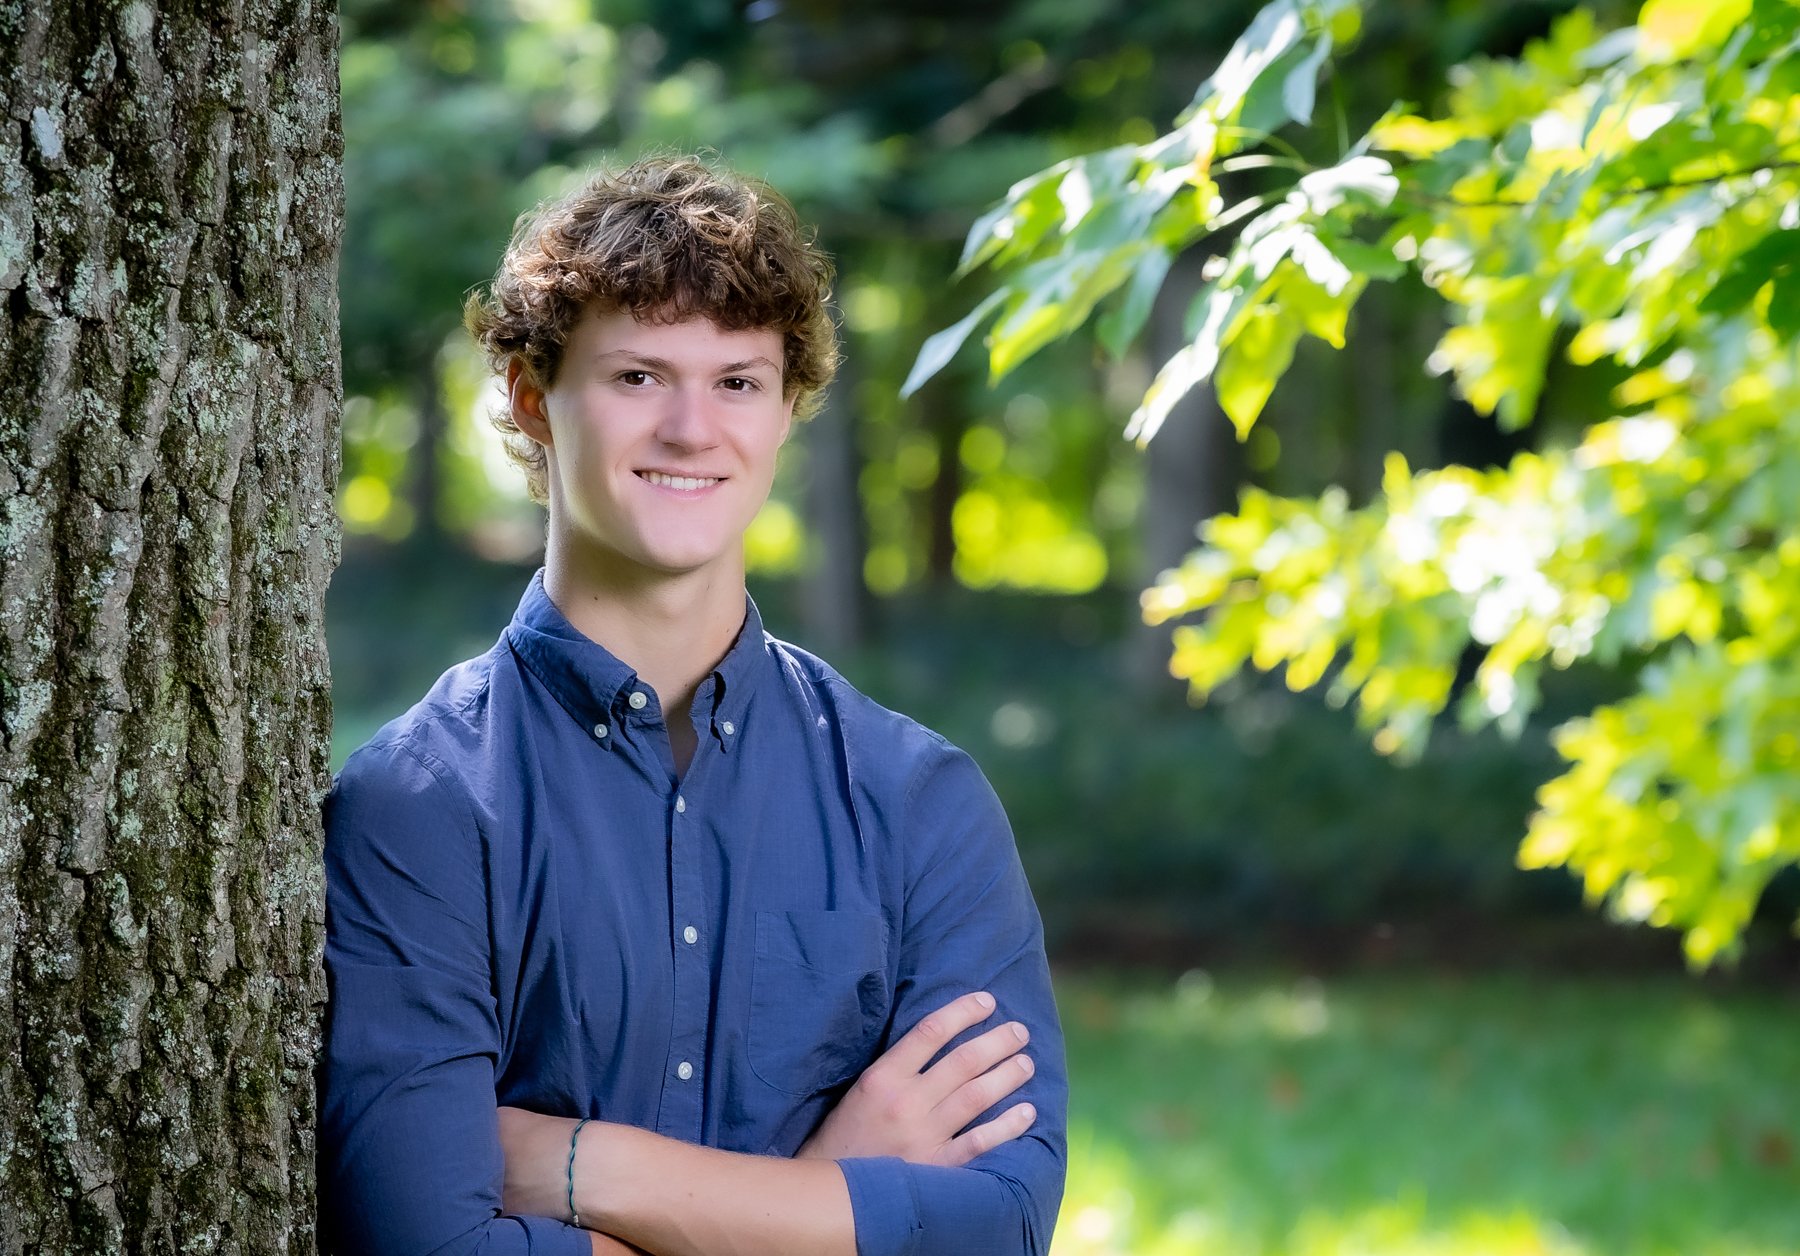
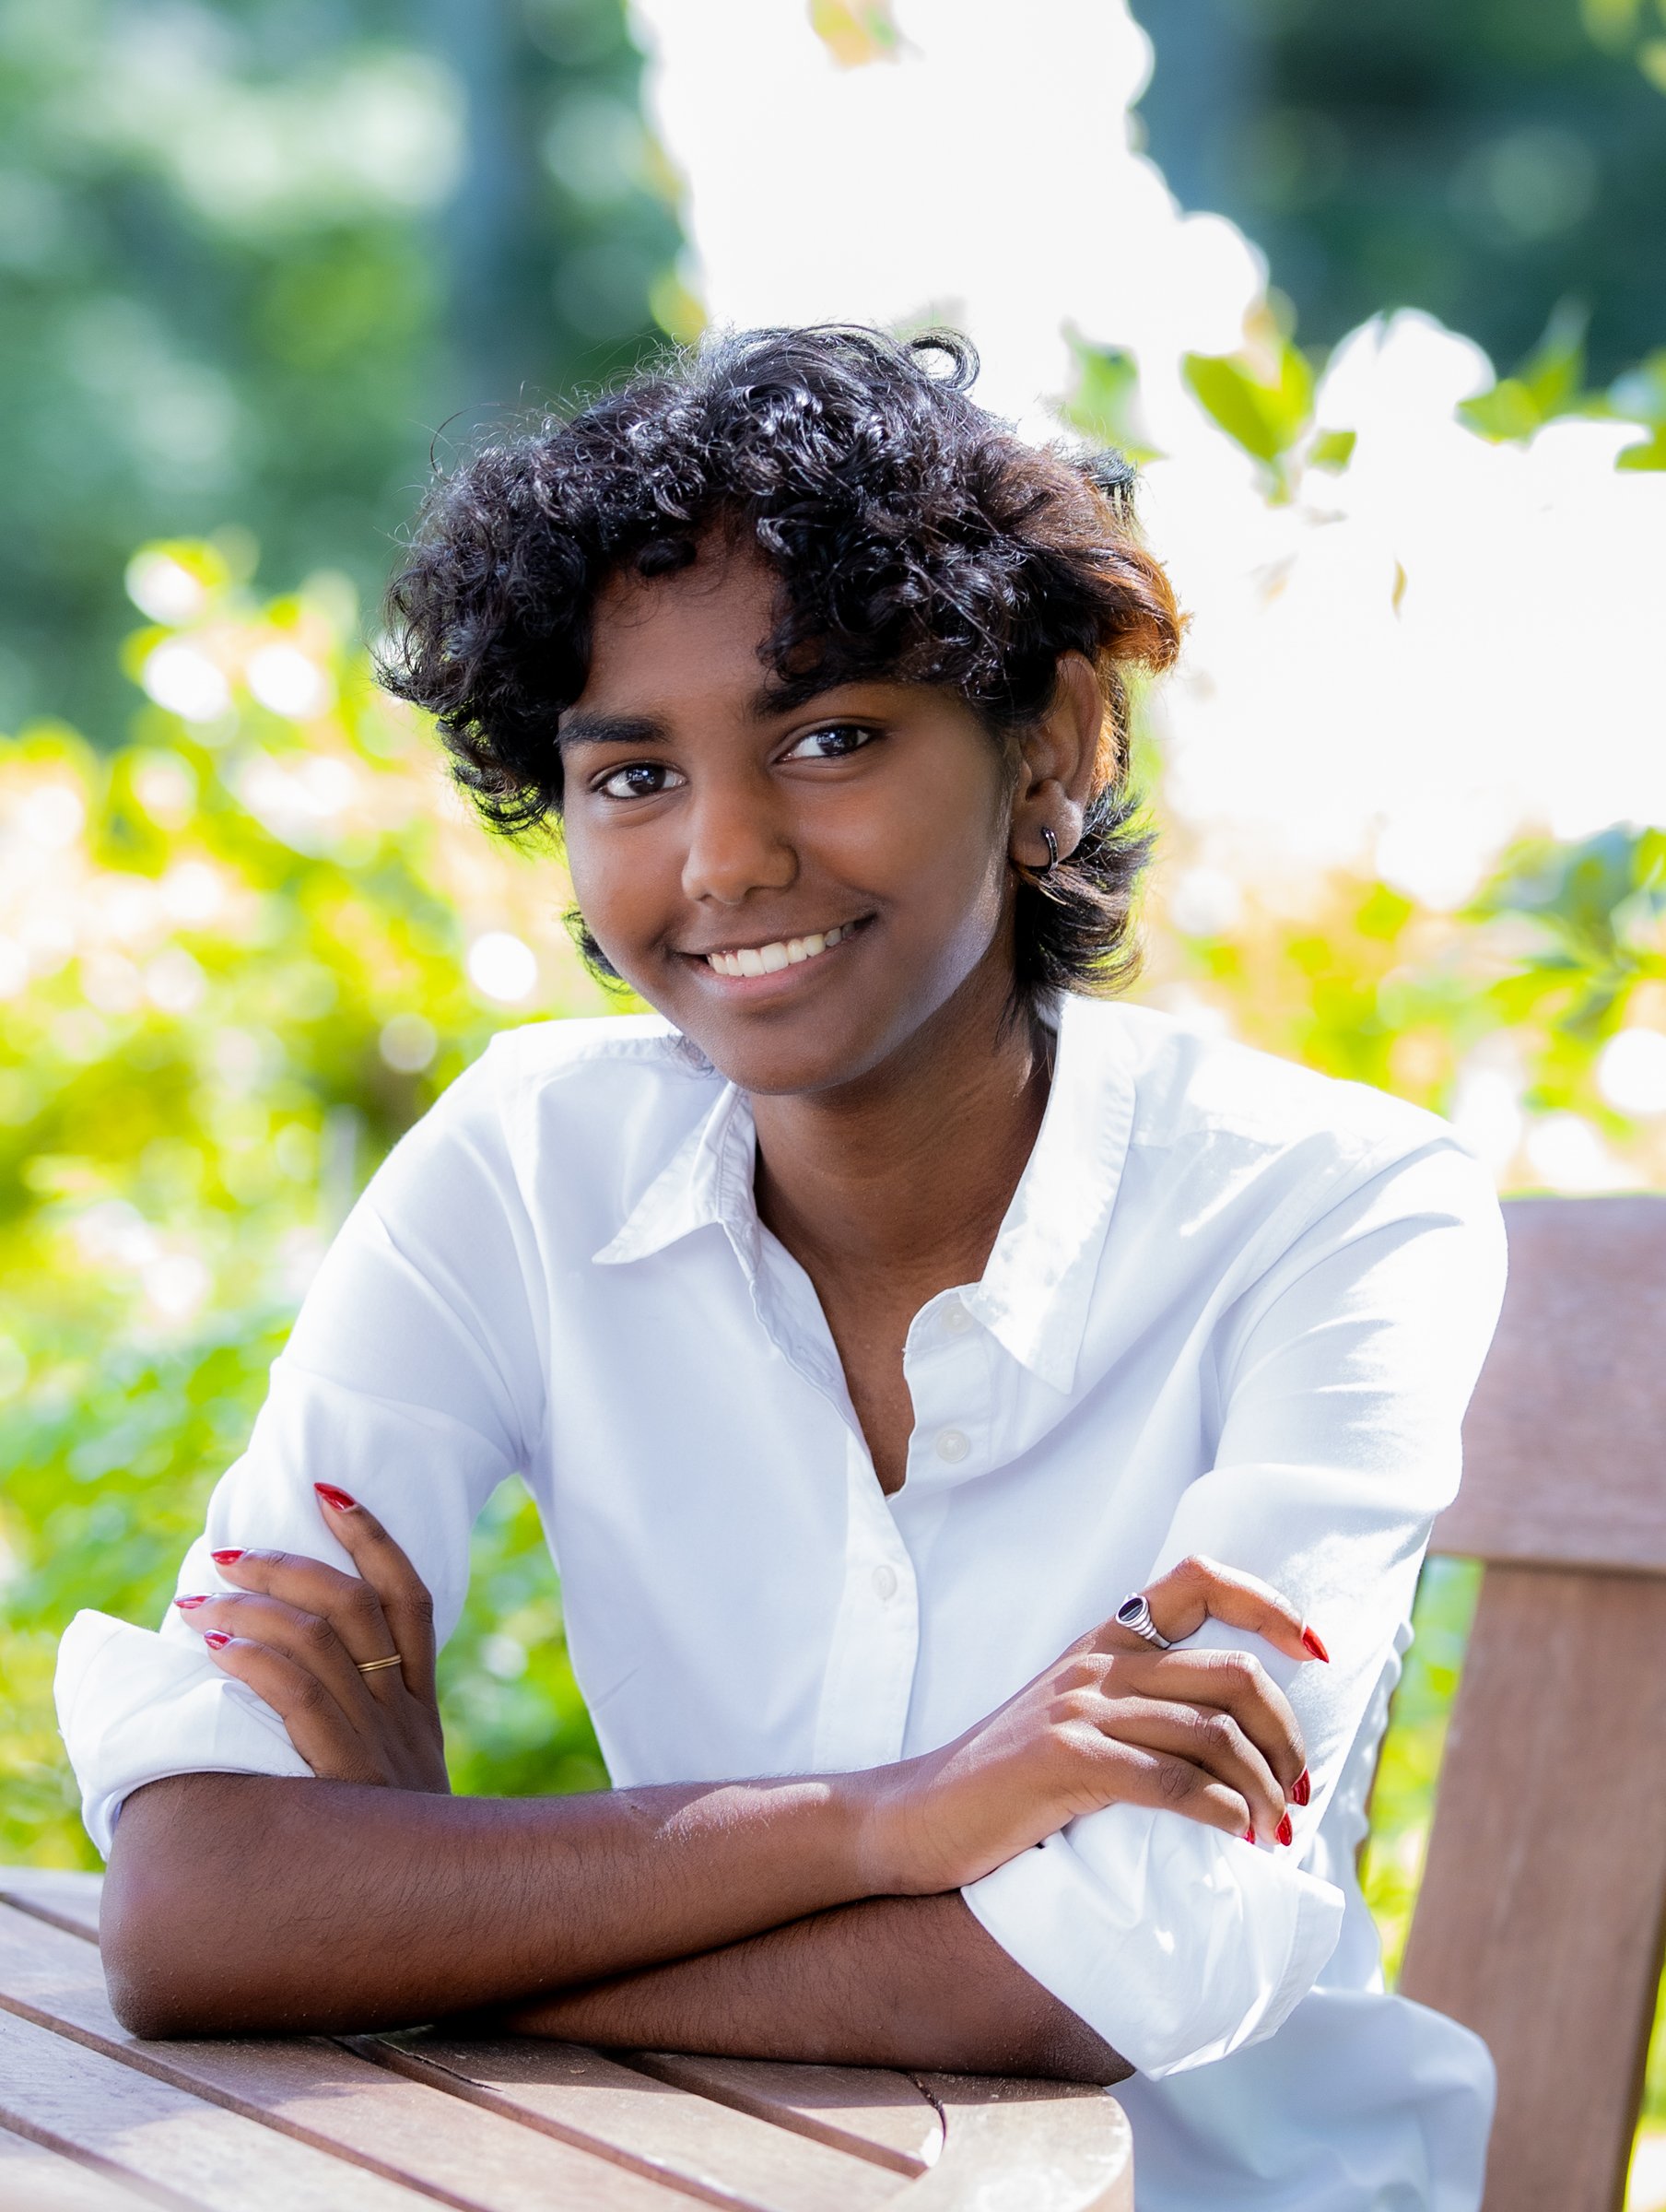
Class of 2027 Senior Sessions Portrait Guide
High School Senior Portrait Highlights
If you’re a High School Senior or a parent of a Senior, it’s a huge milestone in life and educational career. It’s also time to start thinking about your Senior Portrait Session.
You may be asking yourself, “When should I book a session?” “What is the best time of day or time of year?” or “Where is the best location for my portrait session?” “What does it cost”?
This guide was written to help answer those questions.
Schedule a FREE Senior Session Consultation call
Claim Your FREE Class of ‘27 lawn sign!
Make it stand out
Schedule a Class of ‘27 High School Senior Session with us and receive a complimentary yard sign.
*Choose any photo from your session*
Free Delivery (Spring 2027)
When Should I Book A Session?
The Class of 2027 Sessions are now available. Lincoln and Sudbury Regional High School's deadline for your yearbook photo submission is February break 2027!
That may seem a long way off, but the most popular time of year for a Senior photo session is at the beginning of your senior year. August, September, and October are the most popular months, and I recommend booking your session as early as you can to ensure you secure a date and time that works best for you.
Fall is very popular for photo sessions because the weather is good and the lighting is great.
If this is your first time scheduling a High School Senior session, don’t worry, I’ll take care of everything for you. From the initial consultation to the submission of your yearbook photo and everything in between!
Our three-step process is simple and will ensure your experience is as memorable as the photos themselves:
1) Schedule Session
Choose and book your preferred session package. We’ll then schedule a phone call to go through the details, including styling and location.
2) The Photo Session
Whether in the studio, outdoors, or a combination of both, your session will be fun and relaxed. Our studio offers endless possibilities with professional lighting, backdrops, and creative setups. For those who love the outdoors, we have access to stunning local locations that provide the perfect backdrop to highlight your personality. Combining studio and outdoor shots is a popular choice, offering a variety of looks and settings for your senior portraits.
3) Photo Reveal & Selection
I’m here to help you every step of the way. The in-person photo reveal appointment at the studio is when we’ll review the photos from your session. They’ll be carefully curated so you’ll see the very best images, making your yearbook submission fun and easy! This is also the perfect opportunity to order custom prints, wall art, or a stunning album to cherish this milestone forever.
Where Is The Best Location For A Senior Portrait Session?
I’ve compiled a list of our most popular and frequently requested locations for our High School Senior Sessions. (And why they are popular)
Remember that the time of day and the time of year (season) will make a big difference in the look and feel of your Senior photos. I always recommend choosing a sunny day and ideally, either end of the day, when the sun is lower in the sky, which will differ in time, depending on the time of year!
Here is a list of the most popular locations and examples from past years’ High School Senior Sessions.
Our Top 7 Locations For Senior Sessions:
1) The Grist Mill, Sudbury
The Grist Pond looks amazing later in the day when the sun is setting, and can create some beautiful rim lighting behind my subjects. The little bridge behind the mill is another favorite spot. This can be a good location both in the morning and later in the day.


2) Heritage Park, Sudbury
Heritage Park is a popular location for Senior Sessions, and I like to use the town center structures as a backdrop to mix it up. I prefer the light in the first part of the day for pictures at Heritage Park. This stone monument is also great for posing. If you have a pet dog or other family members, it’s always a nice idea to get them involved.


3) Wood Park, Hudson
Wood Park in Hudson is a little hidden gem and is a great location, especially in the afternoon. The park has a river that runs through it, and there is a pretty bridge that provides some great posing options. Wood Park has a small outdoor stage, which is a cool spot for a more grungy feel.


4) Wolbach Farm, Sudbury
Wolbach Farm is stunning at the end of a day in late summer, when the grass in the meadow is nice and high. There are a lot of nice structures and trails at the farm to take advantage of. The meadow also has a nice fence to lean against for a relaxed-looking pose.


5) Camp Sewataro
Now that this beautiful area in Sudbury is open to the public, it’s a great option for High School Senior Pictures. Camp Sewataro is a quiet area offering lots of different natural backdrop options. Pets are always welcome!


6) Your Home
If your home lends itself to a Photo Session, it’s a great option. I love to get creative with lighting, so if ever there’s an opportunity to do something a little different, I love to get creative


1) Beeby Studios: Sudbury
We can combine an outdoor session with a studio photo session, which is also a good idea if you leave things a little late and the weather isn’t cooperating. We’re fortunate to have a great setting in the studio's front and back garden. This picture was taken in the front garden later in the day. (Dogs are always welcome here!)


Gift Your Team with Updated Company Headshots
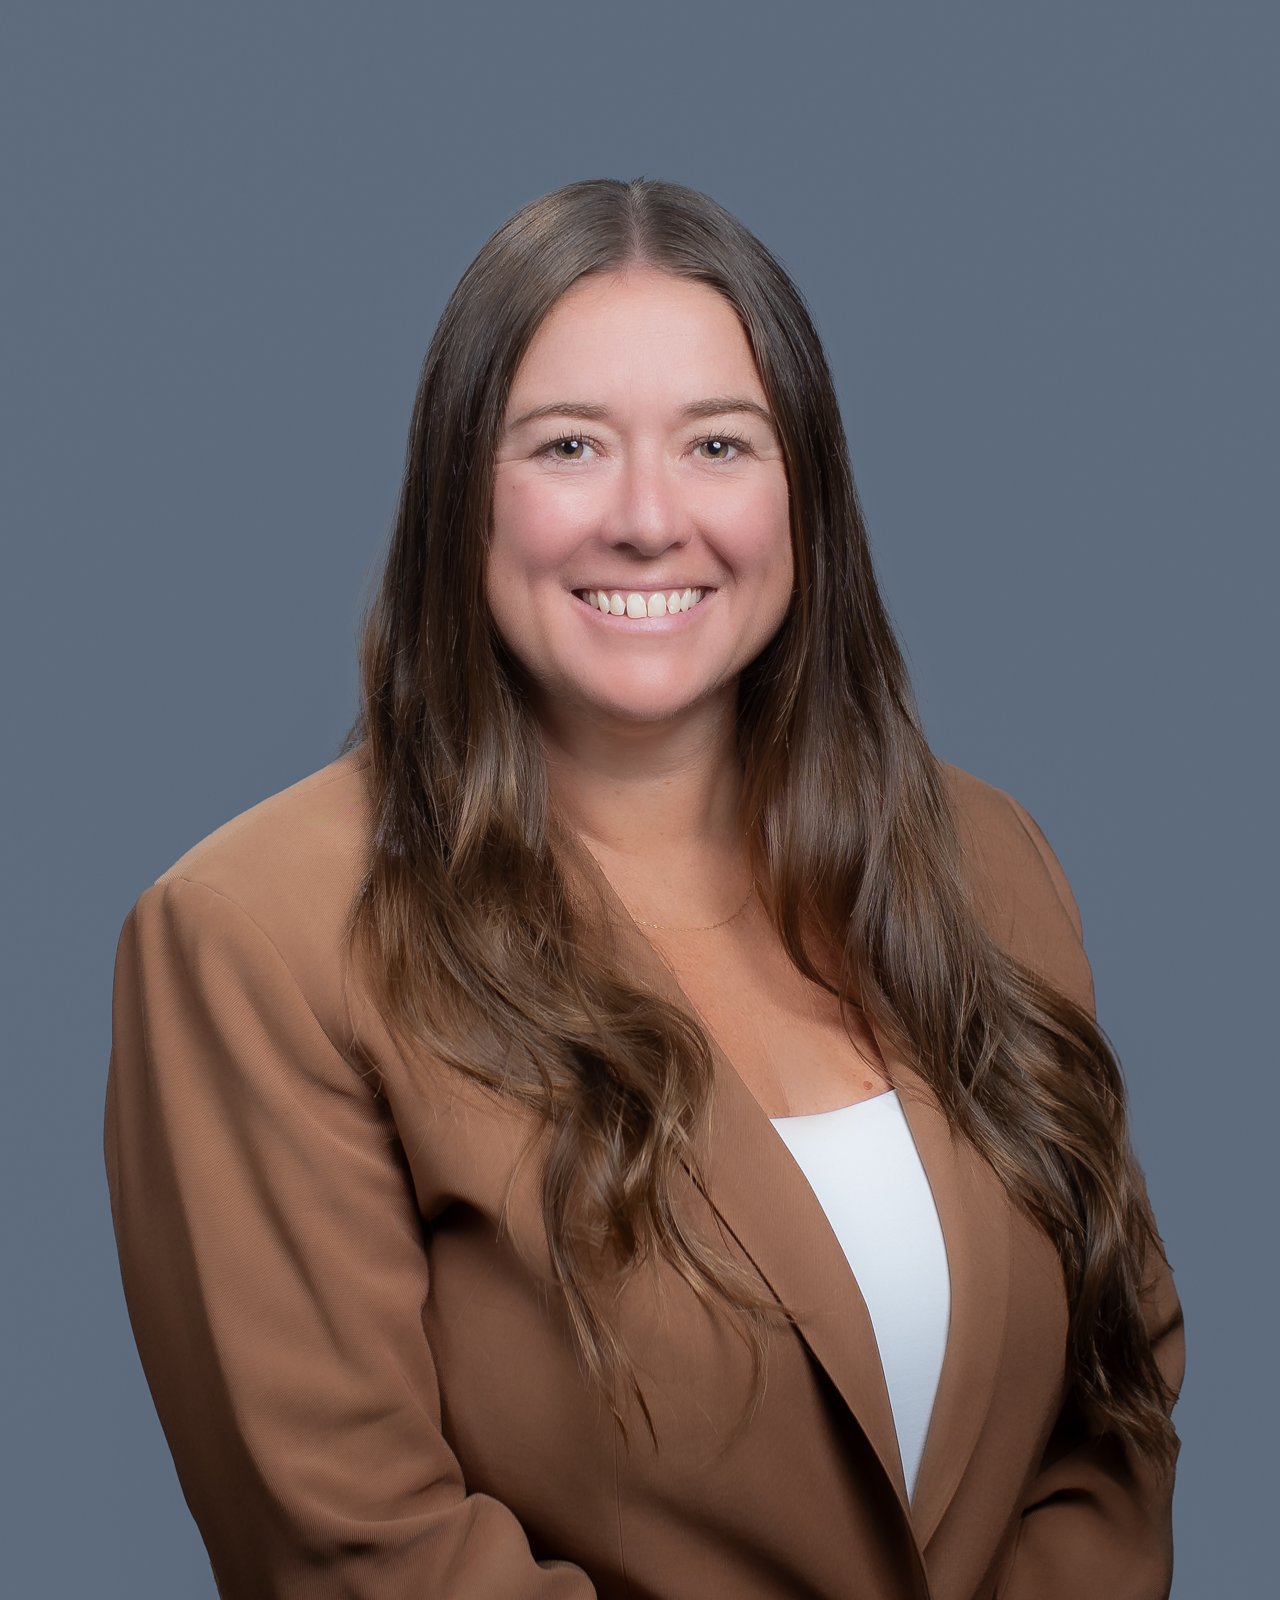
In this article, we identify the importance and need for having a great headshot and how it portrays professionalism and self worth. A staff picture day is a great way for employees to update their headshots in a convenient and efficient way and how this employee benefit promotes a coherent culture in the business.
Introduction:
In your organization, every team member plays an important role in the company's success. From its strong leadership to vital support staff, your people contribute their unique skills and talents in collaboration to make the business successful. A great way to demonstrate cooperation and professionalism to your customers, partners, and across departments is for individuals to represent themselves and your company with professional headshots.
Why Good Staff Headshots Matter
Staff headshots represent your team's professionalism, personality, and company culture. Therefore, having a consistent look and feel across the business is important, and here are three reasons why:
1) Build Trust with your Customers: First impressions matter! High-quality headshots across your internal and customer-facing website, LinkedIn, and promotional materials will make your company appear more approachable, trustworthy, and professional.
First impressions matter!
Good headshots Build trust with your customers.
2) Brand Consistency: Quality professional headshots help establish brand consistency and will strengthen your company's identity.
3) Employee Morale: Everyone in your team wants to feel appreciated and valued. A good professional headshot provides confidence and status, which will help boost morale and performance in a corporate setting.
What if you don’t have a central location, or your team works remotely:
What if your business doesn’t have a central location or your team works remotely? You may also have a team of individual providers and consultants working on different days of the week. We work with many companies in this situation. Instead of a headshot day, your team members will come to the studio for their headshot on a date and time that works with their schedule. This also ties back to new hires and people who miss a picture day at the office because they were out sick or on vacation. When we provide a headshot day at a business location, we use the same backdrop and lighting set up at the studio and it will look as though your team had their headshots on the same day!
This event company has many DJs and Emcees who work remotely, so we provide their team with individual sessions in the studio:


Gift your team a Professional Headshot Day:
Many organizations we work with treat their team to a Professional Headshot Day annually or biannually. It’s a huge benefit for employees because it keeps their professional profiles up to date and saves them time finding a photographer and paying for a headshot session. Also, the business is represented in its best light from the top down, with a professional, consistent look and feel. You may be thinking, but what happens when we hire new people after a headshot day?! Or what if someone is out sick or on vacation on a headshot day? Don’t worry! We have you covered.


How to Organize a Staff Headshot Day:
1) Choosing the Right Photographer: Whether you hire a professional photographer or use an in-house expert, have someone with the experience to capture the best angles, lighting, and overall feel. But it’s not just about the equipment. A quality headshot photographer will also help your team feel relaxed and at ease, which makes a huge difference to the outcome of your staff headshot photos
2) Setting Guidelines: Some people haven’t had a professional photo of themselves since high school, so they won’t know what to expect, how to prepare, or what to wear. You may want everyone wearing a company uniform. But if not, then what should your people wear for their headshots? Check out our article on what to wear for your headshots for some great outfit tips
Staff Headshot Examples With Company Uniform:


3) Allow plenty of time: Give your employees time to prepare. It’s important that your staff feel relaxed and not rushed. We have found that giving people at least three to four weeks’ notice gives them enough time to prepare and plan outfits, book hair appointments, etc.
4) Encourage but make it optional: The ultimate goal may be to have everyone in the company have photos, but it’s important not to make the process too pressurized or force people into it. Many companies we work with make this a fun event, often on a day or week of a company-wide meeting or annual event.
5) Choosing the right location: To ensure your team has the best experience with their headshot session, we recommend having us set up in a private room or space where there’ll be little or no disruption. This helps to keep a headshot day running smoothly and on time.
6) Session slot times: We offer a range of staff headshot sessions, ranging from 1 to 10 minutes per person, depending on your company budget for the project and how many people are in your team. Staff Headshots can also span over a few days, depending on the number of people and your company’s situation.
What happens after your staff headshot day?:
Your staff headshot day was a success, and everyone is excited to receive their new professional headshot photos. What happens next?
1) Password-protected proofing albums: We organize, lightly edit (color correct), and upload everyone’s photo proofs into individual proofing albums. Proofing albums can be protected with passwords, so your team members can only view and proof their photos.
2) Professional Retouching: Retouching can be optional or included in your staff headshot day, depending on the package you opt for. Your team members will choose their favorite proof, and we will retouch skin, hair, eyes, and teeth, fix clothing, and even take off a few pounds if you request it!
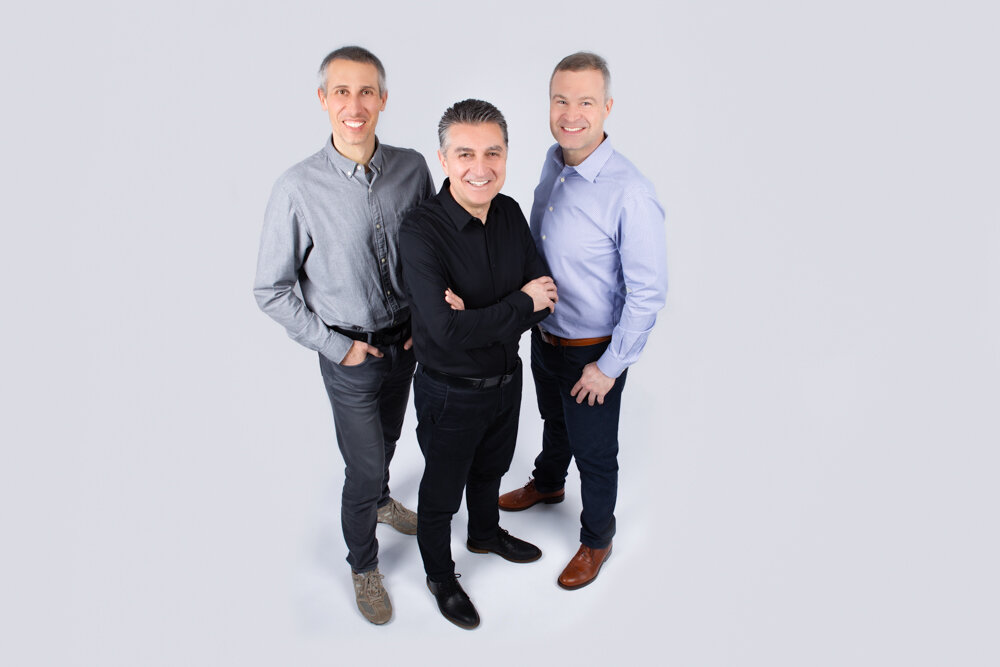
3) Team composite photo: What about a team photo? Sure, we can take a group photo on picture day, but another way to approach it is to make a composite by blending individual portraits into one team photo.
Our studio has a small team, but it was still difficult to align schedules, so we made this composite photo instead, which is also a fun way to represent your team.

4) Final delivery: Once all retouching is done, we deliver the completed headshot photos to the project lead at your company.
5) Update Your Website: Now it’s time to update the company website, intranet, email signatures, and professional social media accounts with your brand-new headshots! Your team will look its best, and everyone will be happy and motivated.
In summary, Staff Headshot Days are a great way to enhance your company’s profile, but it’s also a great way to benefit your staff and to show appreciation for their hard work and commitment. After all, everyone needs a professional headshot, right? It’s a win-win for everyone, and it will promote a cohesive company culture.
Are you ready to set up your staff headshot day? Let’s talk!
For more tips on a successful staff headshot day, check out our article: How to have a successful Executive Headshot Day for your staff

How to have a successful Executive Headshot Day for your staff
In this article, we’ll explain our processes for an Executive Headshot Day for multiple staff members, what you’ll need to consider before booking your photographer, and how we make these types of photography projects run smoothly.
In this article, we’ll explain our processes for an Executive Headshot Day for multiple staff members, what you’ll need to consider before booking your photographer, and how we make these types of photography projects run smoothly, to give you a professional set of photos for your company website, email signatures, and social media campaigns.

1) Choosing Your Photographer
If you’ve managed a photography project for your company before or if this is your first time, choosing the right photographer for your specific need (in this case, Headshot Photography) is essential. Photography has many different genres and niches, so picking one with lots of experience in their niche is essential. When it comes to Executive Headshots, involving dozens or scores of people at your place of work, it’s important to work with a studio photographer who is well-versed in corporate etiquette and has confidence, flair, and creativity.
Hot Tip: Set up a call or video meeting with your prospective photography studio before you book to ensure they will be a good fit for your business.
“Stuart made our staff feel comfortable during their staff headshots. The photos are great and really capture our team! He was accommodating, professional and friendly. I would highly recommend Stuart for your portrait and photography needs.”

2) Scheduling made simple for your Team
A popular choice for companies is to schedule the photographer on the same day of a quarterly or annual meeting when all executives and associates are together at the same location. These days, many companies operate an “office day”, when all staff are expected to be in the office, which is also a great day to book your headshot photographer.
So, you’ve booked your photographer, but now you are faced with the daunting task of scheduling the individual sessions for every member of staff. Rather than offer a “walk-up” service, we prefer to have a list of the people we’re seeing by having staff schedule their session ahead of time. As the project lead, you could make a list of names, but a much simpler way is to take advantage of our scheduling tool.
Our scheduling system allows us to make individual time slots available for your Picture Day. We send the project lead the booking link, which can be shared with the team. They choose a time that works best for their schedule, and they’ll get a reminder when their slot time is approaching. Also, we know exactly who we’re seeing and at what time. We have found this to be the best way to keep the day running smoothly and on time for everyone!
3) Choosing Your backdrop or Setting
A big consideration when choosing the aesthetic and setting for your staff headshots is what happens when you have a new hire. Or, what if you have someone out sick or on holiday on Picture Day!? Don’t worry, we have you covered! Before we go into more detail on that, here are some other considerations when choosing the backdrop for your staff headshots.
Our studio has a range of different backdrop options and colors, which can be set up at your place of work (provided there is room for it), which gives a more traditional look and feel for your staff headshots. I.E. A plain, neutral backdrop (such as white, grey, black, etc.).
Alternatively, if you prefer a more contemporary look, we can picture your staff in a more natural, authentic, or environmental setting. If your workspace, surgery, office, factory, or lab has areas available, we can position your team in a way that represents what they do and the industry they work in. This is popular for many companies we serve.
If you have an area outside at your location, this can also be a popular choice, but we’ll need to factor in the weather, especially in New England!
Here are examples of staff headshots with plain, studio backdrops and then environmental portraits:


All these options are worth some thought, and it’s often a good idea to talk to your web designer or Heads of Marketing beforehand about how the headshots and portraits will appear on the company website.
We raised the question of new hires and absent employees earlier. To overcome this common issue, if opting for one of our studio backdrops, you can choose to send new hires to our studio, and we will easily replicate everything as if they were there on the day!
If you’re opting for the environmental/natural backdrop, we always take a picture of the setting (without a person in the picture) and then use our editing tools to switch out the studio backdrop with the same setting as everyone else.

Hot Tip: It’s worth checking with your photographer if they have a separate space to offer these additional and essential services. We do this for many of our repeat clients.
4) What should we wear?

What to wear for My Business Headshot Session
This is probably the most commonly asked question we get. If you’re giving staff free rein for their outfits on Picture Day (as opposed to having everyone wear a company-branded uniform), we have a whole article on suggested outfits for headshots, which is worth checking out: WHAT TO WEAR FOR MY HEADSHOT SESSION
5) Onsite Photo Proofing
When working onsite with staff members, we believe it’s important that everyone has a chance to take a peek at their pictures throughout the mini-session. It’s not a full proofing session, just more of a check to make sure the staff members are happy and content with their pictures, on camera. However, cameras have a very small screen to ‘review” pictures, but we now make reviewing easy. We have the technology to live cast all pictures onto a separate, larger screen, which makes onsite, instant feedback quick and easy!

6) Post Production and Delivering your Photos
Your company's Company Headshot Day was a great success. In the studio, we select the best photos from everyone’s session, lightly edit, crop, color correct, and upload the proofs to our proofing website. Our website is designed to make reviewing, image selections, and the final delivery of photos a simple process for our business clients.
Our proofing website allows us to subdivide each person’s proofs into separate and password-protected (if desired) albums so that staff members can only access and review their own photos.

Everyone will choose their favorite pose, which we can see from our side, for us to professionally retouch and subtly perfect the final choices. We add all retouched photos to a separate album within the gallery and deliver the finished photos to the project lead, where they can be easily downloaded.
Job done!
Hot Tip: Ask your photographer how they handle this very important part of the process. And if proofing and delivery of photos is via a service like Dropbox or Google Drive, etc., it will not give you or your staff a simple or positive proofing experience!
Thanks for reading. If you have any questions, we’d love to help take your company’s executive headshots to the next level.

Why You Need a New Professional Headshot and What Colors To Wear
As a picture is worth a thousand words, a good professional headshot is priceless and will elevate your personal brand and your business. Whether you are getting headshots for the first time or updating existing ones, what you wear makes a lasting impression and influences how people view you.
As a picture is worth a thousand words, a good professional headshot is priceless and will elevate your personal brand and your business. Whether you are getting headshots for the first time or updating existing ones, what you wear makes a lasting impression and influences how people view you.
Why Professional Headshots Are So Important
A headshot can make a great impression. It represents who you are and conveys many things, including professionalism, confidence, trustworthiness, and success. Often, the first glimpse people have of you and your business is your headshot. Headshots are an extension of your brand and allow people to put a face with a name. Someone may see your headshot on social media, a website (yours, a professional association’s, or someplace else), in an ad, or elsewhere. From your headshot, someone may decide you look friendly and trustworthy, prompting them to learn more about your business and how you can help them accomplish their goals. Separately, people often update their headshots when they begin a job search or receive a promotion. They want their new and refreshed image to convey they are hard-working, reliable, and professional. They want their headshot to help them get an interview and, ultimately, help them get their new job.
Reasons For Your Headshot
So, to help you determine what to wear, think about why you are getting your headshots and where you will use the pictures.
· Are they for a professional association or a corporate website?
· Are they going on a creative website?
· Are you in an industry where your creativity is essential, and you want your headshots to highlight this?
· What do you wear when you visit prospects and clients?
· Are you starting a job search?
· Were you recently promoted?
The answers to these questions will point you toward what you should wear. And then, the details of what you wear, including the type of clothing and the colors you choose, will help you convey your message.
Colors
To determine colors, there are some factors to help you narrow down what to wear. First, find out if your pictures will be taken indoors or outside and how much of your body will be captured in the photos. Then, figure out which colors complement your hair and complexion. Finally, determine what message you want your headshots to convey.
Consider Color Theory and Messaging
Certain colors impact thoughts and behaviors and convey messaging.
Darker colors convey authority and are considered more formal, while lighter colors are considered more friendly and communicate approachability. Think about the industry you are in and what you are looking to accomplish. For example, a CEO and a social worker may choose to convey two different types of messages.
Specific colors are associated with certain traits and convey certain messaging. For example, blue is considered calming and dependable. Green is associated with wealth, prosperity, safety, and calm. Gold conveys success, while purple conveys royalty and imagination. Red signifies passion and energy. Orange is associated with optimism, and yellow is associated with happiness. Brown reflects security, stability, and strength.


The contrast of dark with light conveys authority and power. For example, a darker jacket paired with a lighter-colored blouse is considered a power top.
Consider your colors and what you want to accomplish with your photos as you pick out your clothing.
Look at other people's headshots. Pay attention to how each photo makes you feel, then notice what the person is wearing, which can be helpful as you figure out your clothing.
Now that you know what colors to wear, click here for our complete guide on what to wear to take amazing headshots. – Read the Color Guide
If you are ready to book your headshot, click here to schedule your Headshot or Portrait Session
If you have any questions, don't hesitate to get in touch with us!

What To Wear For Your Headshots
We are dedicated to capturing your unique personality and features in the most professional way possible. We know that determining what to wear is just as difficult as finding the right photographer. Even though your face is the focus of your headshots, what you wear still matters. Every detail in your headshot will contribute to your first impression, including your clothing, which is why we’ve put this guide together.

We are dedicated to capturing your unique personality and features in the most professional way possible. We know that determining what to wear is just as difficult as finding the right photographer. Even though your face is the focus of your headshots, what you wear still matters. Every detail in your headshot will contribute to your first impression, including your clothing, which is why we’ve put this guide together.
Outfit Tips
Choose the Right Colors
Choose colors that complement your hair as well as your complexion. Take color psychology into consideration. What message do you want to convey using color? Not sure which colors look best on you? Look at old photos or ask people you trust.
Make Sure It Fits You Well
Your outfit should fit you well. An oversized jacket or baggy blouse simply looks unprofessional.
Add Layers
If you want to make your headshots interesting without using patterns and big jewelry, layer your clothing instead. Just do this in moderation if you want it to have the right effect, though.
Keep It Wrinkle-Free
Even though your schedule is busy, showing up to your headshot session in wrinkle-free clothing is non-negotiable.
Consider Your Niche
If you want your headshots to appeal to employers and clients in your sector, factor this into your outfit choice. If you’re a creative, find ways to add a touch of fun to your headshot outfit without it being too distracting.
A Clothing Color Guide
Here's a look at the psychology of colors. Choose the most appropriate options for your headshots:

Image Source: Aweber
Here are some general guidelines for how to choose the right colors for your headshots and the effect that different colors and shades can have.
Start with a Neutral or Solid Color
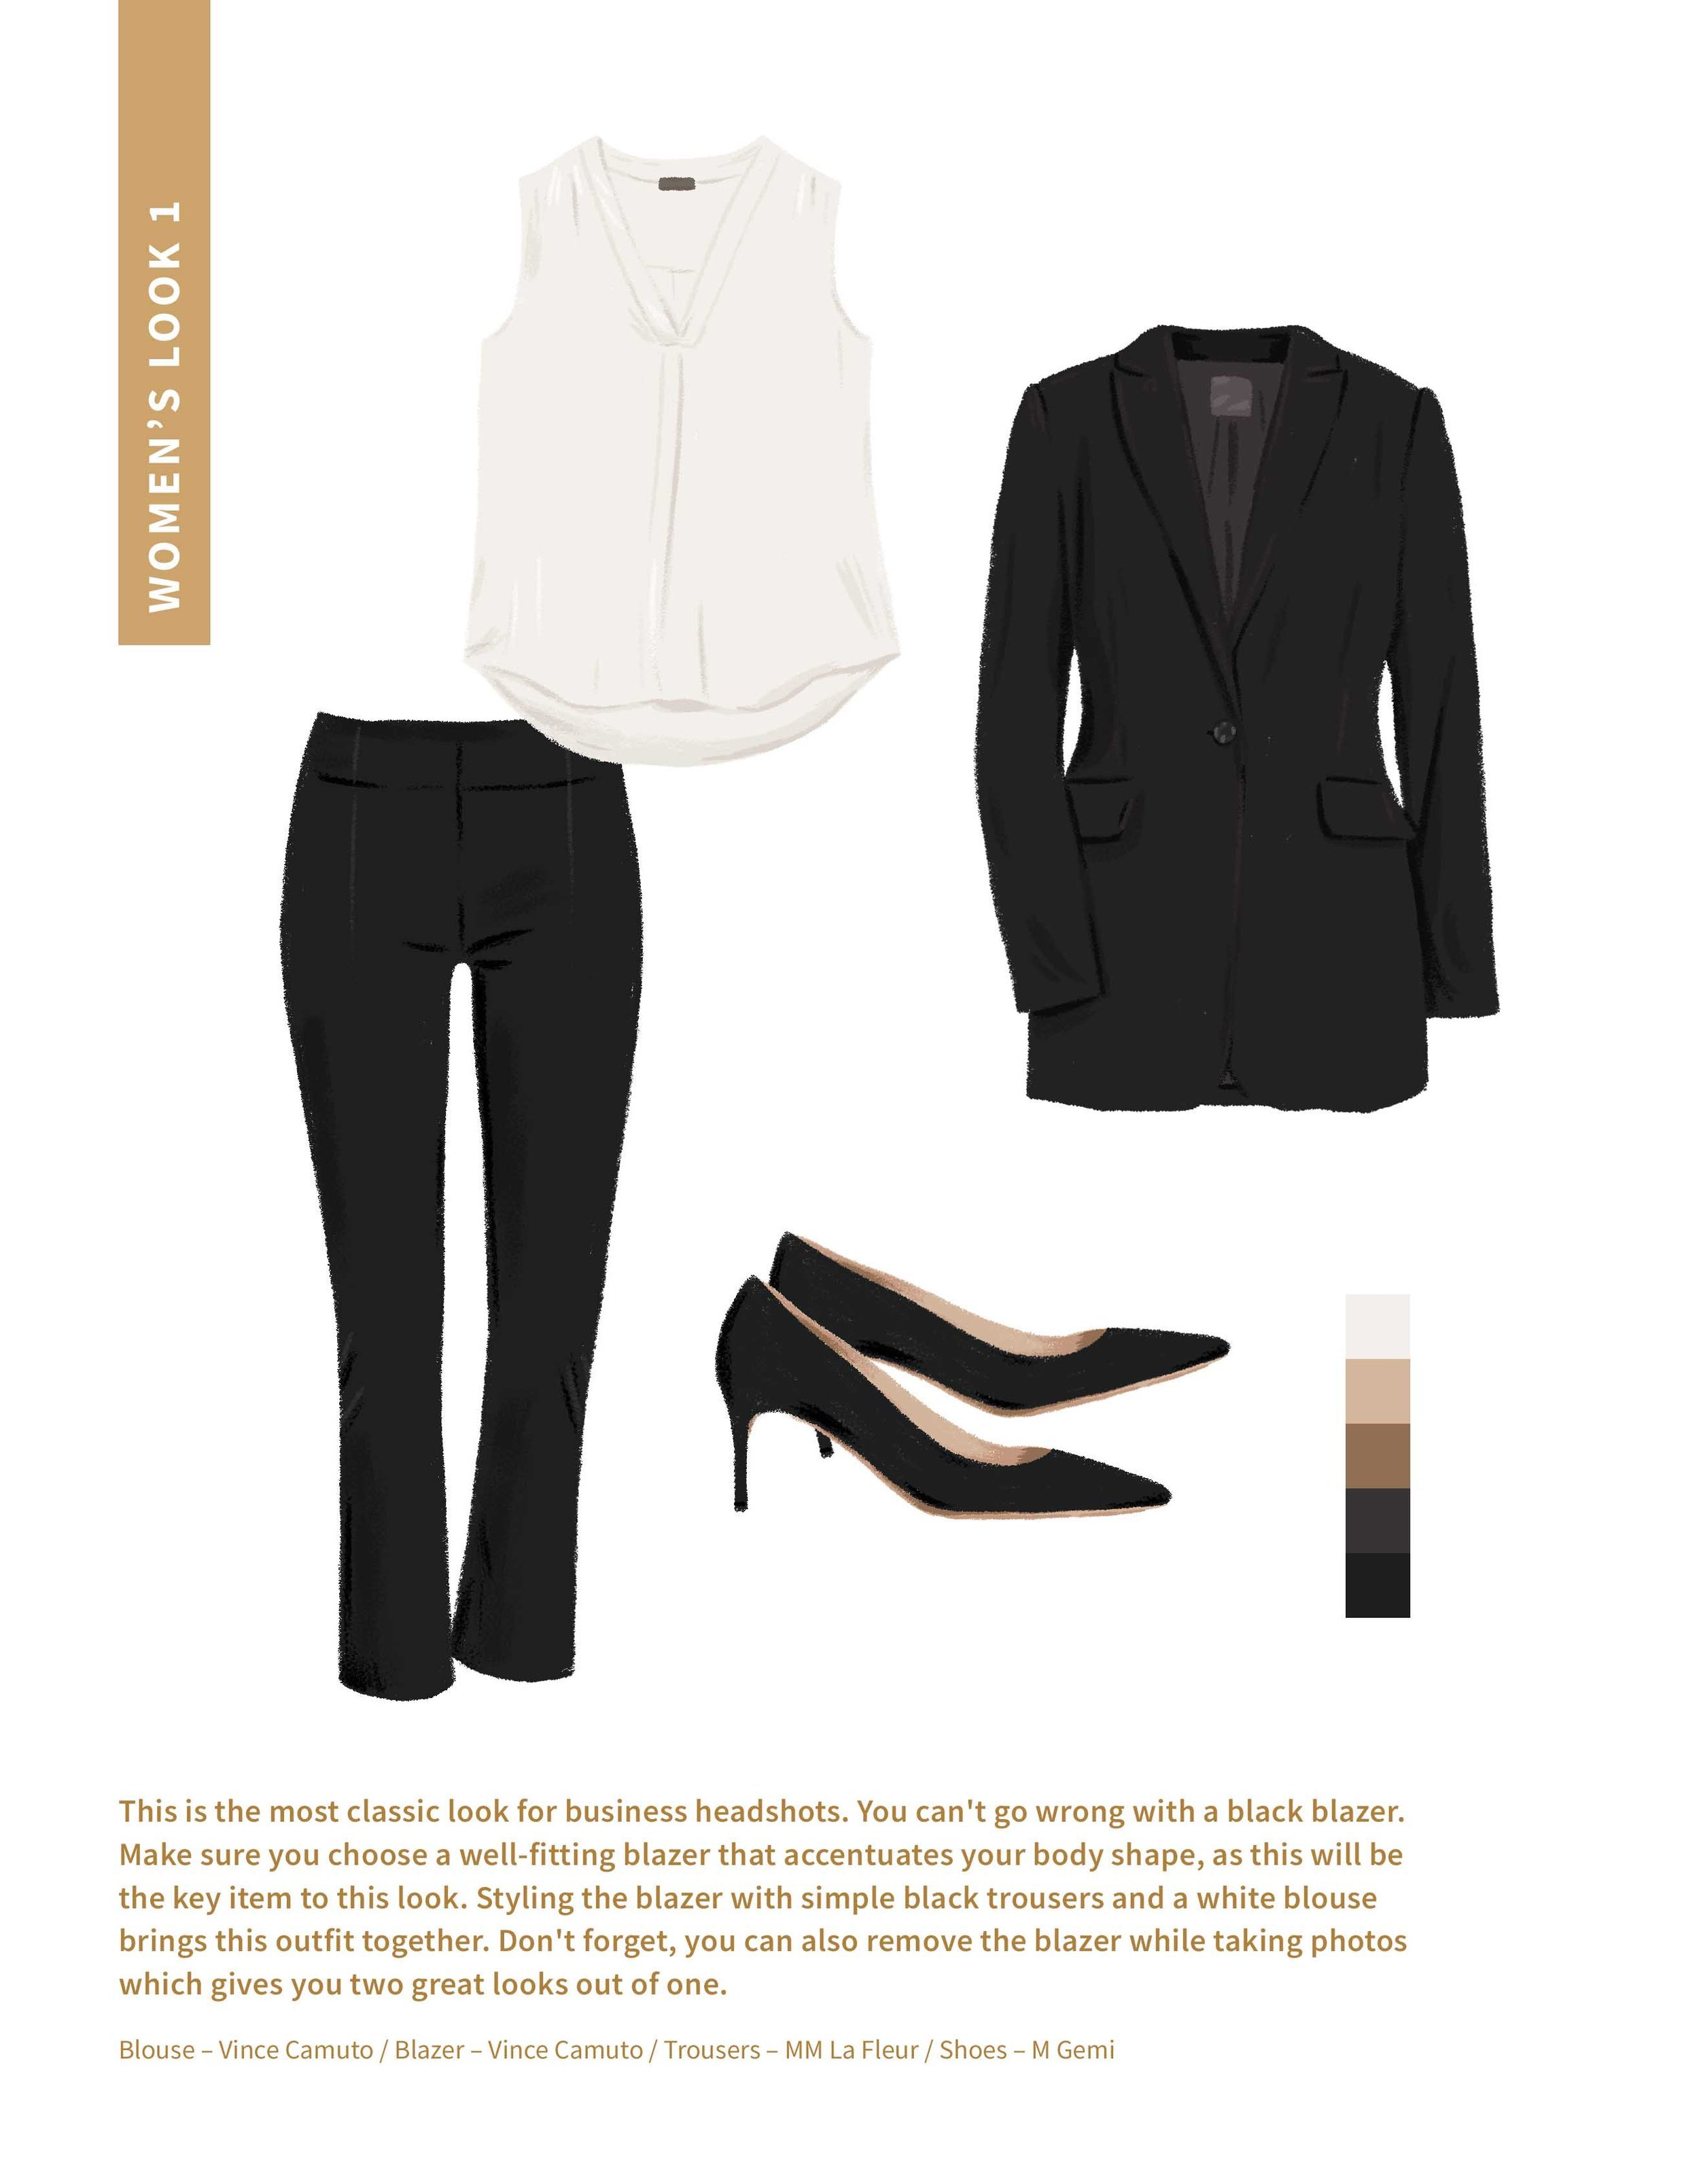
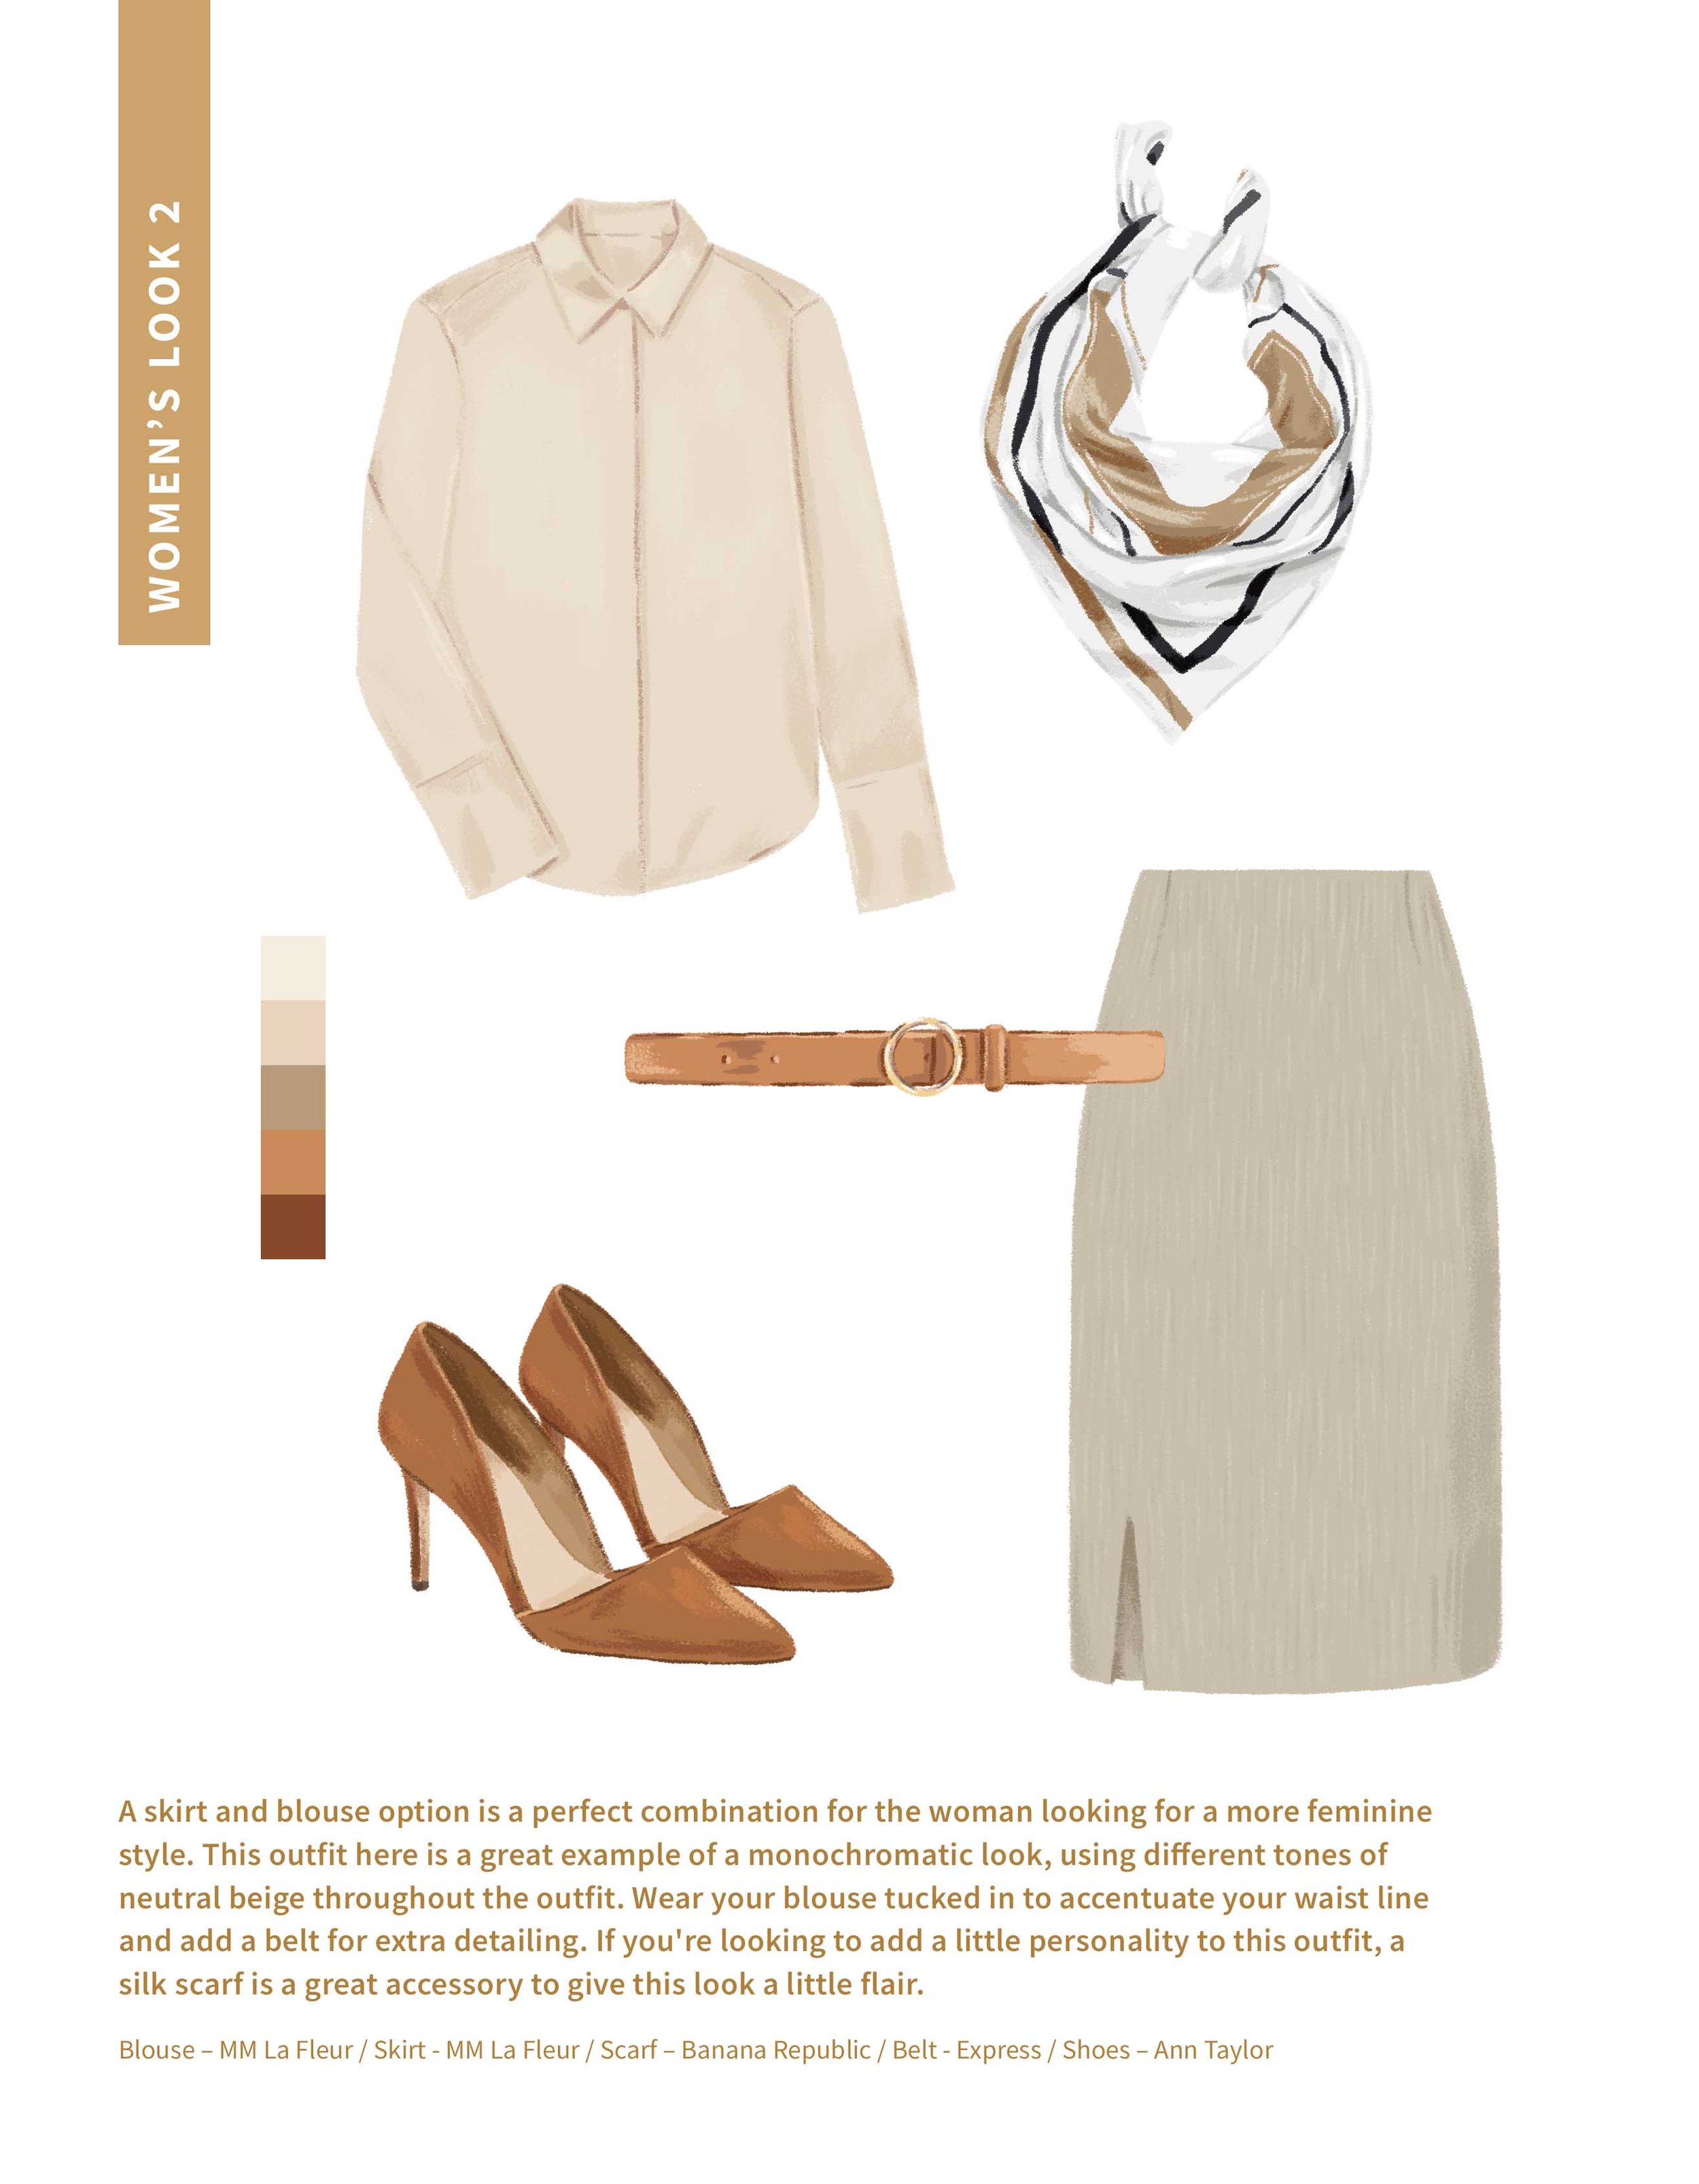
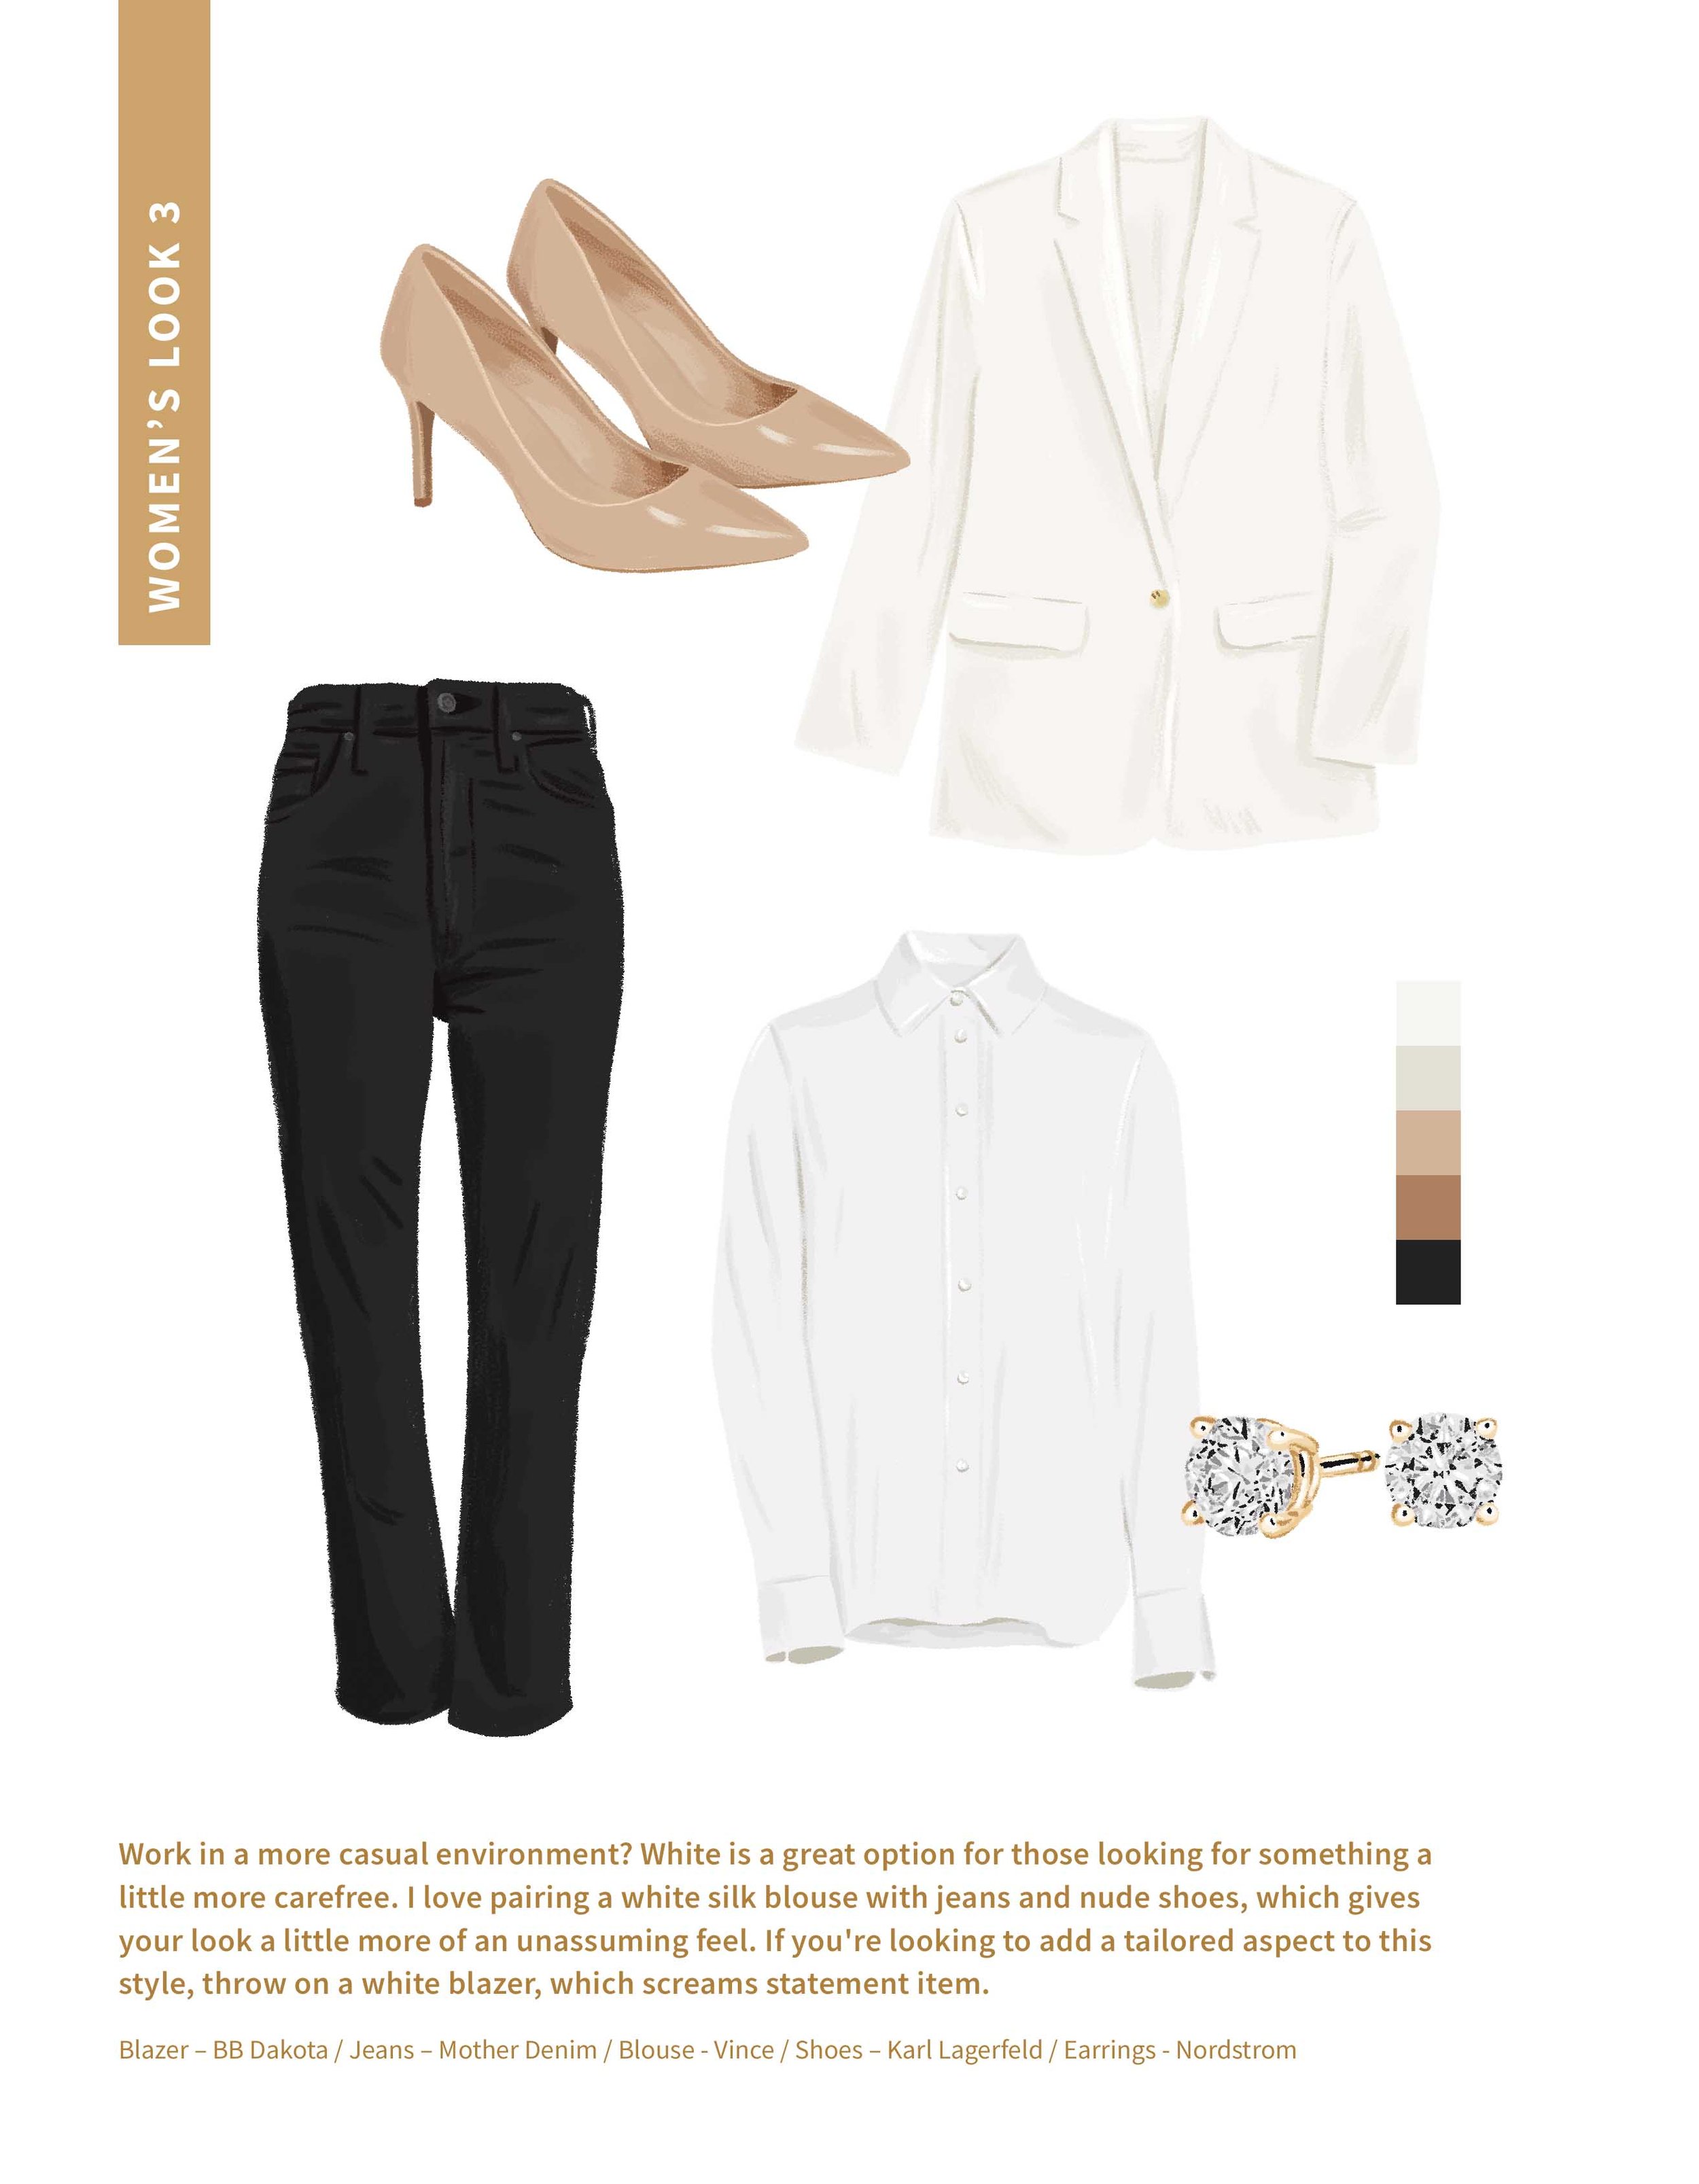
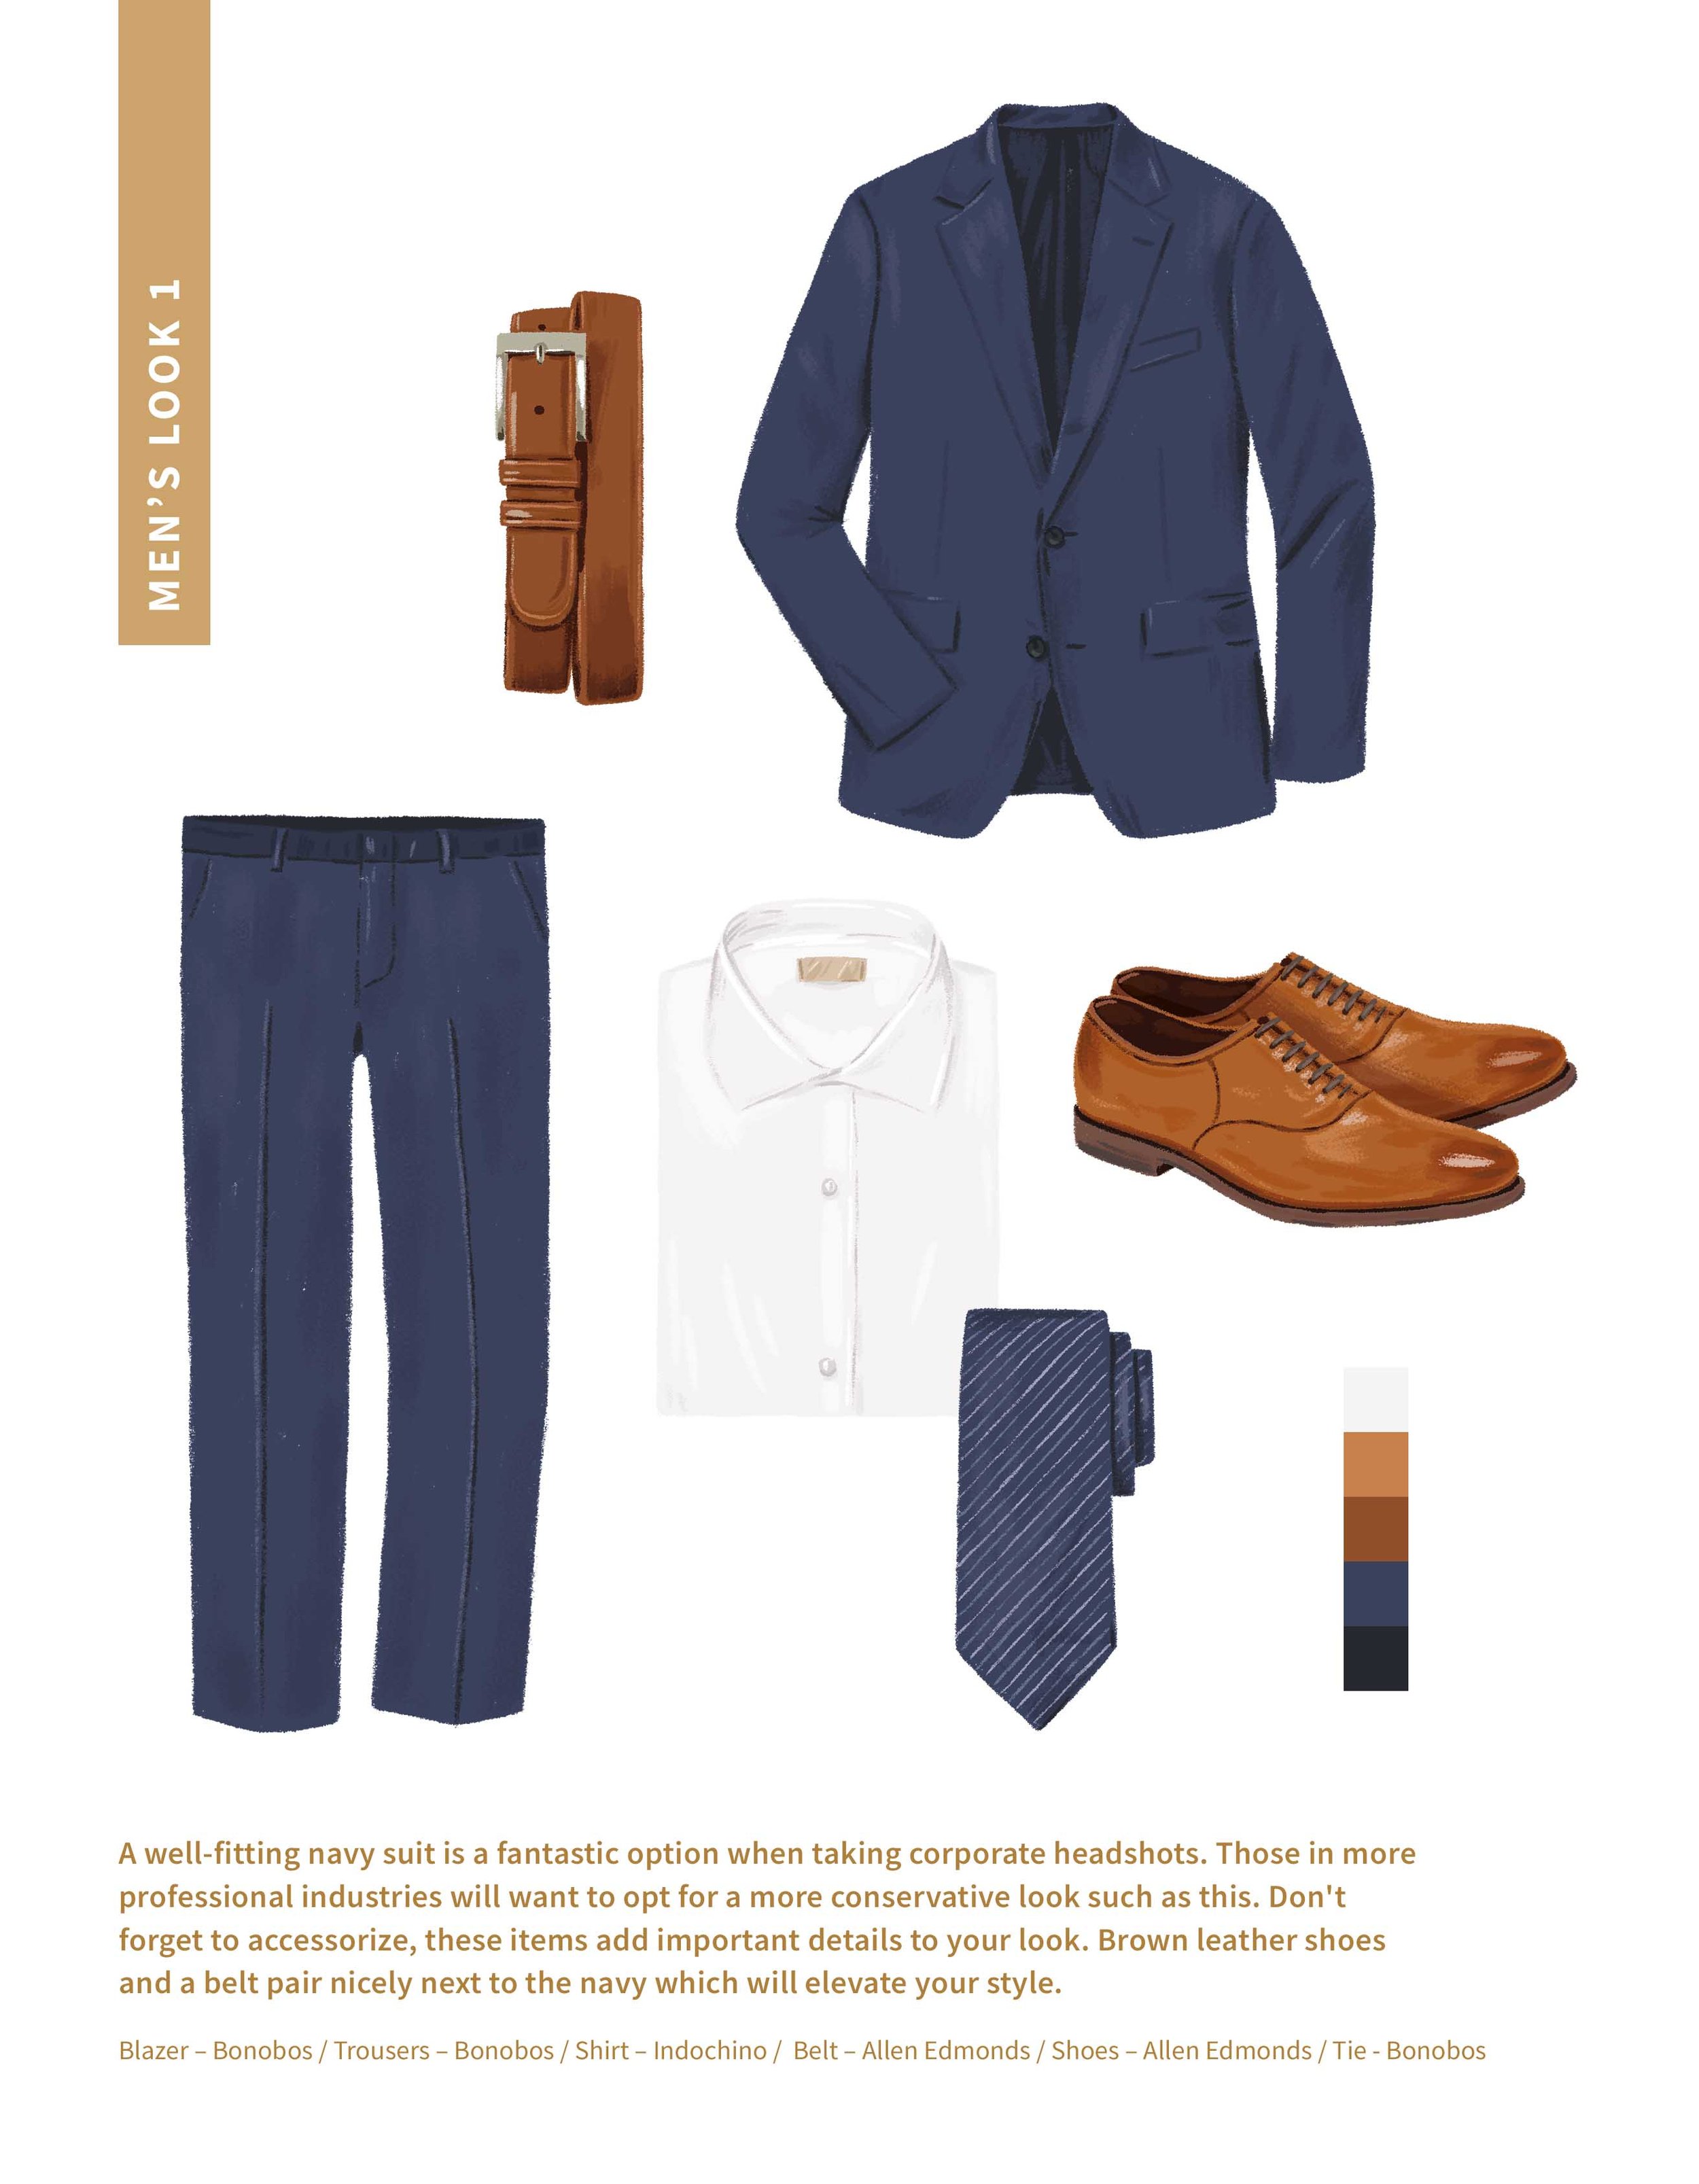
Basing your outfit on a neutral or solid color will ensure you don't overwhelm the frame. Think white, cream, black, or navy blue.
Contrast for Black and White
If you plan to take black and white headshots, choose contrasting colors. For example, if you're planning to wear a white shirt, opt for a black or navy blazer. Wearing a lighter shirt with an equally light jacket won't work for this style of photography.
Keep Color Combos Simple
Layering is great for adding interest to your headshots, but if you're going to do it, make sure your color combinations work well together.
Reduce Light Reflection Using Deeper Colors
If you're planning to have your headshot photo session outdoors, choose deeper colors instead of pale, light colors to avoid looking washed out due to light reflection.
Draw Attention with Bold Shades
While a bold necklace or earrings will draw attention to your face, it will place the focus on your accessories. If you want to draw more attention to your face in your headshots, wear bolder shades around your neckline.
Consider Branding
If your headshots will be used on your website and marketing material, consider your brand colors. Find small ways to work these colors into your outfit so that your photos are complementary.
What To Wear Tips For Women
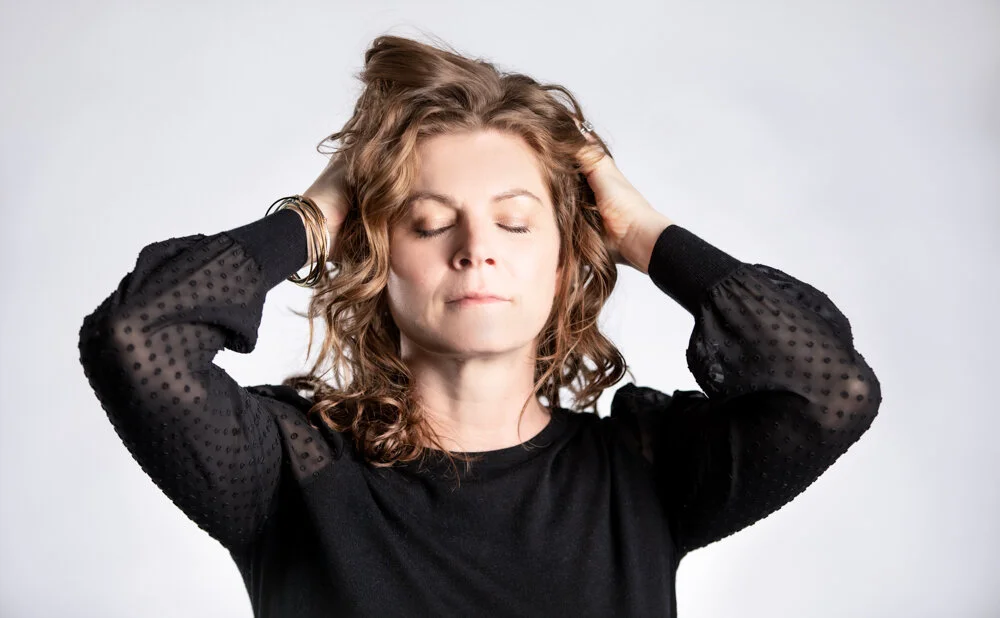
Avoid Too Much Distraction
Patterns, logos, and loud accessories will all take the focus off your face, which is why it's best to stick to solid color tops and blouses and toned-down accessories. It's also best not to wear tops that are too low-cut, as they will have the same effect.
Make Sure it Fits You Well
Even though your headshots only focus on the upper half of your body, it's still important to make sure your top or blouse fits well, as this looks the most professional.
Long Sleeves are Better
Short sleeves add skin to the edge of a headshot, and can also be distracting, which is why long sleeves are better.
Avoid Transparent Clothing
Since you will be taking photos in proper lighting, make sure that your top won't be transparent in bright light.
Choose the Right Undergarments
Whatever you decide to wear, make sure that your bra is not visible. Check for straps and any bumps that the fabric might create under your top.
What To Wear Tips For Men
Opt for Solid Colors
Solid colors are always better. Not only do they look more professional, but they’re not distracting.
Think Twice About White
A white shirt is certainly professional, but keep in mind that does reflect more light. If you are going to wear a white shirt, then it is better to wear something darker over it, too.
Fitted is Better
Whatever you wear, make sure it fits you well. Baggy, loose clothing just looks unprofessional. This is also why it’s important to choose and try on any outfits a few days before your shoot – it gives you the chance to tailor your shirt and jacket or come up with a plan B.
Undershirts Are Not Recommended
You might wear an undershirt daily, but they do tend to show up in photos since brighter lighting is used. It’s best to skip the undershirt for your headshots.
Hairstyle Tips For Men
Choose Your Appointment Date Wisely
If you are going to cut your hair before your headshot session, don’t do it the day before. Cutting your hair a few days before ensures the lines look a bit more natural. It also gives your hair a chance to recover should something go wrong.
Shave at the Right Time
If you generally shave the hair on your head every few days, shave it a day or two before your session for the best results.
Avoid Razor Burn
While your face should look neat on the day of your session, you also want to avoid razor burn. Whether you’re shaving your face clean or simply tidying up your facial hair, use the correct shaving cream and moisturize your face afterward.
Tidy Up Ear and Nose Hair
Don’t forget to trim any nose and ear hair before your session.


10 Things To Know Before Hiring A Professional Headshot Photographer
If your professional headshot is more than 5 years old, looking for a new job, just landed a new position or starting your own business, you may be starting to look for a local headshot photographer or a photo studio which specializes in portrait photography.
Your business profile photo on LinkedIn is often the first impression your clients and associates have of you so it’s important to make sure it reflects the best version of you.
Here are 10 things to know before hiring a Professional Headshot Photographer.
Is your professional headshot more than 5 years old? Are you looking for a new job, or have you just landed a new position? Have you just started your own business? If so, you may be in the process of looking for a local headshot photographer or a photo studio that specializes in portrait photography.
Your business profile photo on LinkedIn is often the first impression your clients and associates have of you, so it’s important to make sure it reflects the best version of your personality.
Here are 10 things to know before hiring a Professional Headshot Photographer.
1. Give Yourself Time.
Your professional headshot should reflect the best version of you and your personality. If you try to squeeze a photo session in between meetings or just before collecting your kids from school, your stress level will show in your photo!
When choosing your headshot photographer, make sure they are available on a day when your schedule is less busy. That may be a weekend or after work. Even if the photo session is only 15 – 30 minutes, a lot of people will take the morning or afternoon off. The more relaxed and less rushed you feel, the better your photos will look!

Your stress level will show in your photo!
2. Choosing Your Outfit.
Do you provide professional services, such as financial or legal advice? Are you a realtor or a business coach? Are you a fitness instructor or a landscape gardener? Essentially, your outfit for your professional profile photo should be in line with how people see you when they do business with you.
Think about what you typically wear when you are meeting a new client. Outfits or items to avoid in headshot photos include “loud” patterns or strong, bright colors. Bright green and/or royal blues, for example, will dominate a photo. Your headshot photo should draw the viewer to your eyes. If you wear a really bright-colored outfit or something with big patterns, the viewer will be drawn away from your eyes.

Think about what you typically wear when you are meeting a new client.
3. Getting Over Photo Anxiety.
Most people indeed align having their professional headshot taken with going to the dentist! It’s something we know we have to do, but the thought of having a camera pointed at you can make a lot of people feel nervous and anxious.
To overcome this, choose an experienced portrait photographer and ideally, one who has a lot of positive reviews on Google or Yelp, for example. A decent portrait photographer (as opposed to someone who has an expensive camera) will know how to put anyone at ease. It’s their job to!
But even if you’re confident in your photographer, you may still be nervous. My best tip here is to empty your mind and forget about any photos from the past. Relax and have fun. Let go of any fear and let your photographer guide you and he or she will quickly build a good report with you. You’re in the hands of an expert, and they will know what to say to put you at ease, how to find your best side, and how to pose and position you in order to get the best and most flattering photos for you.
Empty your mind and forget about any photos from the past!
4. Is Professional Makeup A Good Idea?
My clients who opt for pre-session makeup not only benefit from a professional eye, and look great as a result, but they also treat it like a pampering session. It really helps them to relax before their photoshoot. Guys will occasionally opt for makeup too, to help even out skin tones and hide blemishes.
Remember, the more relaxed and less rushed you feel, the better your photos will look. So, although it’s not essential, I personally think it’s a good idea and will make for a more complete and fun experience.

Professional Makeup Services available at the Studio
5. To Smile Or Not To Smile?
This is probably the biggest question I get. Your headshot photo should portray a friendly, warm, and genuine look, which gives off the feeling of confidence, professionalism, and trust. These feelings come from within and will show in your eyes. So the answer is not to simply pull a smile with your mouth, but to think happy thoughts. A smile that comes from within will show in your eyes!
The best way to do this is to really think about how you would feel right now if your favorite client agreed to buy your latest gadget, signing up for that 3-year deal, or saying yes to your $10 million proposal! Whatever it is that will give you that “warm buzz” inside. It will shine through your eyes and be written on your face. That’s the “magic moment” your headshot photographer should capture.
To capture the magic moment, your photographer will need to know a little bit about you before they start clicking away. Before any photo session, I always ask a few questions: “What are these photos going to be used for”? “What do you do for a living”? “Where have you come from today”? “Do you have family”? “Have you had photos done before”? Nothing too deep but just enough to help relax my clients and to keep the conversation going and to build rapport through the session.

Your headshot photo should portray a friendly, warm and genuine look
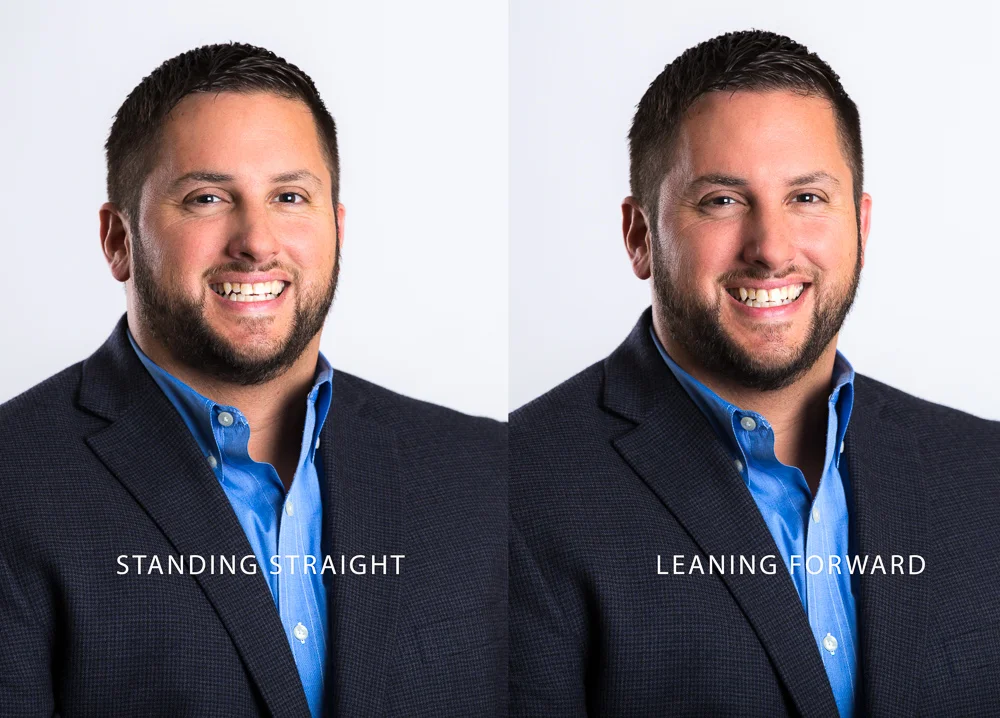
6. How Should I Pose For My Headshot Photo?
Correct posing, which includes head, body, and hand positioning, will make a huge difference to the outcome of your professional headshot! Your headshot photographer should provide very clear and precise instructions and guidance on how you should sit, stand, and look. You’d be amazed at how different you look in a photo, with just the slightest of leans, head tilts, or head rolls. It’s incredible! Remember always that your eyes are the focus.
Everything closer to the camera will appear bigger, so by leaning in toward the camera slightly, with the shoulder closest to the camera lower than the other, the result will make your eyes appear larger. On the flip If you lean away, and the shoulder closest to the camera is slightly higher, this will give the impression that your body and chin are larger than they are and your eyes smaller than they really are.
With this in mind, therefore, it’s rare that I would ask my client to stand facing straight at the camera. Generally, I like to pose people at a 45-degree angle because this will also make your body look slimmer! Ultimately, we are all unique with different body shapes, facial features, and head sizes, so it isn’t a one-size-fits-all kind of deal. Your headshot photographer will figure out the pose that works for you.

Leaning in towards the camera will make your eyes bigger and your chin smaller!
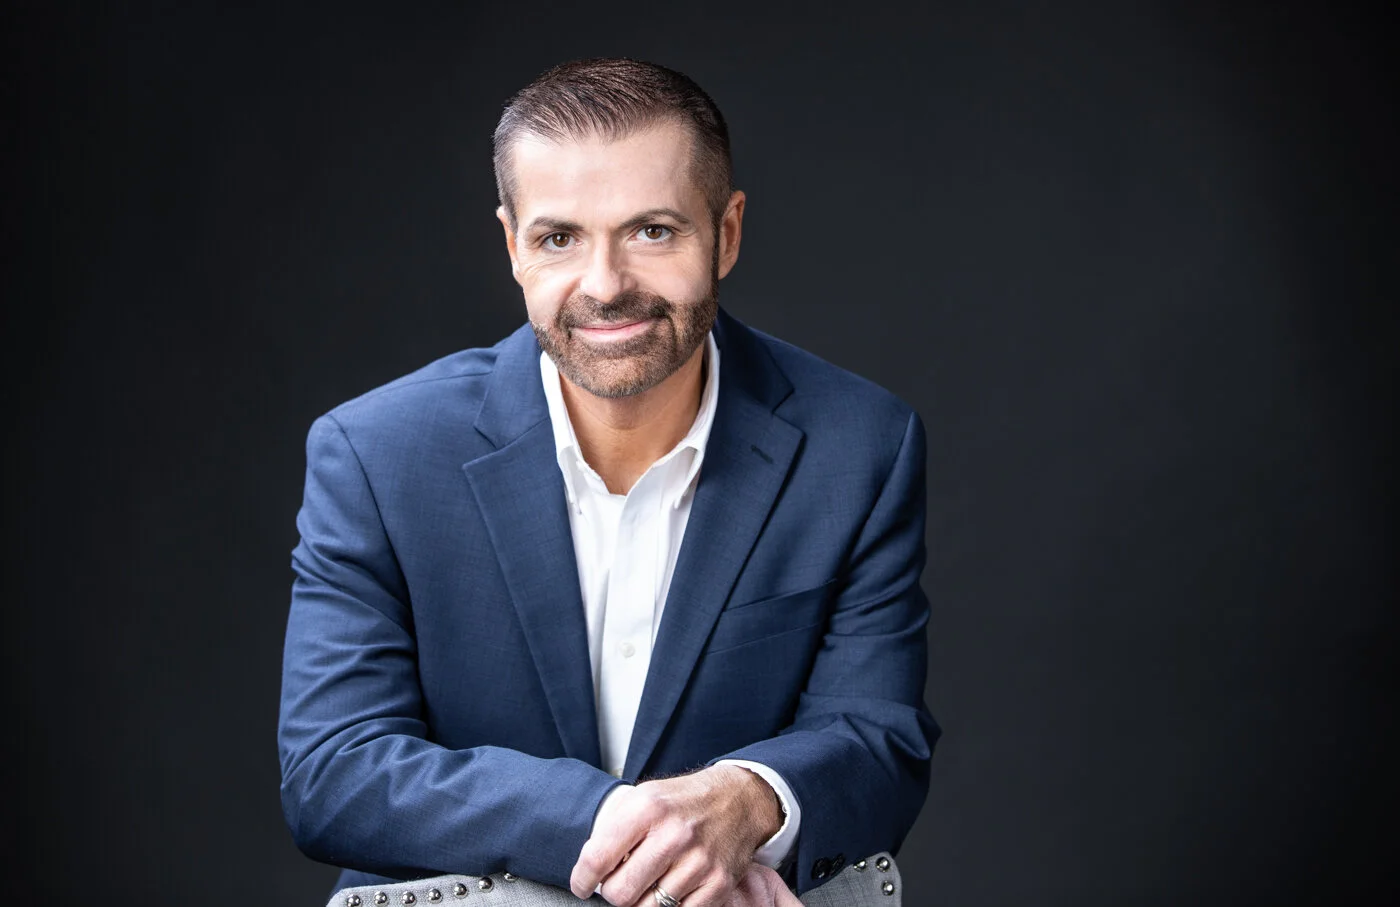
7. Should I Sit Or Stand For My Photo?
It really depends on what will look best for you. If I want to introduce hands into a photo, I personally like to turn a bar chair around so that the back is facing me. I ask my clients to “straddle” the chair like a horse and then use the back of the chair as an armrest and have the person either folding their arms on the back of the chair or maybe having both elbows resting on the back and having my client gently cupping their hands or having one hand touching their chin, cheek or back of their neck. Again, this really depends on how comfortable you look on the chair. Does it look and feel natural? Everyone is different, but I often use a chair or stool for different poses!

Sitting photo example
8. Is It Better To Have Indoor Or Outdoor Photos?
I get asked this a lot. Ultimately, it really depends on the look you want to represent your personal brand! If you want or need a traditional-looking corporate headshot with a plain, neutral backdrop, then to have your photoshoot inside a studio makes sense. I have many clients who need a very specific look for their business profiles, for example, a plain white backdrop. But of course, the backdrop inside doesn’t need to be plain or neutral. You may want to show that you work in a downtown office block, a lab, a doctor’s office, a warehouse, or a factory! “Environmental Portraits” are very popular today because they really support personal and business brands. Outdoor portraits are also popular because they are generally more casual and relaxed-looking.

Environmental Portraits are very popular today
9. Do I Need Photo Retouching?
The short answer, in my opinion, is YES! A professionally taken photo, with correct lighting, straight out of a camera, will look good. Your photographer will take that photo and lightly edit it, meaning that it will be cropped (if necessary), color corrected, and “styled” to the way your photographer likes. They will probably use Adobe Lightroom to do this. I personally have a big stock of pre-set looks and styles to choose from in my Lightroom program. This first stage of “editing” will turn a “good” photo into “very good,” and clients (mostly younger people), will be very happy with the outcome of their photos after they have been lightly edited. However, when my clients opt for the professional retouching option, this will transform their photos from “very good” to “excellent”. Retouching involves a much higher level of photo editing and attention to detail to skin, eyes, teeth, hair, and clothing. I’ve had many requests for weight reduction, too! Yes, it’s even possible to make you look 10, 15, or 20lb lighter with some clever editing! Having said all this, subtlety is the key. An over-edited photo will stand out like a sore thumb.

10. How Much Does A Headshot Photo Session Cost?
This really depends on where you are in the world and how much local competition there is for your business. When I set my photography studio up, I wanted to deliver a great service, a great product, and at a great value. I also love what I do, so although I’m not the cheapest photographer, I’ve always been ok with not being the most expensive photographer in my area. As a result, I serve a lot of happy clients! Some photo studios offering the same service, running their business in the middle of a busy city, will also need to charge more because they have higher running costs and higher rents! Click on the link below to receive a business headshot and personal portrait pricing. If you’re a business and you need all your staff to update their professional headshots with a consistent look for your company website, I can travel to your place of work and offer the same type of service as I do out of my studio.

Is Your Professional Profile Photo Damaging Your Brand?
What we say and do on social media defines our online “personal brand”. So, it’s become increasingly important to represent our brand in the best way we can, which ultimately starts with your profile photo. It’s fair to say that by not having a “half-decent” or updated profile photo (less than five years), on your professional social media account, such as LinkedIn and/or Twitter, it is likely damaging your brand in some way. There are really two options for anyone wanting to improve or update their professional profile photo.
Why Your Profile Photo Is So Important:
According to statista.com in 2019, 79% of the population in the United States had a social media profile, which equates to approximately 247 Million Social Media users in the US alone! Quite staggering, and this is a 2% increase in one year!
What we say and do on social media defines our online “personal brand”. So, it’s become increasingly important to represent our brand in the best way we can, which ultimately starts with your profile photo.
It’s fair to say that by not having a “half-decent” or updated profile photo (less than five years old), on your professional social media account, such as LinkedIn and/or Twitter, it is likely damaging your brand in some way.
This article was written to help anyone who needs to update their online professional profile photo, and for businesses, updating their website’s “About us” or “Meet the Team” pages with executive headshots. I hope you find it useful.
There are two options to improve or update your professional profile photo:
1) D.I.Y Mobile Phone Headshot:
The good news is that the cameras in our phones are getting better all the time, and since the introduction of “Portrait Mode”, it’s possible to get some fairly good results.
If you opt for the camera phone route for your professional headshot photo, here are some tips to get the best results possible from your phone:
1) If your phone has a “Portrait Mode”, use it.
2) Find a place that has even, soft light. If outdoors, the best conditions would be an overcast, cloudy day. If it’s a bright sunny day, find a shaded area and make sure that the background is the same level of light as you are situated. I.E. The background shouldn’t be flooded with direct sunlight.
3) Find a background that is plain, and even in color and light to the area you are standing in, and ideally, one that is a darker tone than your skin. Otherwise, your phone camera will underexpose your face!
4) Put as much space between you and the backdrop as possible to prevent unwanted shadow.
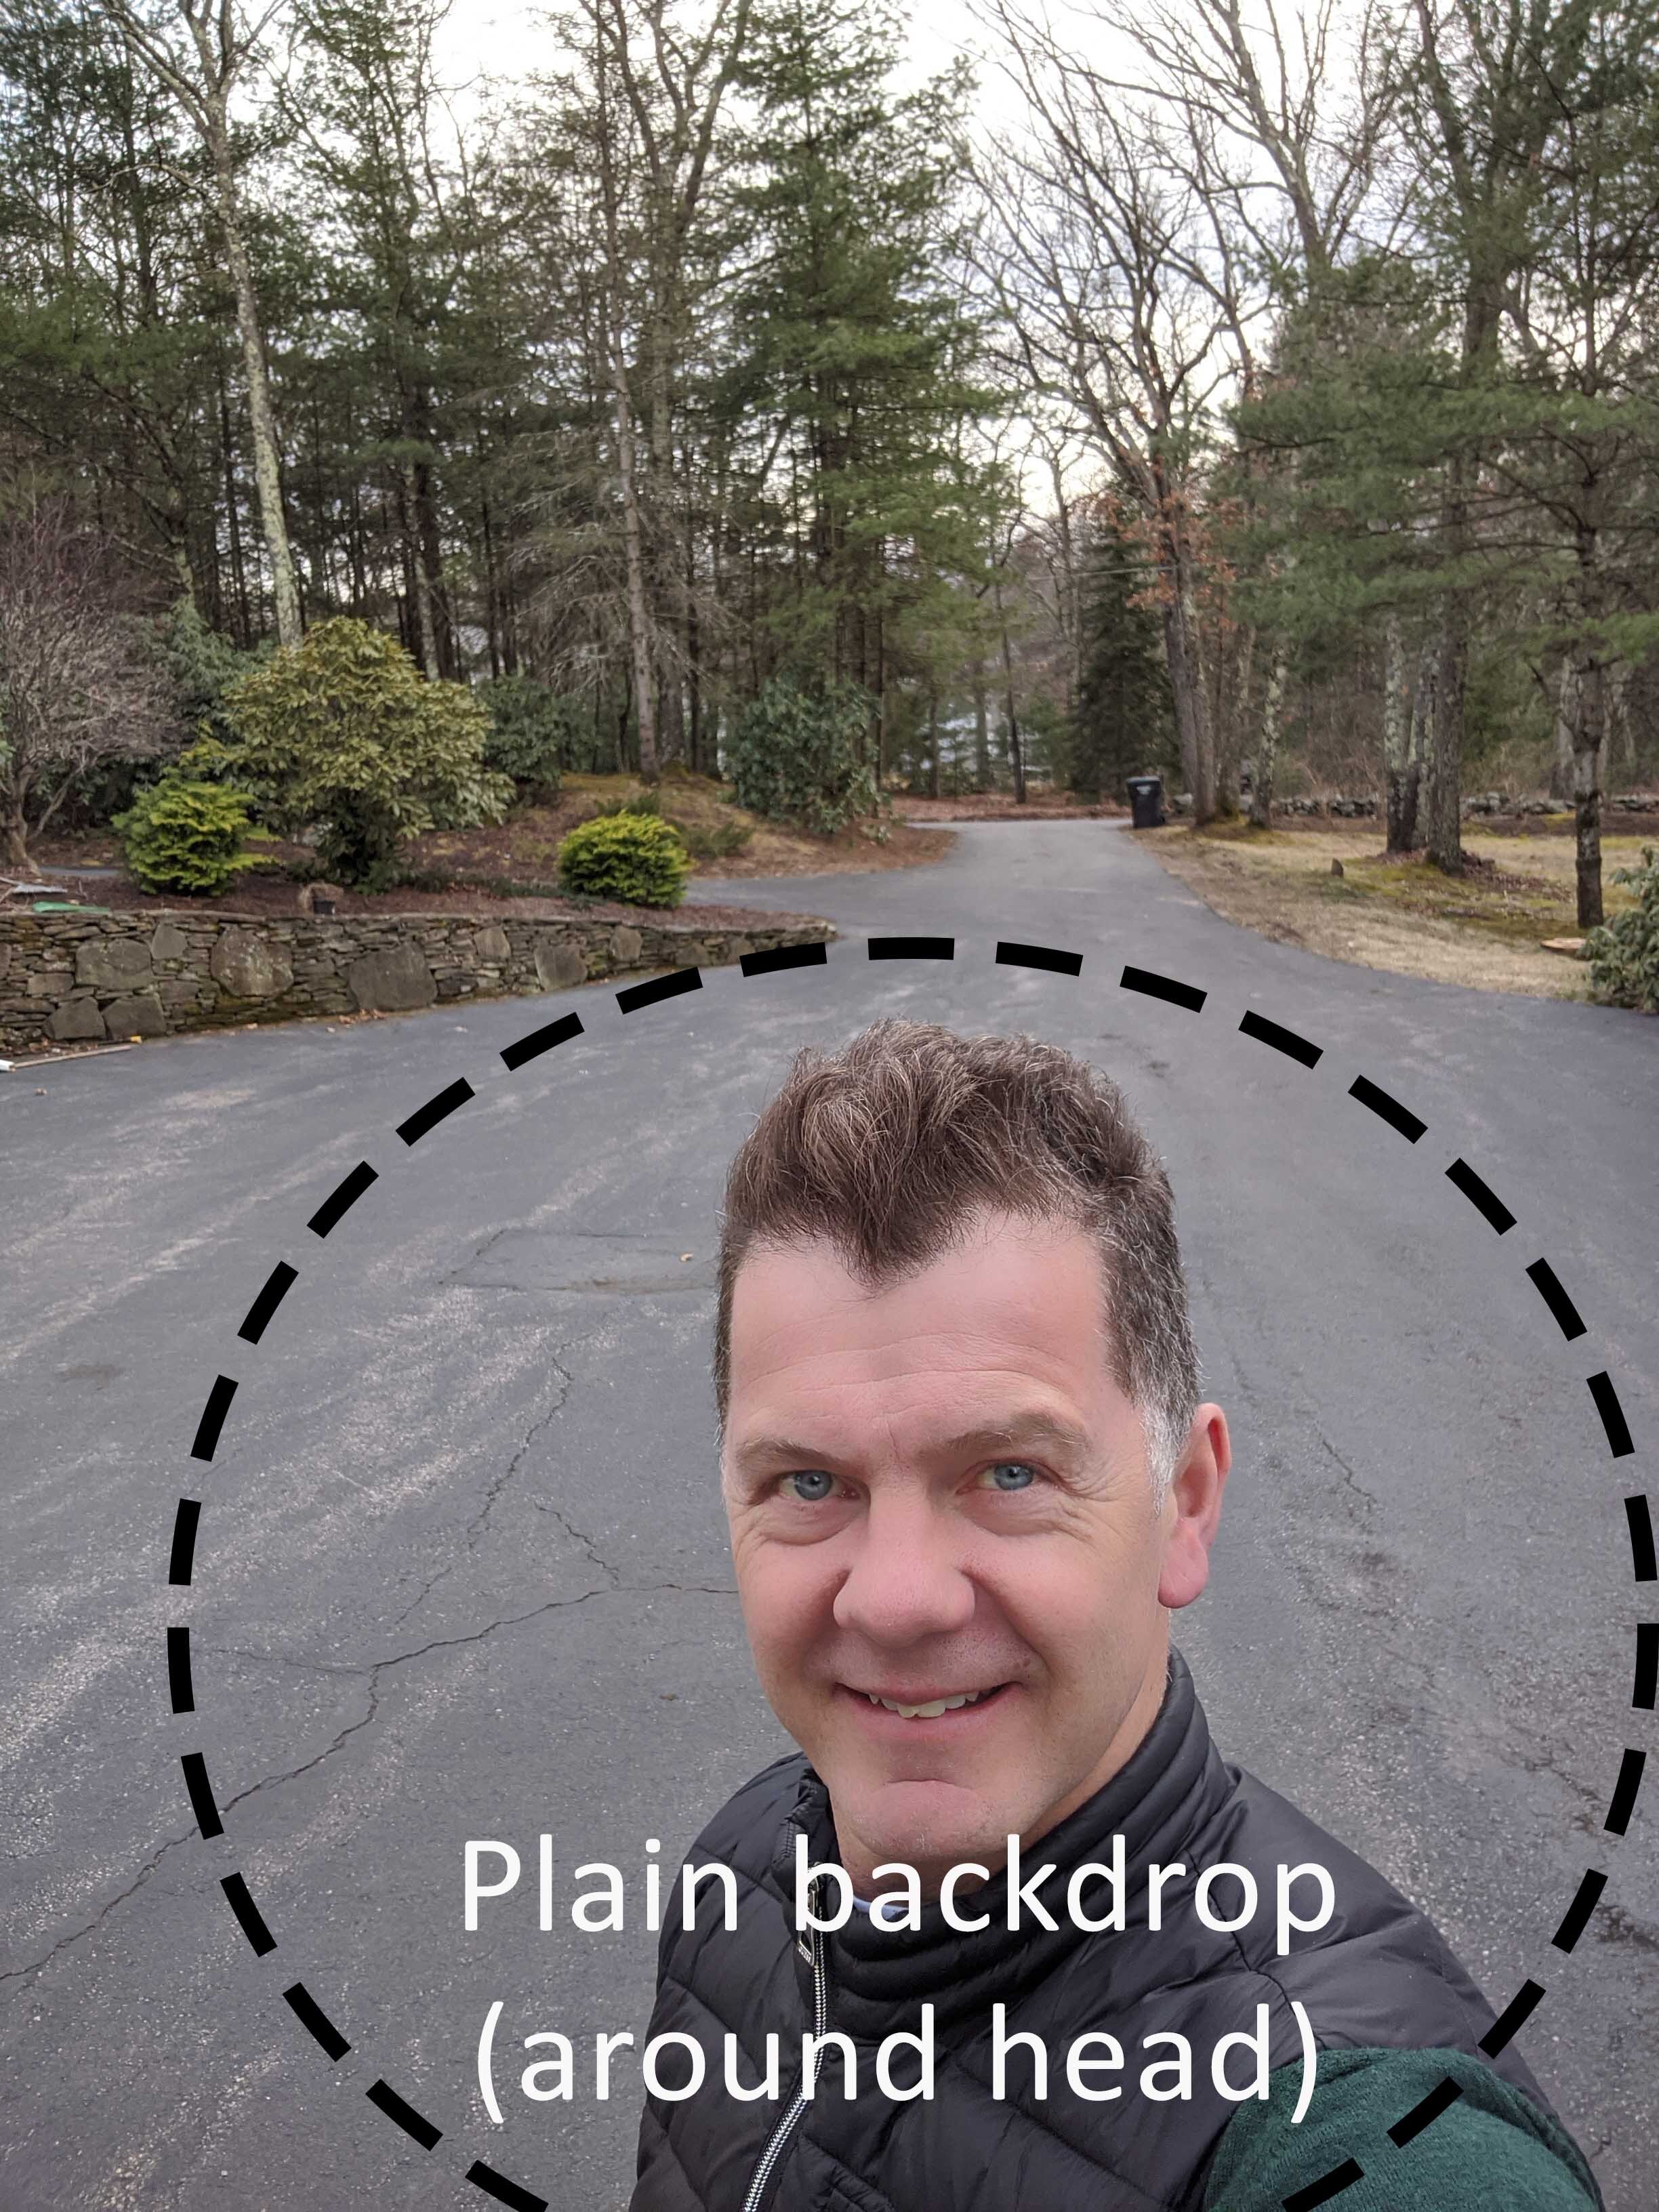
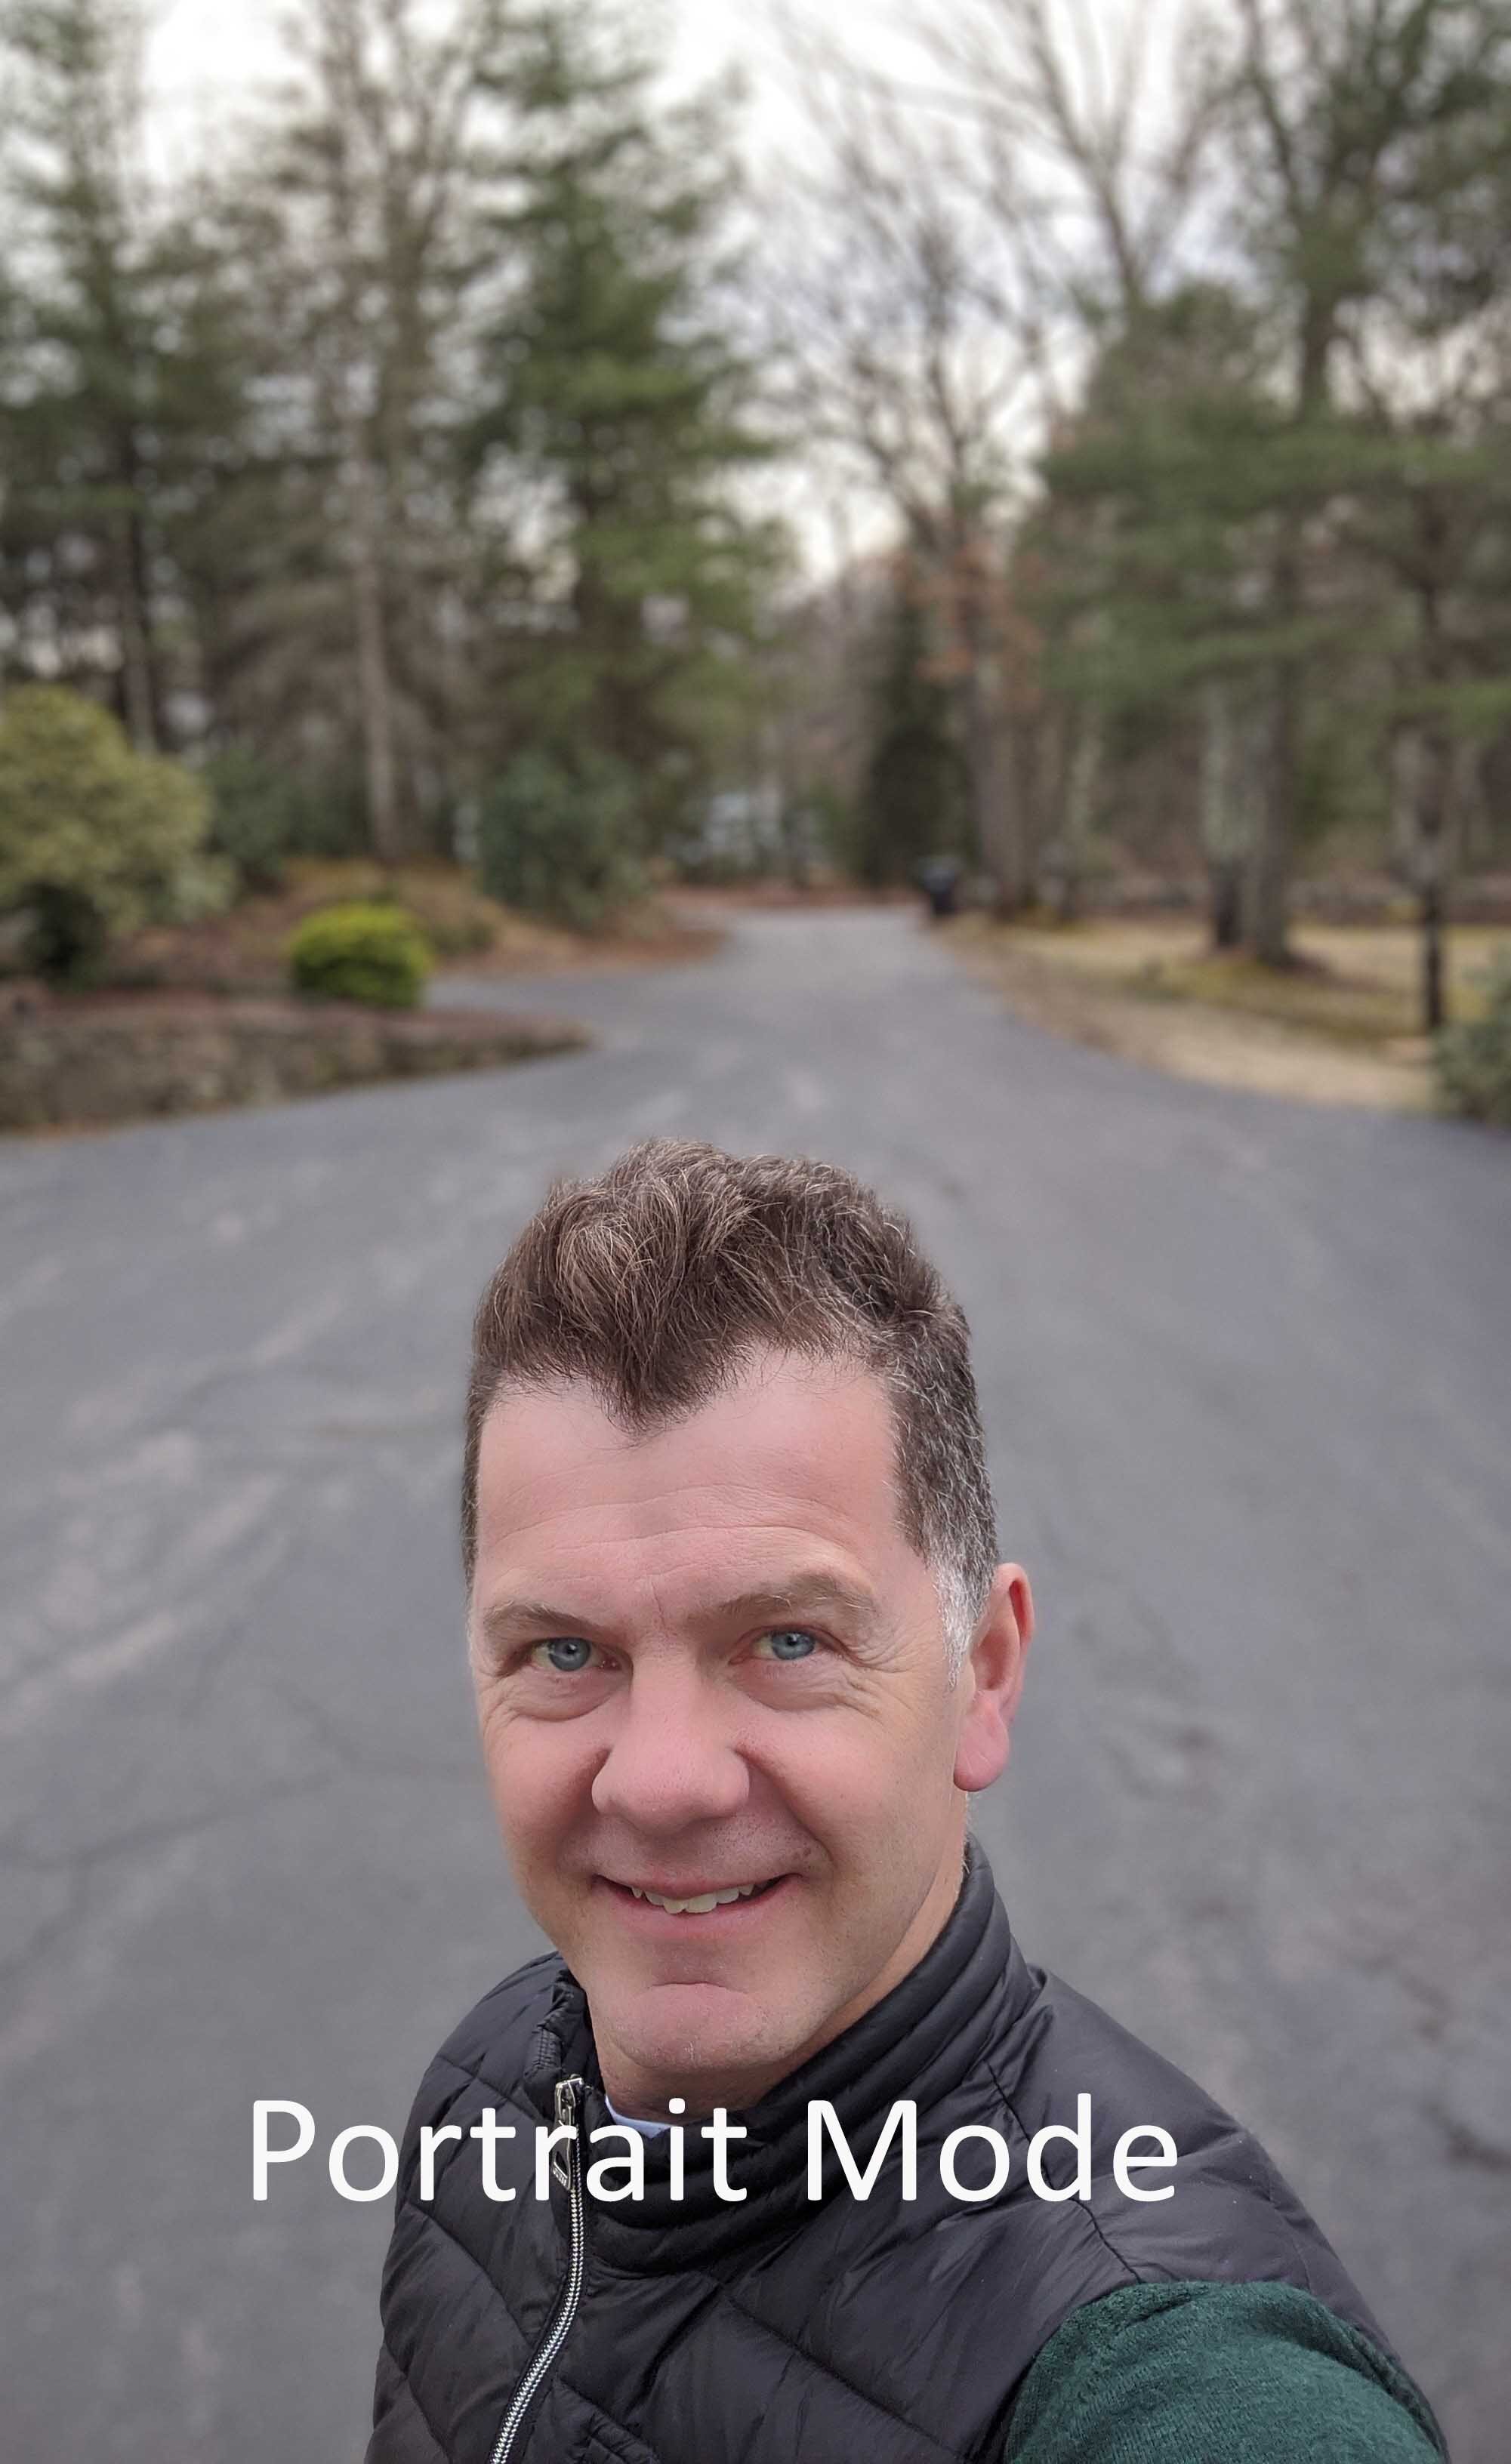

5) If taking a “Selfie”, again use the Portrait mode, then switch the self-timer to at least 3 seconds. Those 3 seconds will help you to compose your shot and your expression!
6) Take a few photos, and I recommend enhancing your favorite with the editing software that comes with your phone. I usually increase the exposure a touch and crop the photo so that your eyes are in line with the top third of the frame.
2) Hire a Professional Photographer
Hiring a Professional for your headshot is the way to go if you’re serious about your personal brand. But how do you find a photographer near you that will give you the results you need in order to portray the best version of yourself? Headshot Photography is a niche. I recommend not just simply hiring “a photographer”, but to find one who specializes in headshot and portrait photography. Just like Newborn / Infant Photography or Wedding Photography, a quality headshot requires someone with experience in that field.
Why choose a Specialist?
The fact is, most people get nervous and anxious at the very thought of having a headshot photo. But this is where the interpersonal skills of a professional portrait photographer must shine.
In order to capture the true essence of someone’s character, they must have the ability to calm nerves and to help their client relax, and in a short space of time. This is probably the most important aspect of headshot and portrait photography. If someone is nervous throughout their photo session, it will show in the final photos. But a decent portrait photographer is (or should be) skilled at helping anyone and everyone overcome camera nerves and fill their client with confidence and energy. They should make it a fun experience, and not like a visit to the dentist!
Take an event photographer, for example, who is skilled at capturing and documenting events and candid moments. I’ve personally covered 100’s of events but compared to a portrait session, there is very little, if any, one-on-one interaction between an event photographer and their subjects (people). In other words, a decent event photographer may not necessarily have the added qualities and personality needed to be an excellent portrait photographer. So choose your photographer wisely.
The second most important thing to consider before hiring a photographer for a headshot is to know if the photographer has the skills and ability to work with professional lighting.
Here’s why.
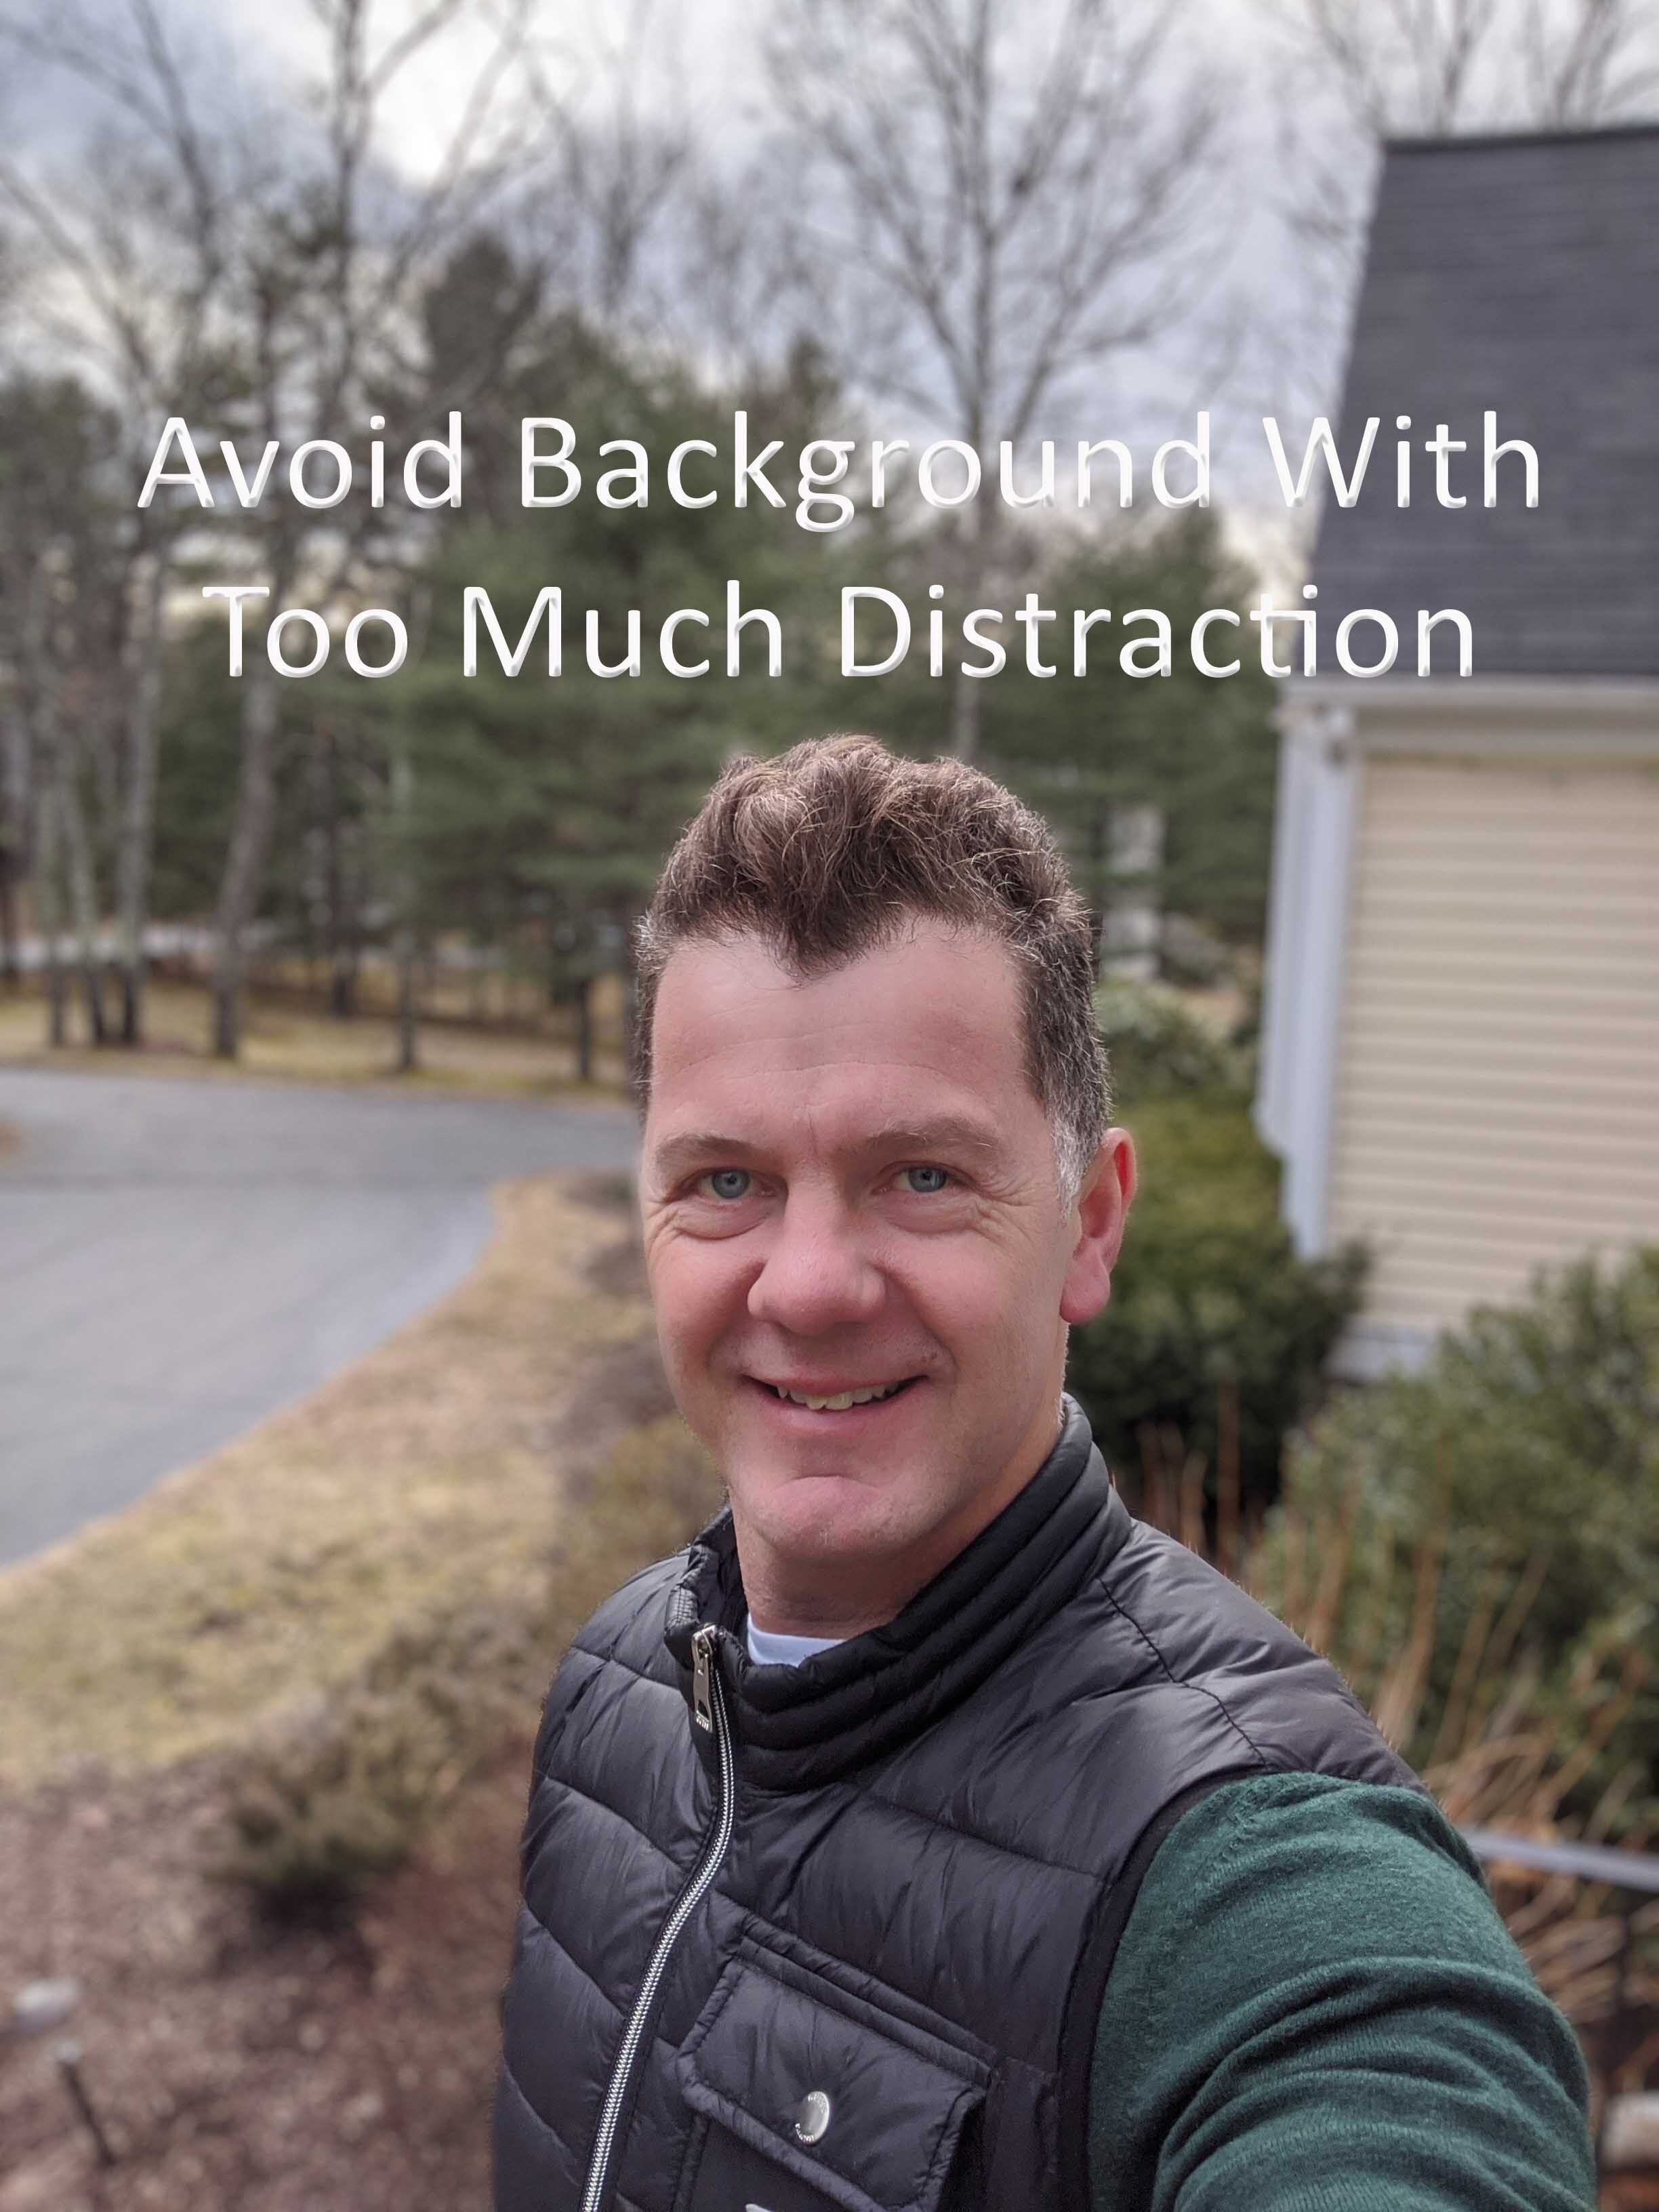
Natural Light Photography:
A decent “natural light” headshot can be stunning but it requires an experienced photographer and nice, soft light conditions. For a professional using only natural light (No flash or studio strobe lights), the key is finding an area, space or location with soft, even lighting.

Outdoor, Natural Light Portrait
(Stuart Beeby Photography)

Lighting Inside a conference room is often poor
But the challenge for a photographer using natural light only is that it may not be possible to find that light when it’s needed! I can think of dozens of situations where I have been invited by a business to take headshot photos of all their employees, and the only available room is a windowless conference room, with tungsten, overhead lighting! (I.E., Terrible lighting for a photo).
It’s for this reason that most Photographers who only use natural light prefer to work outside. But then weather and the seasons will dictate the time and day of any photo session! Having a headshot outside in the middle of a snowstorm or torrential rain wouldn’t be much fun for the Photographer or their client.
Professional Headshot with Studio Lighting:
A huge benefit and overwhelming advantage of having a professional headshot or portrait session in a photography studio is that every single aspect of lighting is controlled by the photographer. It doesn’t matter what time of day it is, which day of the week or season it is, a studio headshot photographer can perform their craft 24 x 7. (If they really wanted to, but you get my point)
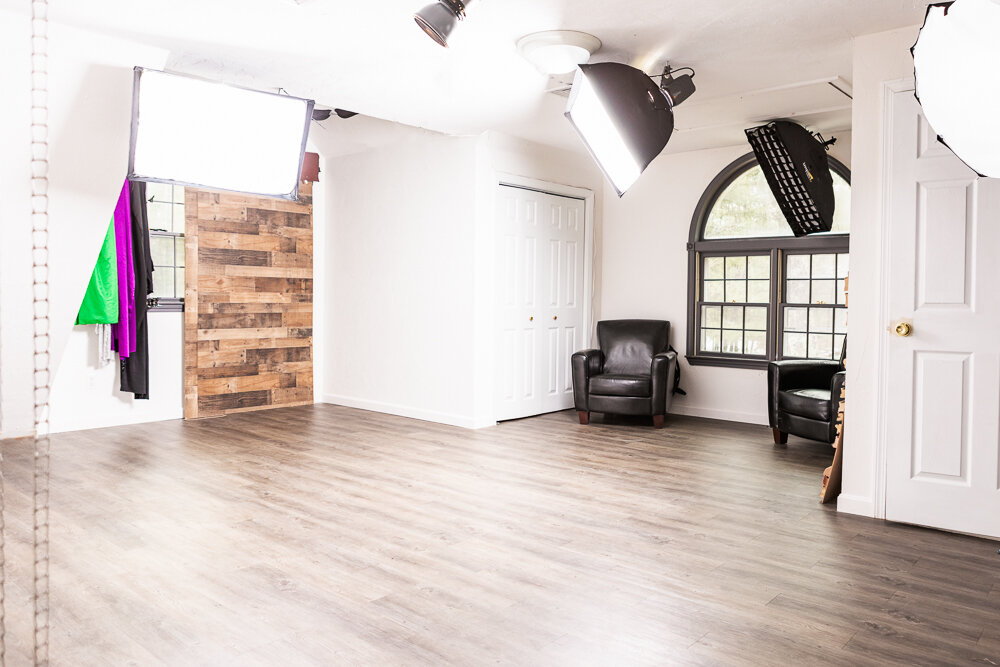
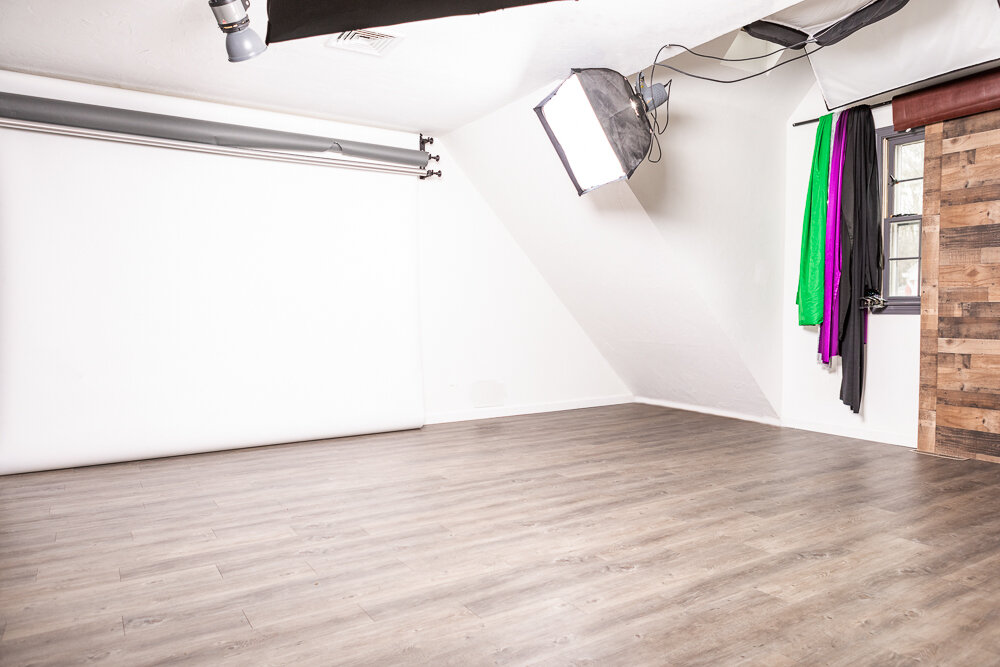
Studio lighting provides many other advantages. An accomplished studio photographer understands how to manipulate and shape light in such a way as to completely change the way a person or group of people is portrayed. For example, to create a feeling of authority, experience, and importance for a CEO, Entrepreneur or author for example, a more “cinematic” headshot will portray a very different look and feel to a more traditional, evenly lit headshot.
Studio lighting really makes a headshot or portrait “pop”, especially when using a two, three, or four light set up. Carefully placed lighting separates a person from the background of the surrounding. This means that the viewer’s eye is naturally drawn towards the person’s face.
Beyond a business headshot, lighting can also be used to create special effects, and when a situation arises for the need to get really creative, combining lighting with studio fog, for example, can provide some very dramatic results!

The Takeaway:
Ultimately, the biggest takeaway is if you would like your professional headshot or portrait to portray your character or your business brand in the most authentic way possible way, the best option is to choose a headshot and portrait specialist. One who is professional, a good communicator, and one who can create stunning results every time, even in a poorly lit room!
Thanks for reading!
Stuart Beeby Photography

How to look and feel confident in front of a Camera
Is your Professional Profile Image in need of an update? Do you want to avoid having a bad headshot to represent your personal brand? Do you want to look and feel confident in front of the camera? These five simple tips will help even the most camera-shy people to relax and enjoy a photo session.
It's true to say that many people shy away from having their picture taken professionally and keep putting it off, often resorting to what they can capture on their smartphone. I would even go as far as to say that as many as 75% of people who visit my studio starts off by saying “I should just let you know that I hate having my picture taken”.


So why do so many of us feel uncomfortable in front of a camera or feel that we hate having our picture taken? It’s a combination of things:
1) When we look at photos of ourselves, we often pay more attention to the things we don’t like about the way we look. Let’s be honest, we are our own worst critics. We may say to ourselves, “I don’t like the way I smile”, “I have a double chin,”, “My teeth are bad, “I don’t like my grey bits”, or “I’m overweight”.
2) Most pictures we have of ourselves these days are taken with a smartphone, which cannot control light or be able to use the most flattering focal length for a portrait. So, although phones have quite sophisticated cameras these days, there are still huge differences in the quality of results between a smartphone camera and a $5,000 professional camera.
3) The person taking the photo doesn’t know how to pose or direct us. This is a big deal! Even if a friend or a family member owns a nice, new, shiny, expensive camera, it takes years of practice and experience to know how to pose and direct someone to ensure the most flattering results. And what looks good for one person may be less flattering for another!
So, to help alleviate these fears and previous experiences, I wrote this guide to provide five tried and tested easy tips for people who don't feel comfortable in front of a camera or are nervous about the whole idea.
I hope you find the guide useful.
- Stuart Beeby
Tip 1
Planning Your Outfit
Men:
Plain white or blue dress shirts are classic and clean-looking. Solid shades of gray or navy are also good. Pinstripes or plaid patterns tend to distract the eye.
Layers on men look great on camera. Another layer will bring extra dimension and visual interest to your photos. For example, blazers, vests, and jackets enhance any look. Or add a V-neck sweater with a pop of color from a long-sleeved collared shirt and tie underneath.
Don’t be afraid to get a little creative with layers!


Women:
When choosing colors for your outfits, I recommend selecting softer, lighter tones or more muted shades. Try to avoid ultra-bright, bold colors. The camera loves delicate shades, mixed with sophisticated light neutrals like heather gray, creams, brown, and white.
A single plain top with neck jewelry with subtle earrings looks great, but adding another layer over your top enhances any business portrait.
If you choose to add another layer, try a slightly different shade or tone rather than an exact match to the layer beneath.


Tip 2
Look away!
Constantly looking toward the camera and holding a pose causes your eyes to glaze over, and your smile will look forced; consequently, your expression will develop into a "hard stare" after a few frames.
To make your expression more natural, I always have my clients "look away" from the camera between each shot. When prompted, I'll ask them to turn their head and eyes towards me, at which point I capture a much more natural expression.
It works!

Tip 3
Lean Toward the Camera
For those who would like the camera to take a few pounds off, my favorite trick is to make my subject’s head larger in proportion to their body.
I achieve this by asking my subject to "lean in" towards the camera so the closest part of their body is their forehead. This may feel awkward, but it works because everything further away from the lens (i.e., your body), appears smaller in the photo!
Never lean back when anyone takes your photo if your goal is to appear a few pounds lighter.
Tip 4
Stool for confidence
I use this trick for the most camera-shy people, and it works every single time!
Having a small "physical barrier" between you and a camera lens really helps boost confidence.
I keep a high-back bar stool in my studio for when I see someone having a hard time relaxing. I place my stool between us and ask them to lean on the back of the stool in a folded arm position.
Having this little barrier instantly boosts confidence, which helps you to relax.
Relax and Have Fun
To sum everything up so far...
1) Plan your outfits
2) Don't stare at the camera and look away between shots
3) Lean in towards the camera
4) Use a stool to boost confidence
And my last tip is to simply RELAX and HAVE FUN!
If you relax and trust your photographer to coach you through your session, it will make all the difference in your final images.
ENJOY the experience and just "let go". I can assure you that your investment will be so much more worthwhile.

If you’re needing to update your professional profile images on LinkedIn or your company website or if you’re a performing artist and you need an updated acting portfolio, launching a new business or creating a new website, our photo studio is located in Metro West Boston, and we serve clients from Sudbury, Wayland, Weston, Marlborough, Framingham, Acton, Concord, Lincoln, Ashland, Wellesley, Natick, Newton, Worcester, Southborough, and Boston.

Represent Your Business The Right Way With A Professional Headshot
Do you wish to set yourself or your business apart from the competition?
If yes, then perhaps its time to ditch the selfies and consider getting a professional headshot for your company’s website or to use as a profile picture on LinkedIn. A professional business headshot gives the impression of someone who we can trust and is professional, thus having an updated headshot, that’s less than three years old, will lead to more business or increased engagement with you and your brand.
Do you wish to set yourself apart from the competition?
If yes, then perhaps its time to ditch the selfies and consider getting a professional headshot for your company’s website or to use as a profile picture on LinkedIn. A professional business headshot gives the impression of someone who we can trust and is professional, thus having an updated headshot, that’s less than three years old, will lead to more business or increased engagement with you and your brand.
We’ve all seen those LinkedIn profile photos from a wedding or a fancy night out where the photo has been heavily cropped. A professional-looking profile photo is essential for anyone doing business in today’s digital world.
Professional headshots will help you make the most of platforms such as LinkedIn.


LinkedIn is the leading and most widely used professional networking platform and has been since its inception. The platform has a plethora of advantages, including networking, advertising, recruiting, and so much more. By having a LinkedIn profile, its easy to connect with peers, clients, and businesses professionals around the world. So its very important that you look the part! You may be looking for a new position or have just landed a new job, so you need to represent the business the right way, with a professional headshot.

Getting the most from your headshot
There are many tips and tricks that you can implement to get the most from your professional headshot. One thing that you will see in many executive headshots is that executives try to present themselves as seriously as possible, but this does not always have to be the case! Of course, in many industries, you will have to look serious, but if possible, make sure that you show a bit of charm and personality that people will remember. Most importantly, make sure that you choose the right photographer. Use an experienced professional headshot photographer, because they will know how best to pose you and capture your personality.
With my experience of working with corporate executives and leadership teams far and wide, I know how to capture the best of people’s charm, confidence, and charisma.

Does Size Matter?
Do you have a special memory or moments captured on camera, that touches your heart every time you look?
Just like you, we have memories printed and framed around our home but most of them are either printed as a 5 x 7 or at best a 10 x 8. If you've ever wondered what your memories might look like if they were made larger, you may find the demonstration below, interesting.
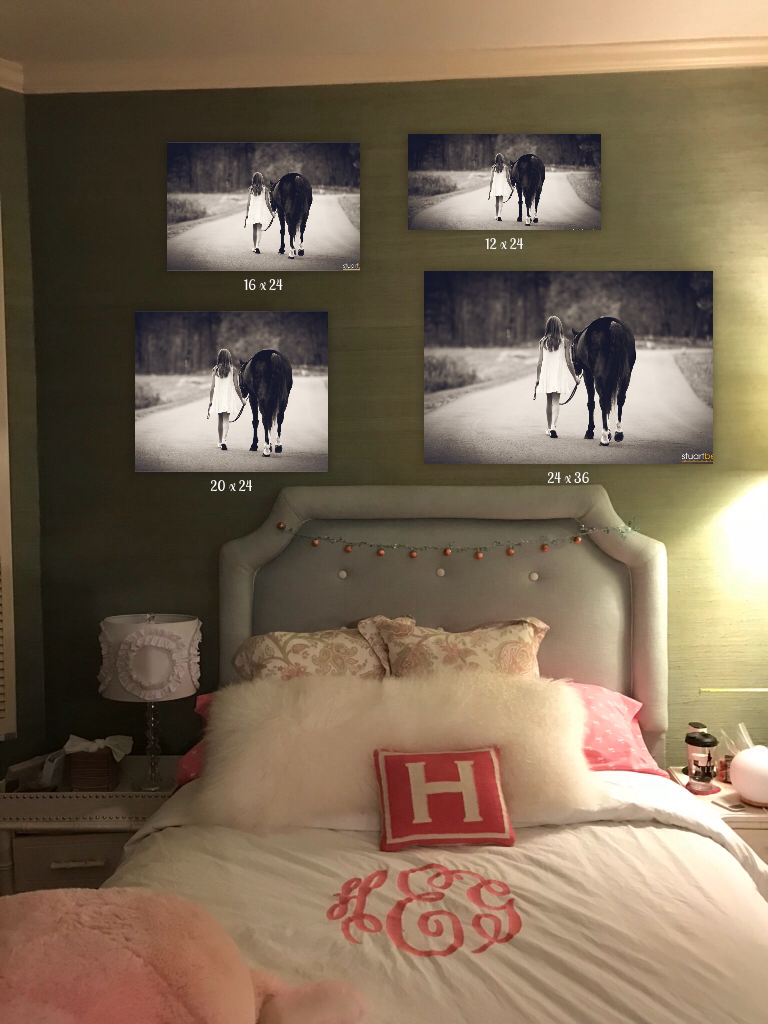
In these examples, my camera was set approximately 10 feet away to demonstrate the difference between me holding a 5 x 7 framed print standing next to a 20 x 30 framed print.
I then stood with a 10 x 20 frame and took another photo. As you can see, the difference even between the 5 x 7 and 10 x 20 is quite striking!


"Her reaction upon opening it on Mothers Day was special"
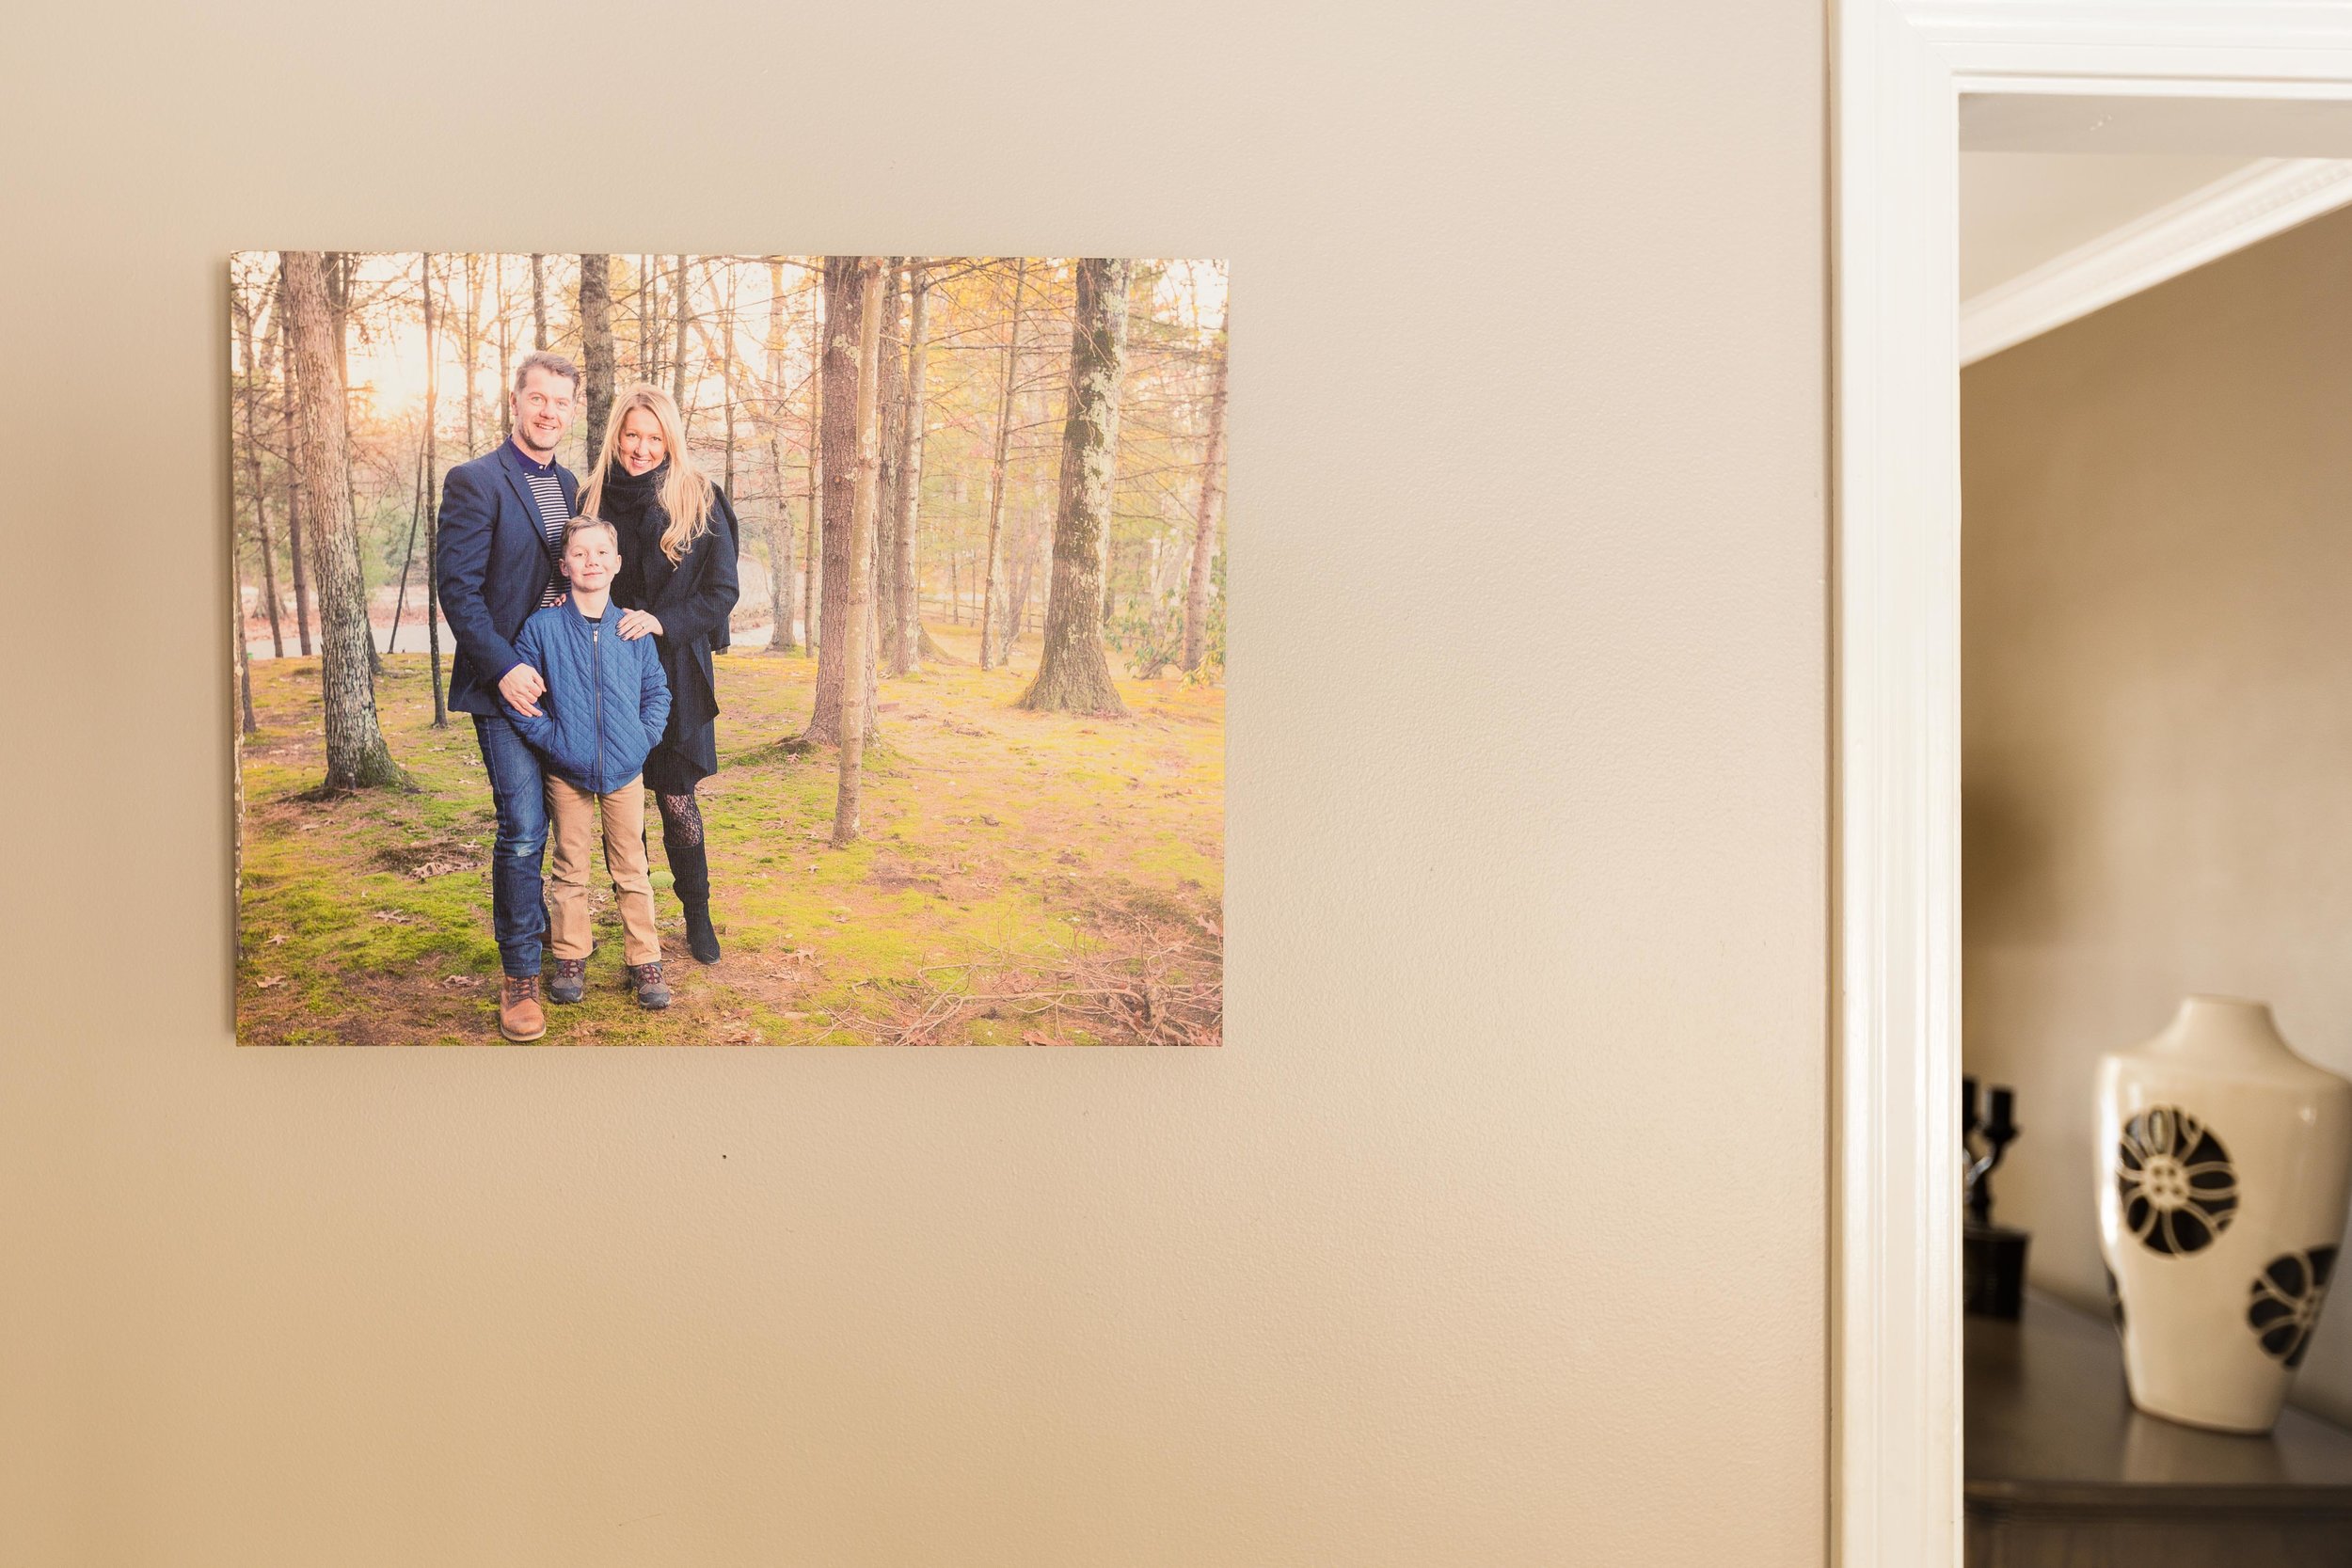
On Mothers Day this year, I surprised my wife, Wendy with a 12 x 12 Custom Leather Book, which contained over 50 special moments of her and our son, Oliver from the last 10 years. I even included moments she'd never seen before and it was quite emotional for me designing the book... Her reaction upon opening it on Mothers Day was special!
There were three images in the book, which we kept coming back to. We loved them so much, that we wanted to enjoy them every day. So we've decided to have larger versions made..
To help us work out the best combination for our space, I used my studio application to super impose the images in the frame style we liked on the wall we wanted to decorate. The image below is what we designed with the app. This is the super imposed version... (They haven't been hung yet because we're still decorating)!

We really wanted to make a statement in our newly decorated lounge so this combination of plain white frames to match the window frames, contrasting the deep blue wall paint, really worked for what we wanted.
We took delivery of them last week and we can't wait to hang them!
If you'd like to revisit any moments I've captured for you and wish to and discuss framing options, please complete the short form below or reach out by phone: 978 261 5661

Family Photo Session Moments
As a professional portrait and event photographer, my role is not only to capture special moments but its to give you the very best experience from the first time we talk, through to the final delivery of your images and beyond.

One of the first things I ask people when they hire me as their portrait photographer is how do you want to enjoy your images after your photo session?
We live in a digital world, so it’s often hard for us to think past digital. But I’ve helped many clients decorate their homes and offices with, custom made, framed prints, gallery wrap clusters and beautiful albums.
Obviously, if you’re in need of an updated head shot or updating a website for example, digital files are imperative but even in these situations, I’ve had clients request printed versions of their final images.
If you do opt to print, I can’t emphasize enough, the value and joy that a beautifully made print in a quality made frame or canvas can bring to your home, versus having sent on a hard drive and shoved in a drawer!

As your portrait photographer, I’ll help you every step of the way to ensure you make the right choices on sizes and formats for your space. An 8 x 10 or 11 x 14 print may sound large but in a large room, even these sizes can sometimes be lost.

To help you further, the application I use will allow you to see exactly what your favorite images look like on your wall before you make any decisions!
This has helped so many of my clients make the right choices for them.
Thank you
Stuart Beeby

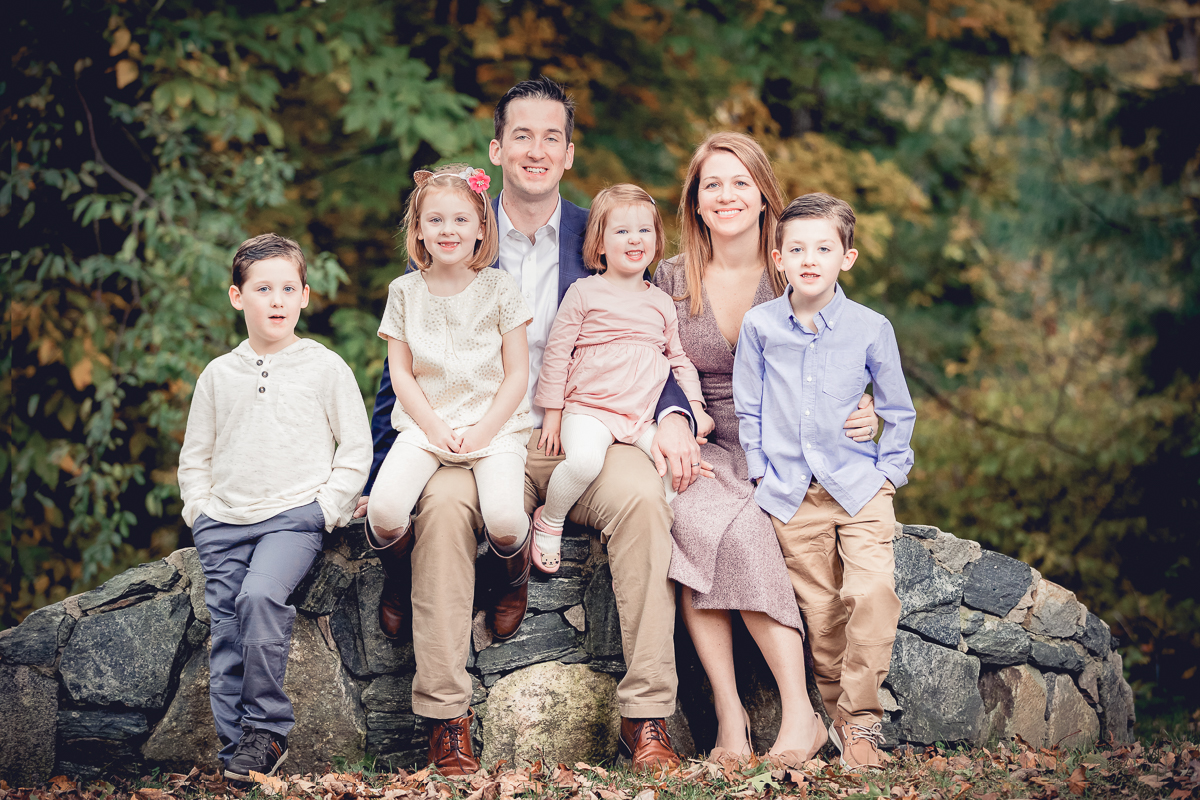
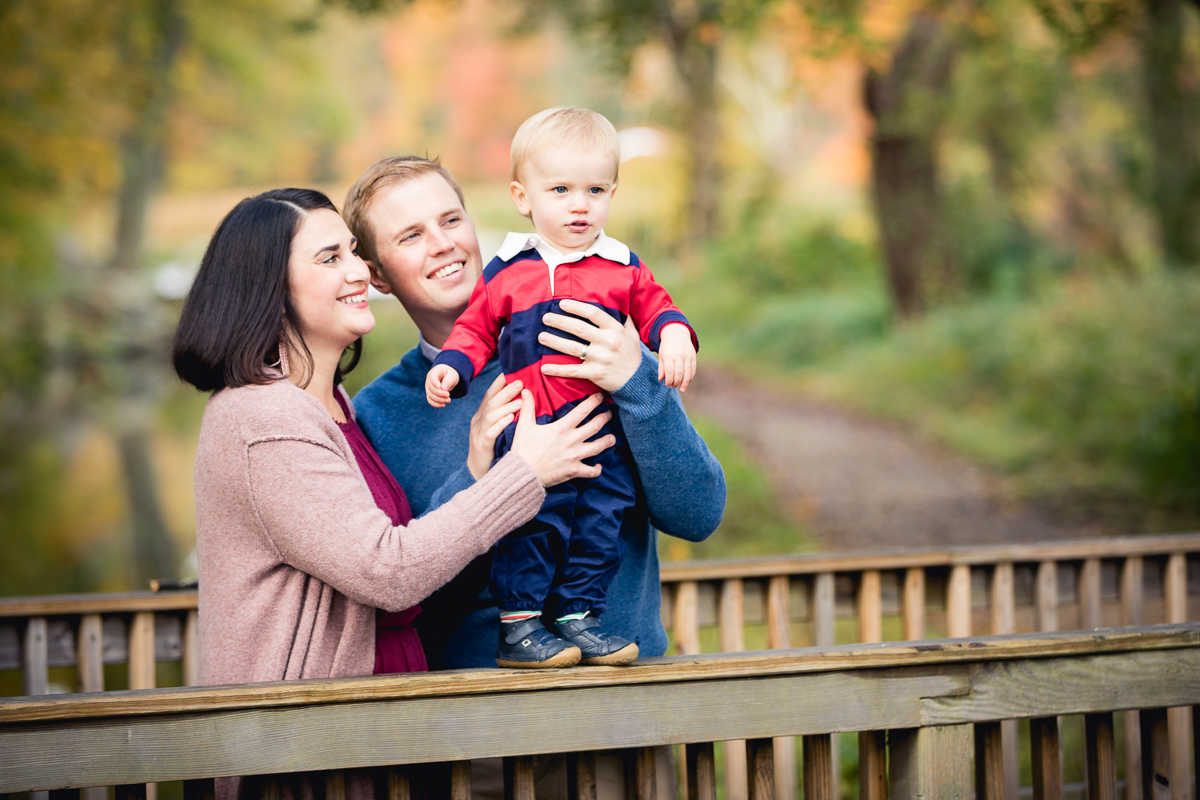
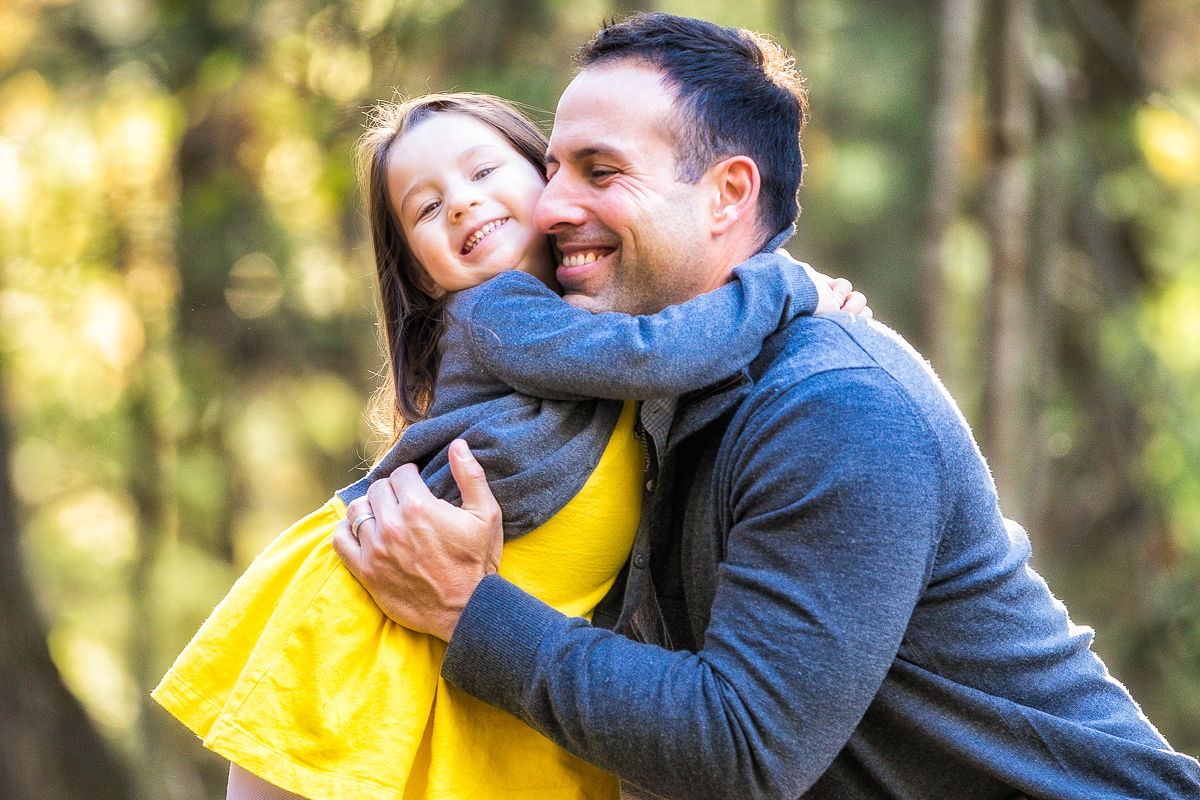
5 Tips for a Fun and Successful Family Photo Session
The thought of getting our family ready for photographs can be a daunting feeling, especially if you have young children. To help you prepare, I've written this blog, which provides my 5 tips for a fun and successful family photo session.
The thought of getting our family ready for photographs can be a daunting feeling, especially if you have young children.
To help you prepare, I've written this blog, which provides my 5 tips for a fun and successful family photo session.
Enjoy!
Tip 1: Choosing the right location
The location for your family session is very important because it will be the backdrop for your beautiful photos. A location that you visit and enjoy as a family is a good idea but bear in mind that if you enjoy a particular place, it is likely to be enjoyed by others and so it may be crowed at certain times.

However, some families feel a little uneasy about the thought of having formal photos in a public space so if you have a large enough space at home, choosing to have photos done in your own home can be a good idea. Not only will it offer you privacy, you may feel more relaxed. This is not to say that a beautiful public place should be overlooked. The time of day or the day of the week will make a difference here.

Tip 2: Choosing the date and right time of day
You may have heard the term “the golden hour”, which is a term often used by photographers. It describes the time up to one hour after sunrise and one hour before sunset. On a sunny day, the light is much warmer and softer at these times and creates great conditions for photos. My tip is to meet for a photo session 30 – 60 minutes before golden hour so there is plenty of time and no rushing about.

This may seem obvious but if you have young children, having a family photo session on a warm summers evening may sound appealing but it will mean that your children will need to be up late! But also bear in mind the temperature change as the light fades in the cooler months.

Tip 3: Plan your outfits
This is quite a big topic so to help you further, I've created a FREE style guide, which provides some great tips for her, for him and how to co-ordinate the whole crew. If you would like a copy of my free family photo style guide, sign up for your free copy:
Tip 4: Plan out where your family portrait will hang
A printed family portrait will provide you with a little piece of history, a family heirloom if you will, which becomes more valuable as time passes. Its a good idea to think about where you might hang a family portrait in your home. Look at the colors in the room and this will help you with outfit choices too!
Tip 5: Relax and have fun
If you all relax and have fun, it will show in your photos. But I realize that’s easy to say, especially if the little ones aren’t in the mood for photos! I’m a daddy too so I appreciate how children can dictate the mood.
My advice is to allow enough time for your session or even opt for a longer session. The more time you have, the more chance your family will have to relax and enjoy themselves. It will also give you a lot more photos to choose from!

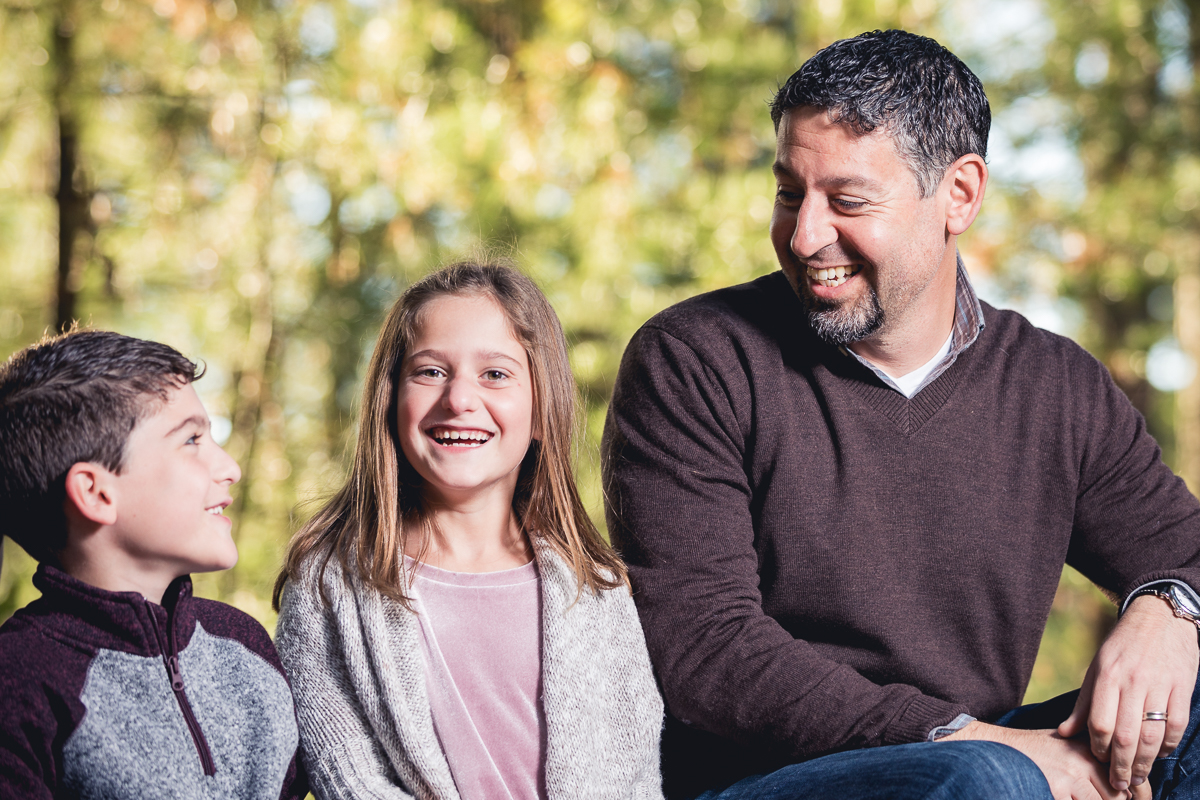
Family in Weston, Ma
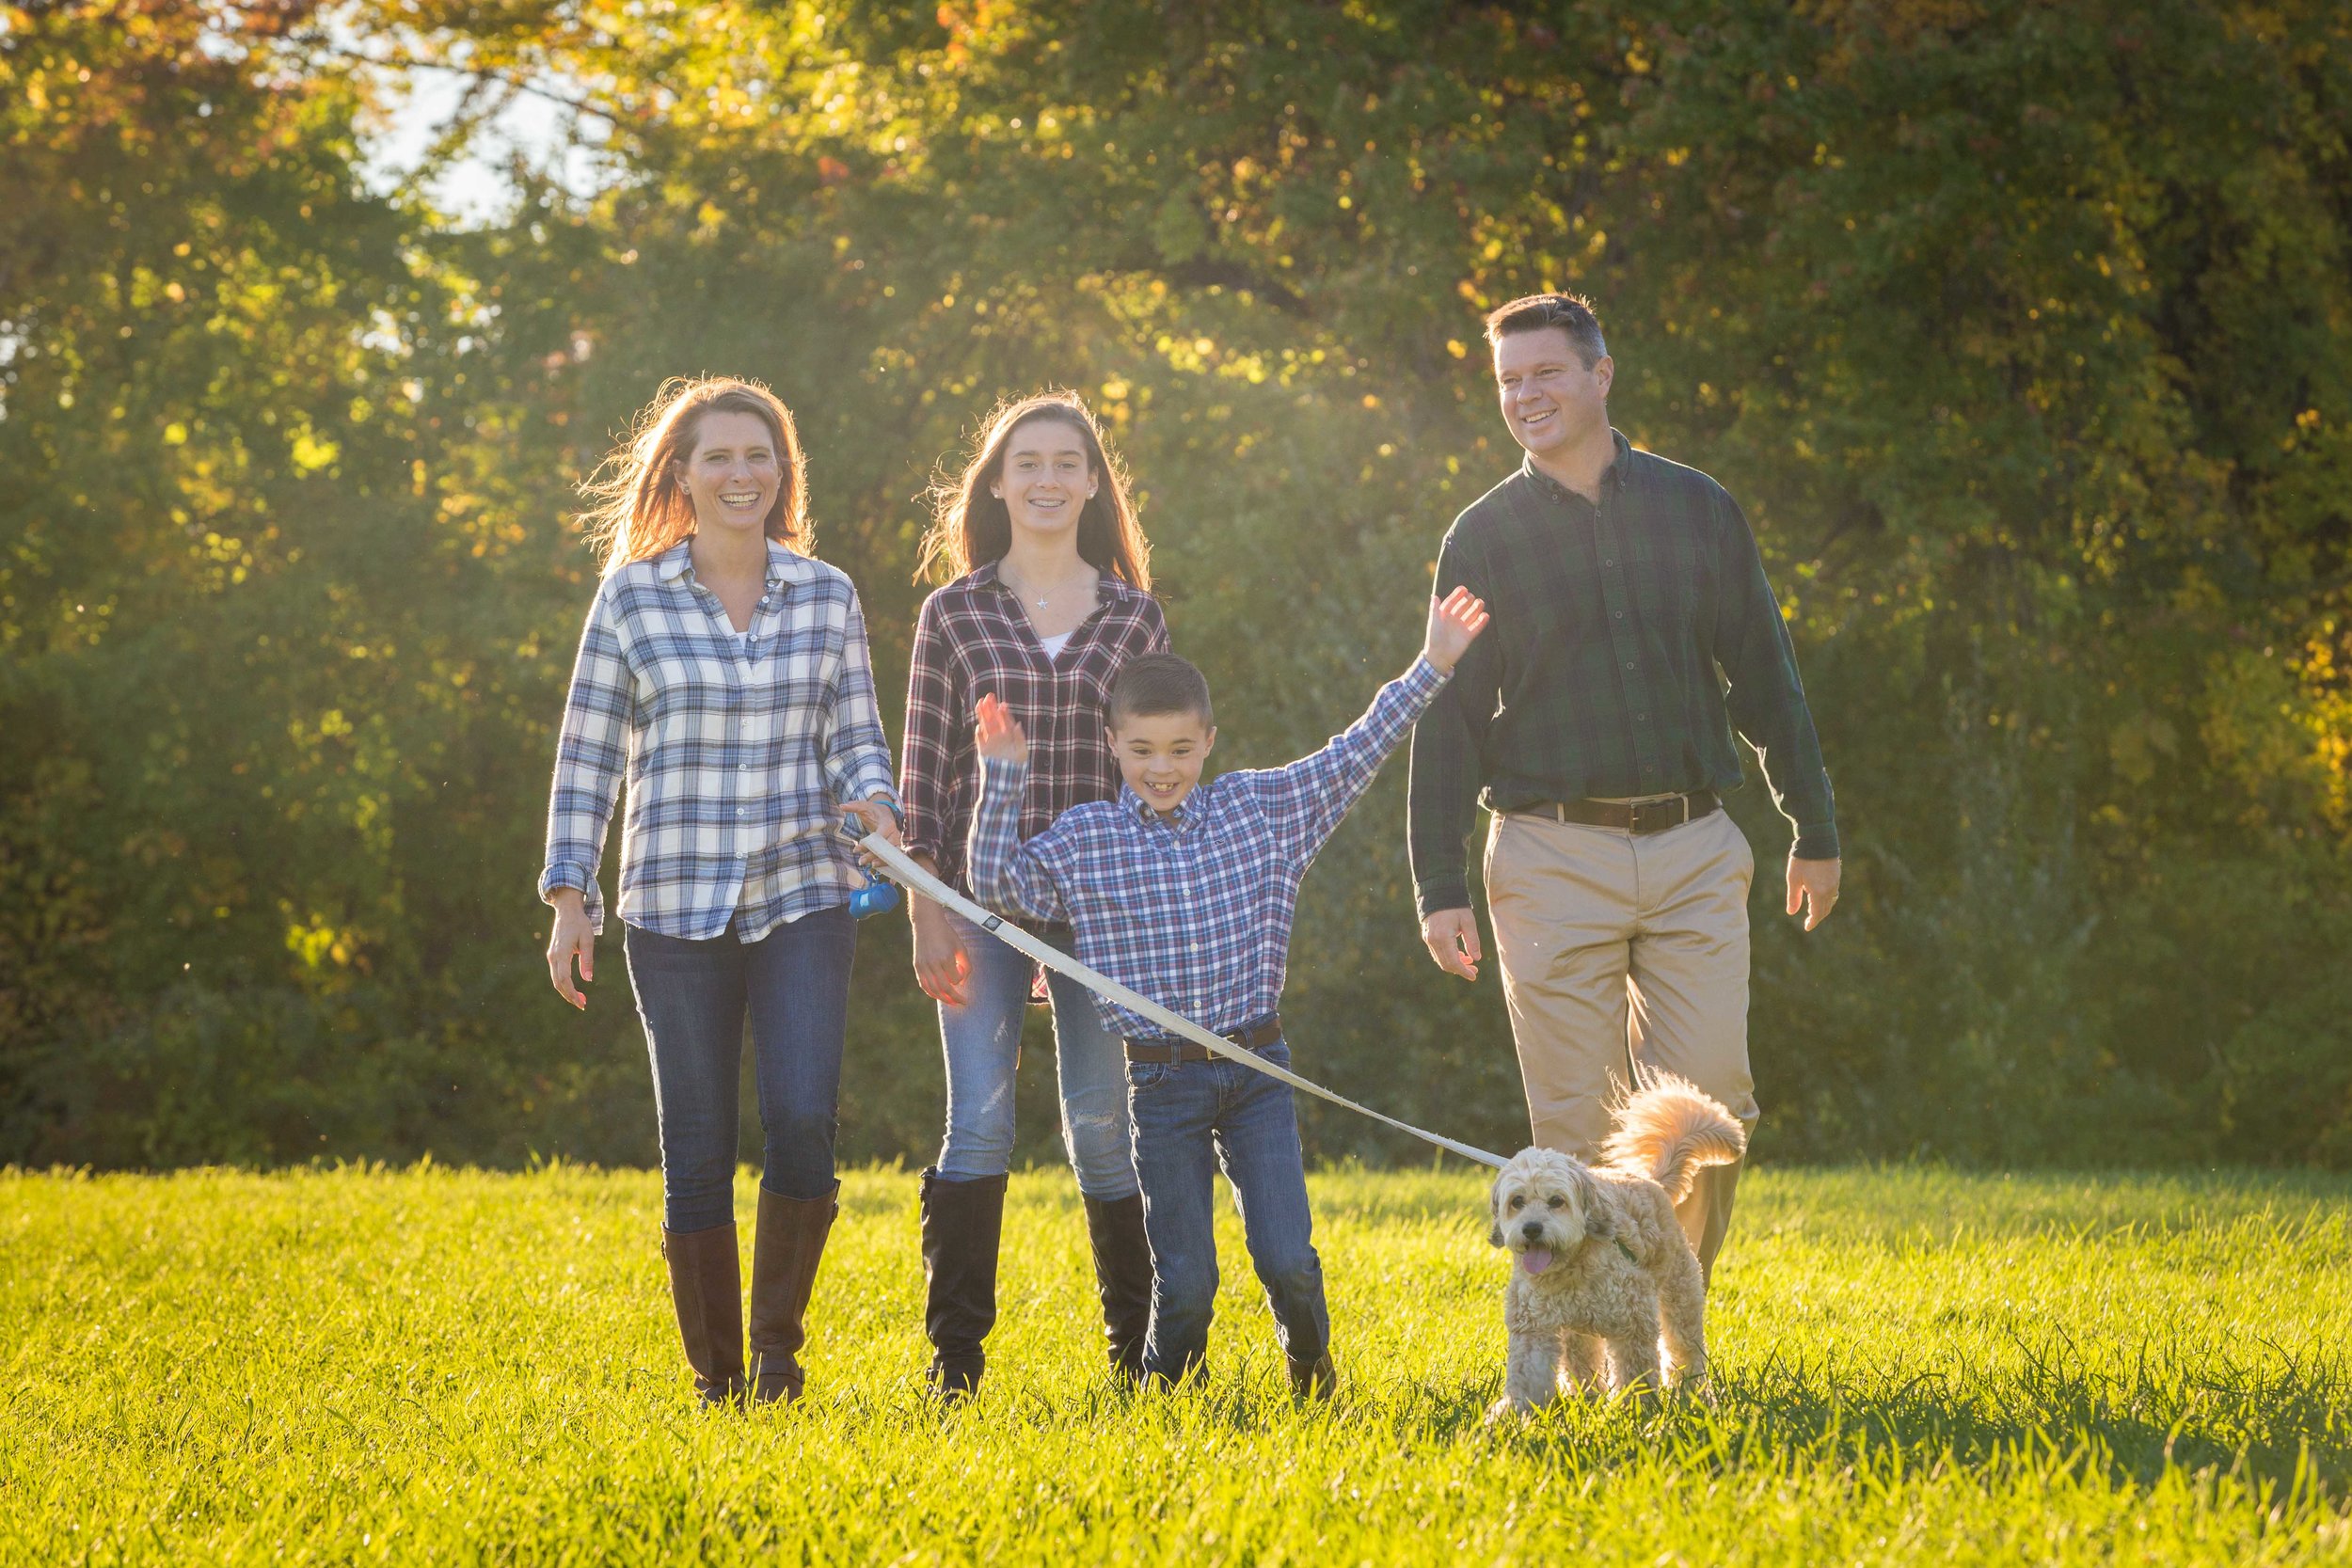
Family and their pet dog enjoying their time together
I recommend that you pack a bag with snacks, water and any small objects (like toys or lollipops) that might help us get their attention when it’s time for them to look at the camera. If they are old enough to understand you, it’s a good idea to prepare them for what’s to come before the session starts. Explain how much the photos mean to you so they know to be on their best behavior.
A lot of families pick something fun in advance as a treat after the session if they’re good listeners, like an ice cream cone, for example. It also helps if they’re bellies are full and they’ve has some good rest beforehand. Once you prepare them physically and mentally, then feel free to give them (and you!) grace!
Family Photo Session Checklist:
1. Set date, time and location for your photo session
2. Request my Family Photo Style Guide
3. Choose your outfits
4. Pack a bag on the day with:
- Flats or flip-flops for walking between photo spots
- Second outfit (if you’re doing two)
- Touch-up makeup
- Water bottle (for warmer sessions)
- Coat or cover-up (for colder sessions)
- Snacks for the little ones
- If you have a toddler or younger, small eye-catching toys (or lollipops) to hold their attention
All my best!
Stuart Beeby

Family Photography Session in Concord MA
Tarantino Family Photo Session in Concord, MA
The North Bridge in Concord is a very popular, historical tourist attraction and It was on the North Bridge that the first day of battle of the American War of Independence took place in 1775. Nowadays, it's a peaceful and beautiful setting and a great place to visit and walk around.
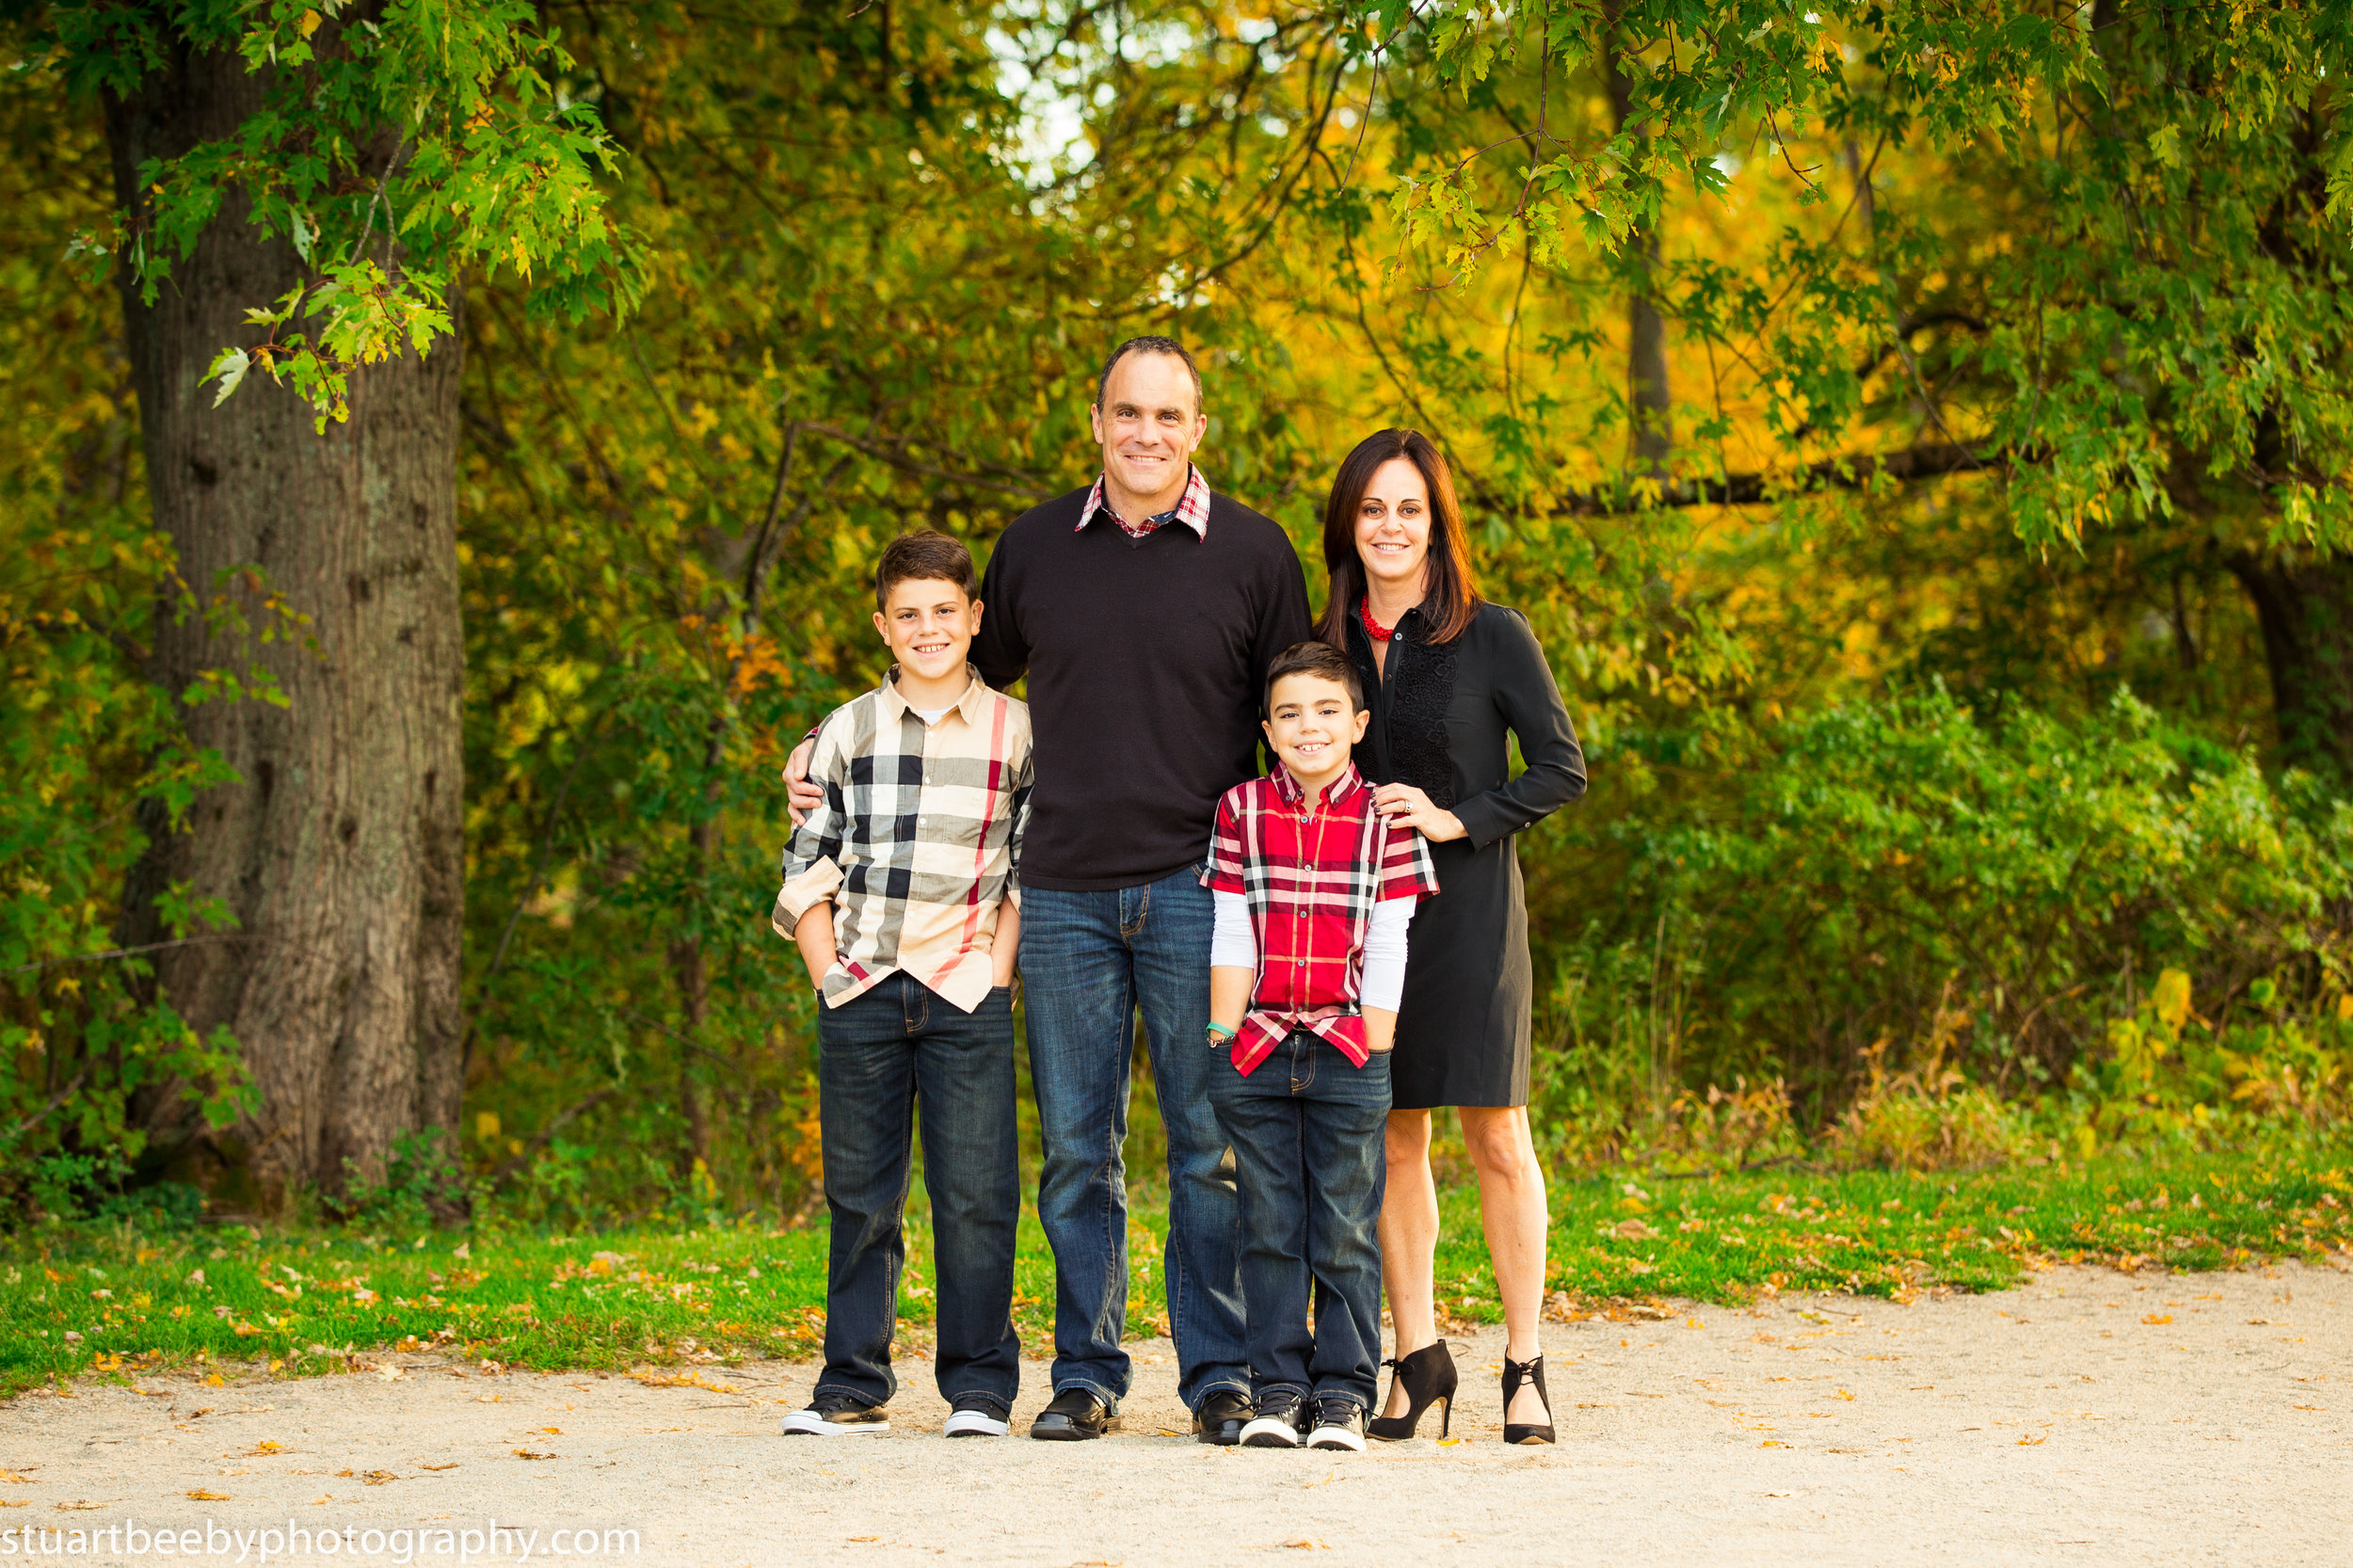
It was photo day for the Tarantino family and we met on the North Bridge on a sunny Saturday afternoon.
A few weeks before their session, I had sent the family my style guide, which offers suggestions on what to wear for a family photo session. I knew as soon as we met that afternoon, it was going to be a successful shoot. They were really well coordinated, very relaxed and ready for their family photos.

Like many families in Sudbury and the surrounding towns, the Tarantino boys participate in many sports so their weekends get very busy. But we were lucky to find a slot in their sporting calendars to schedule a two hour photo session, which allowed plenty of opportunity to make use of many different spots in the park.
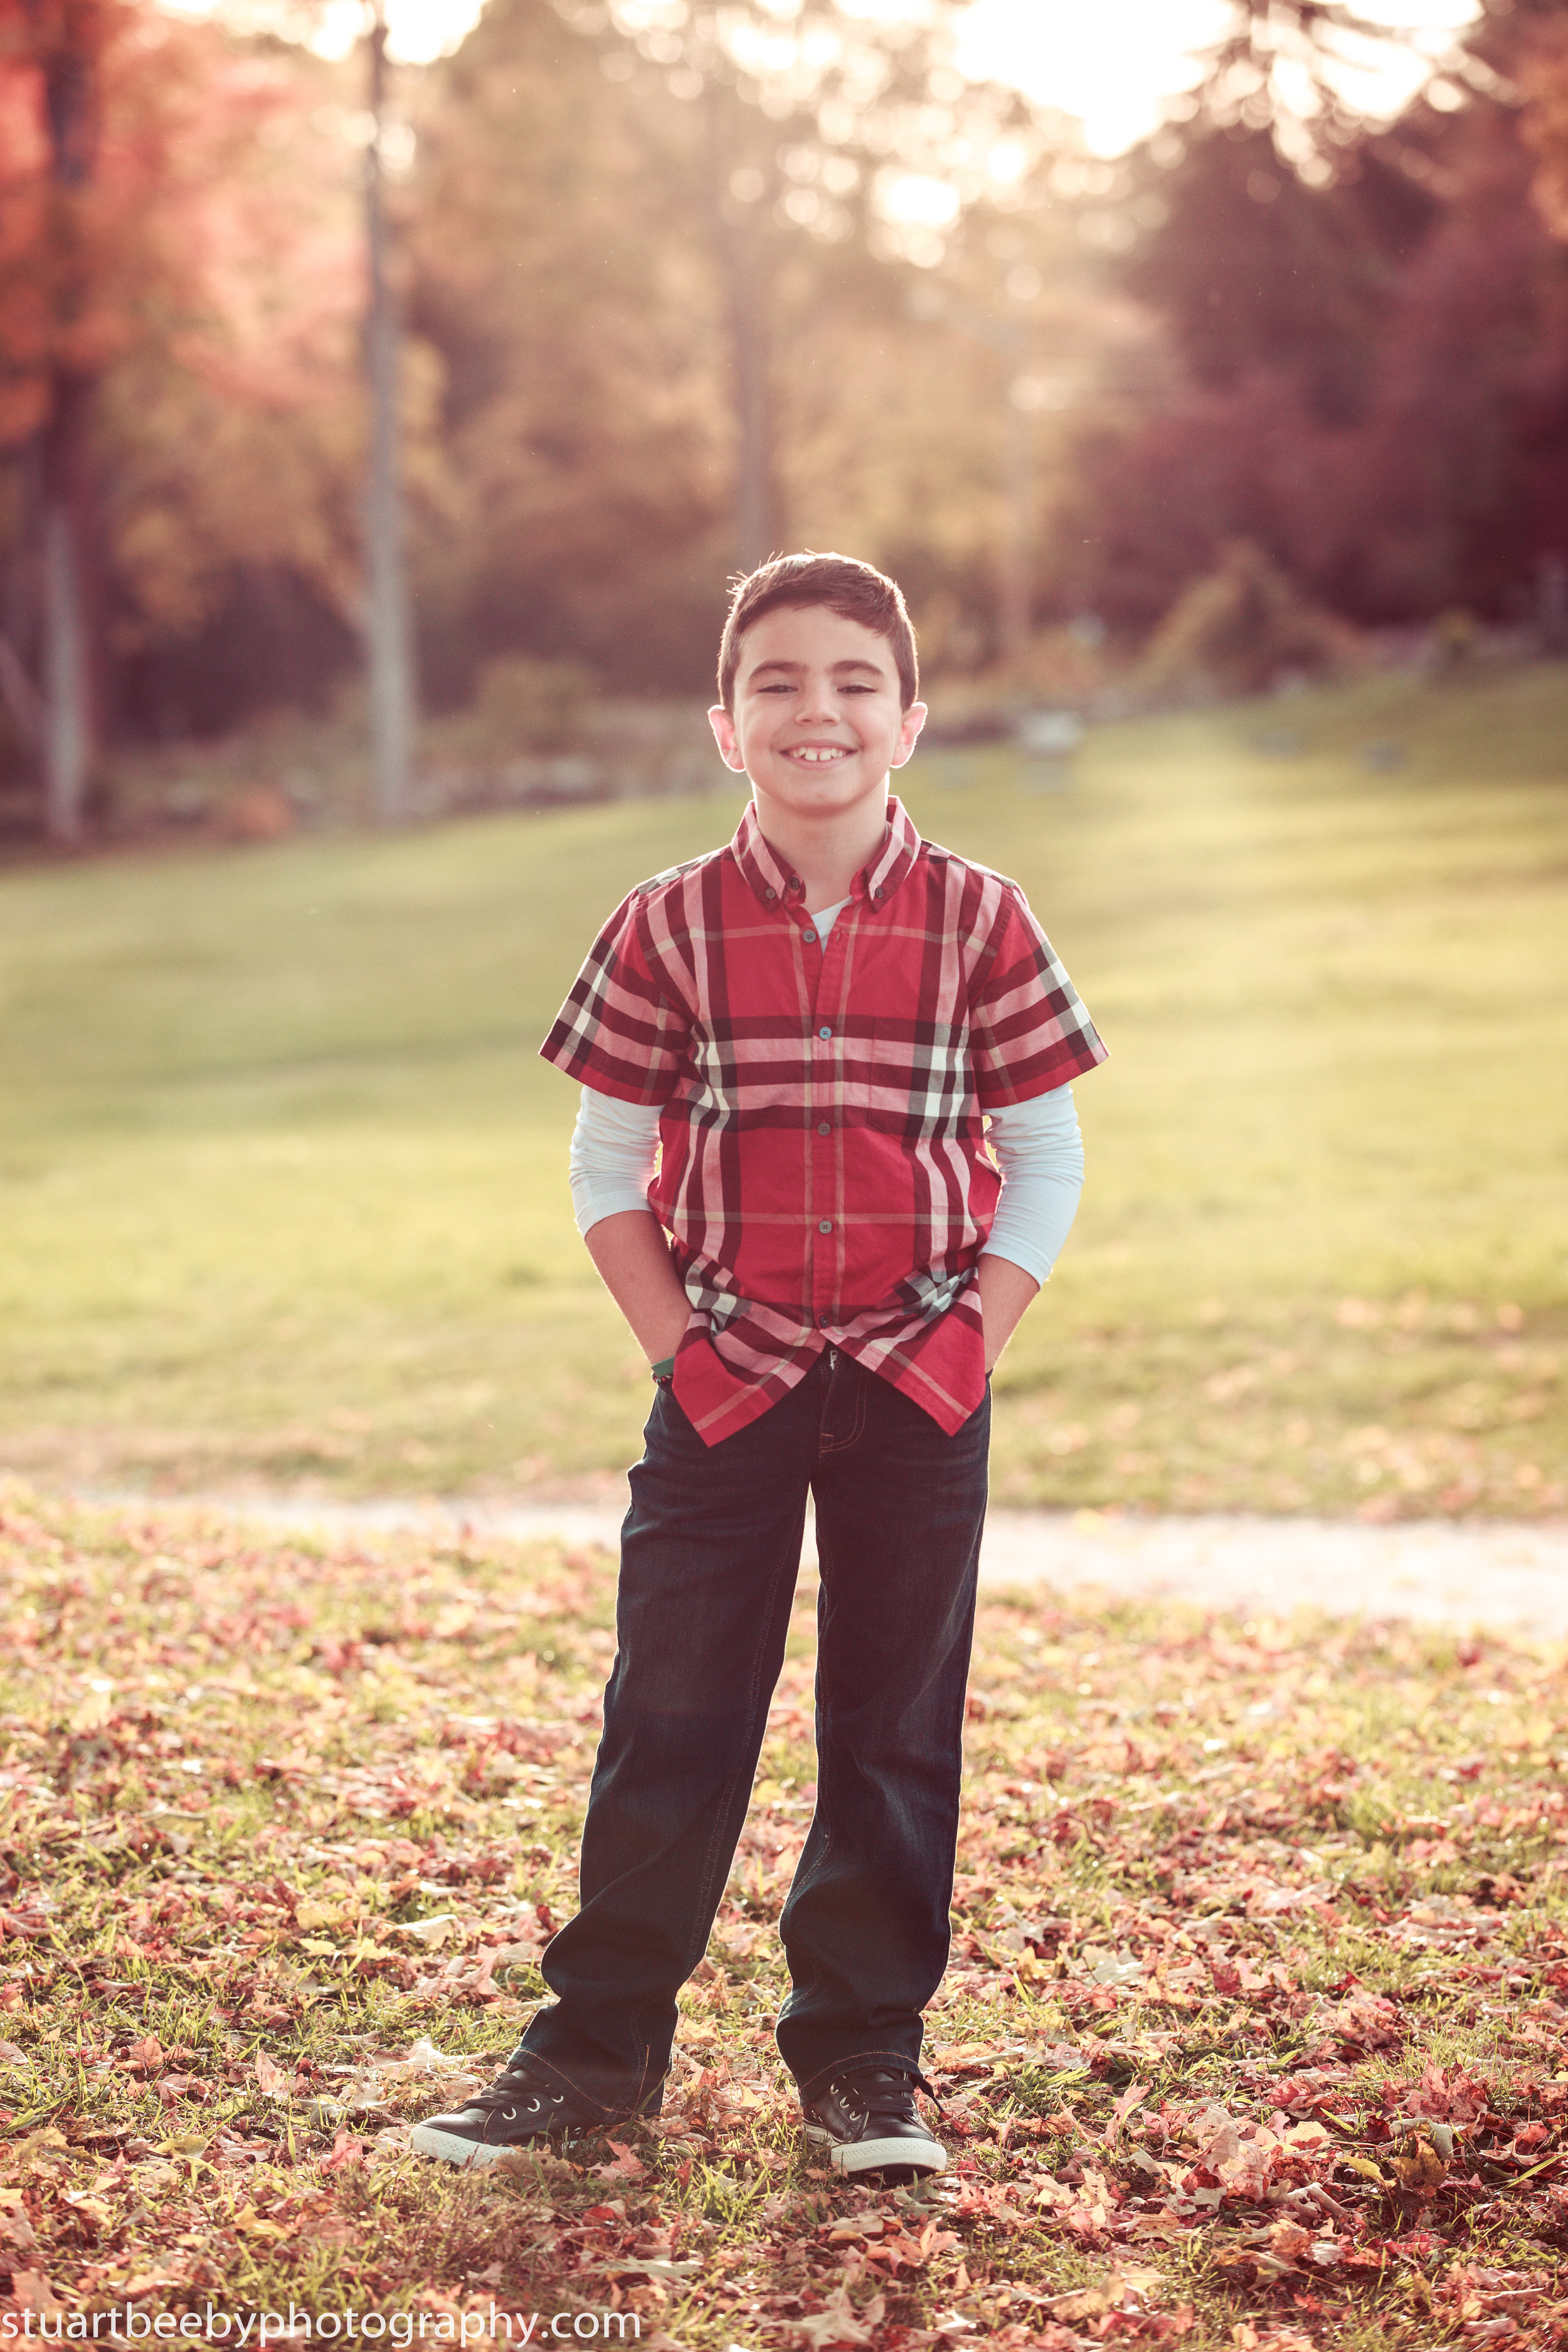
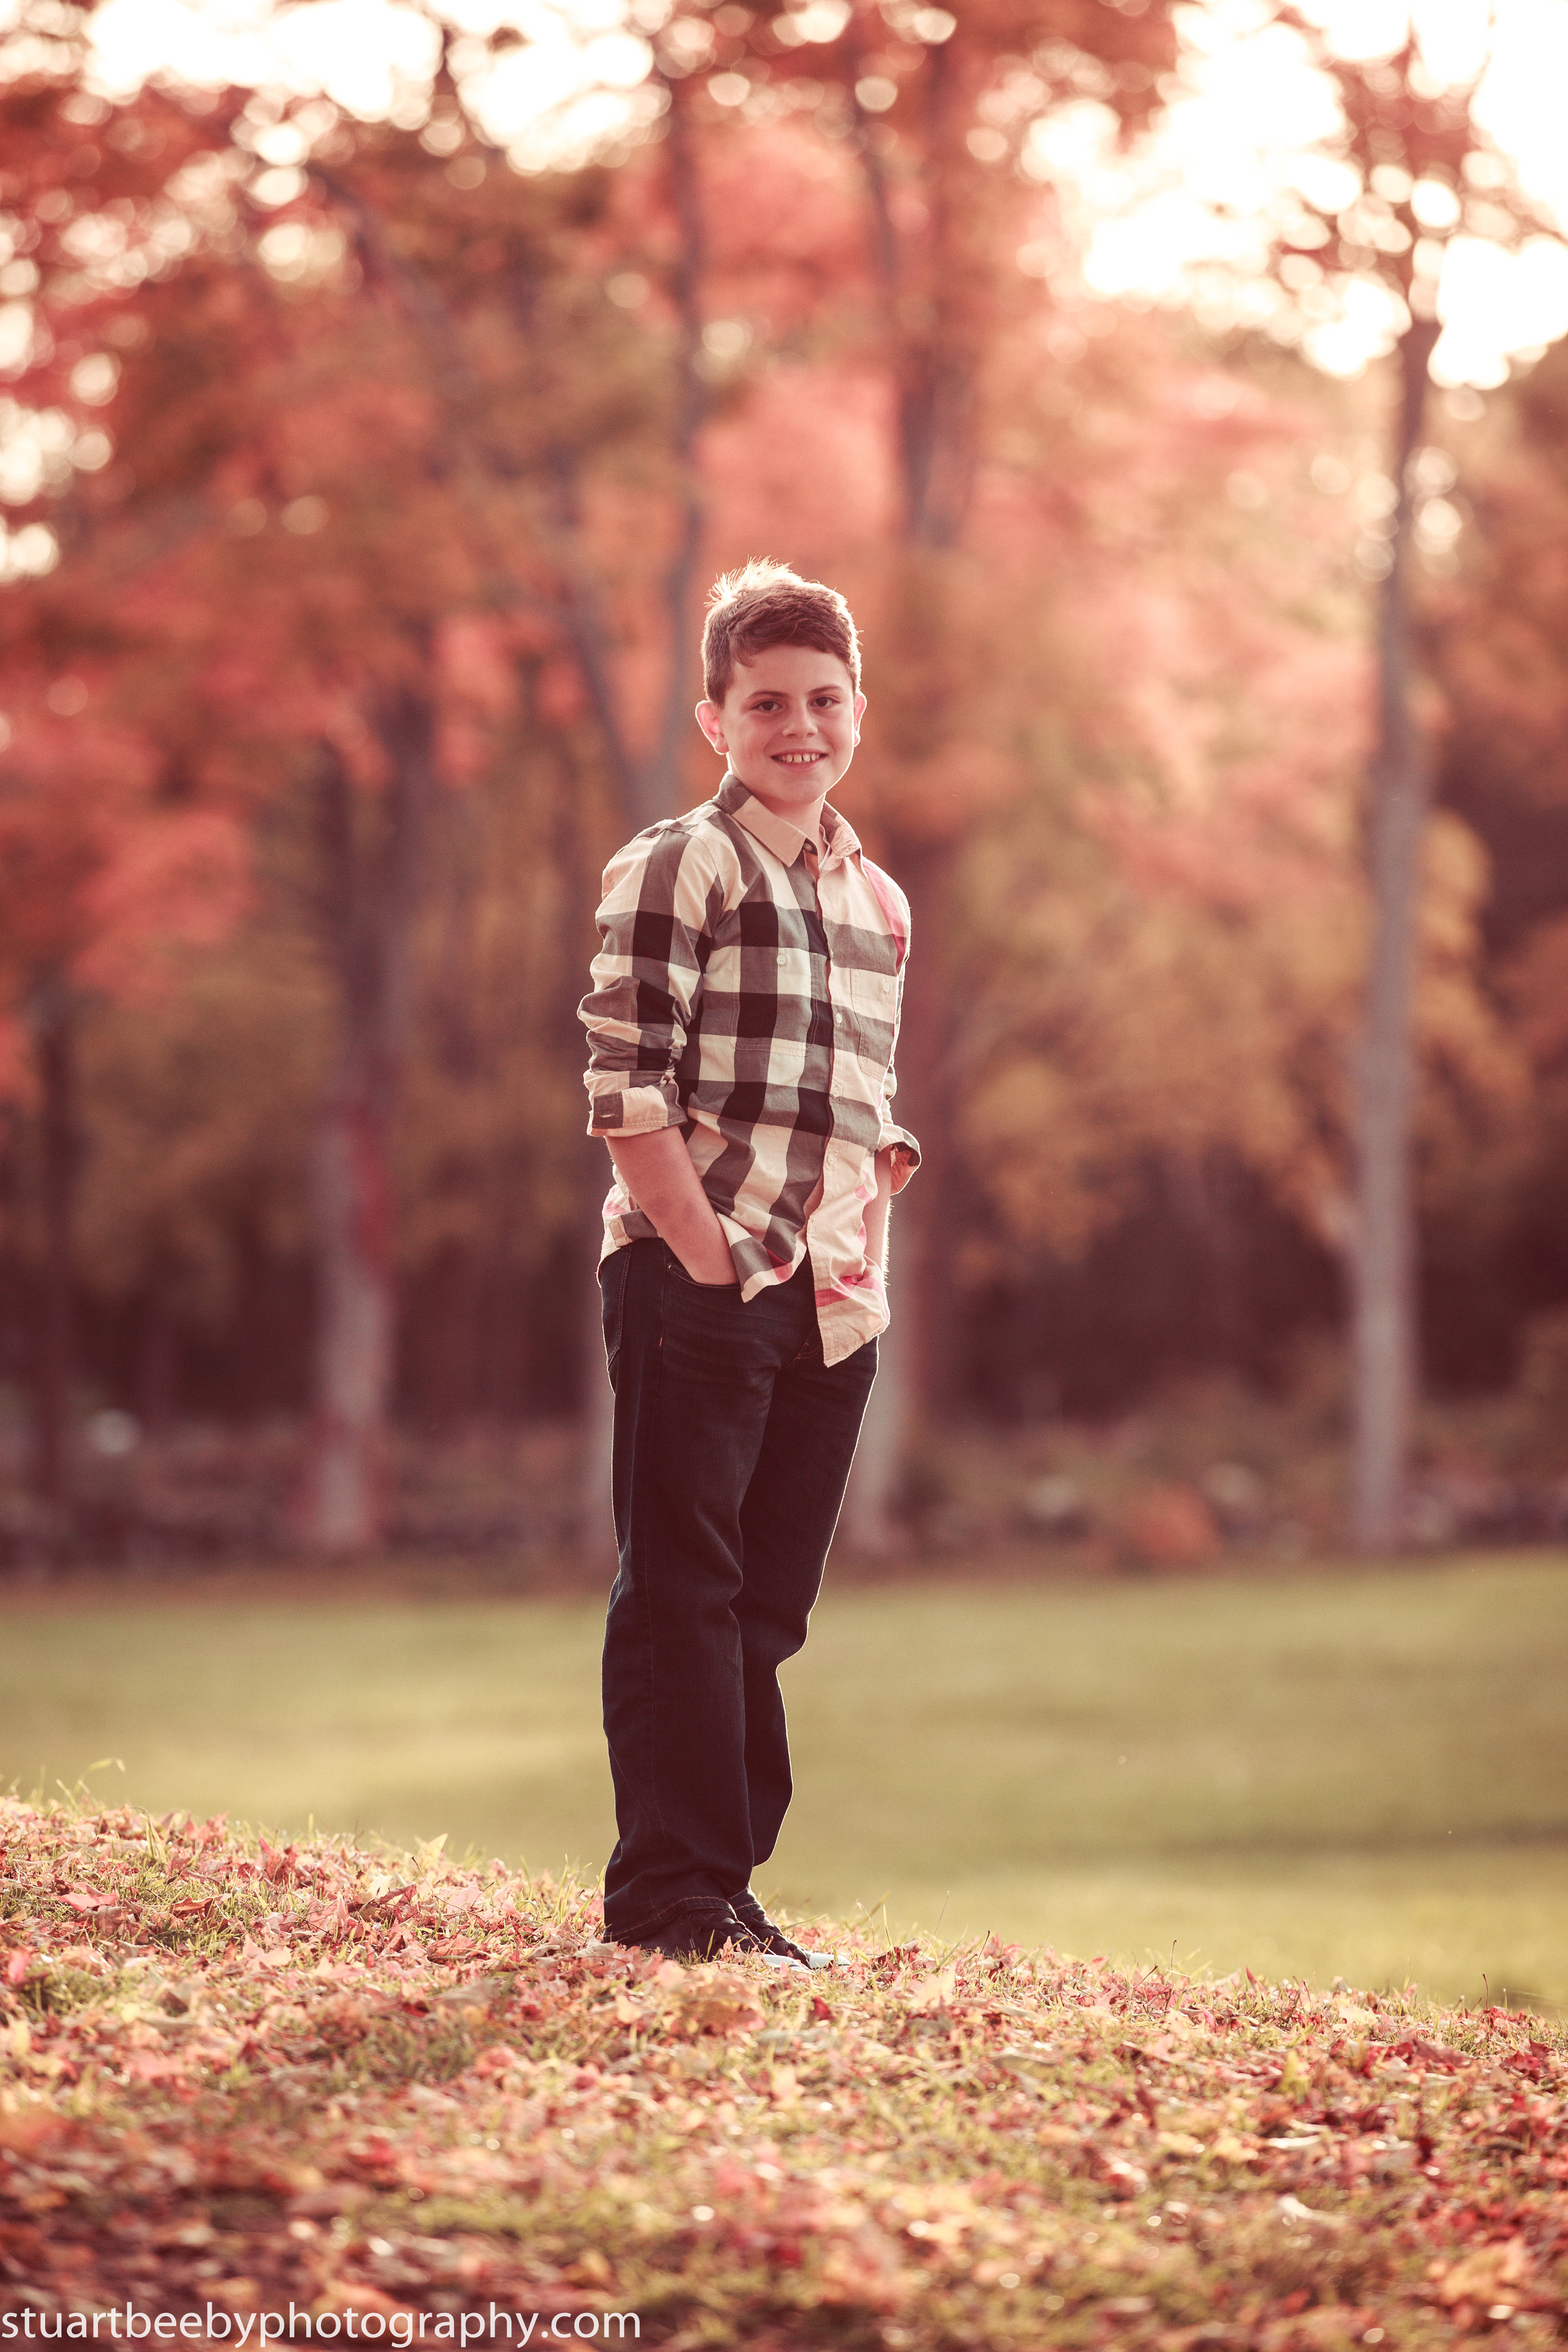

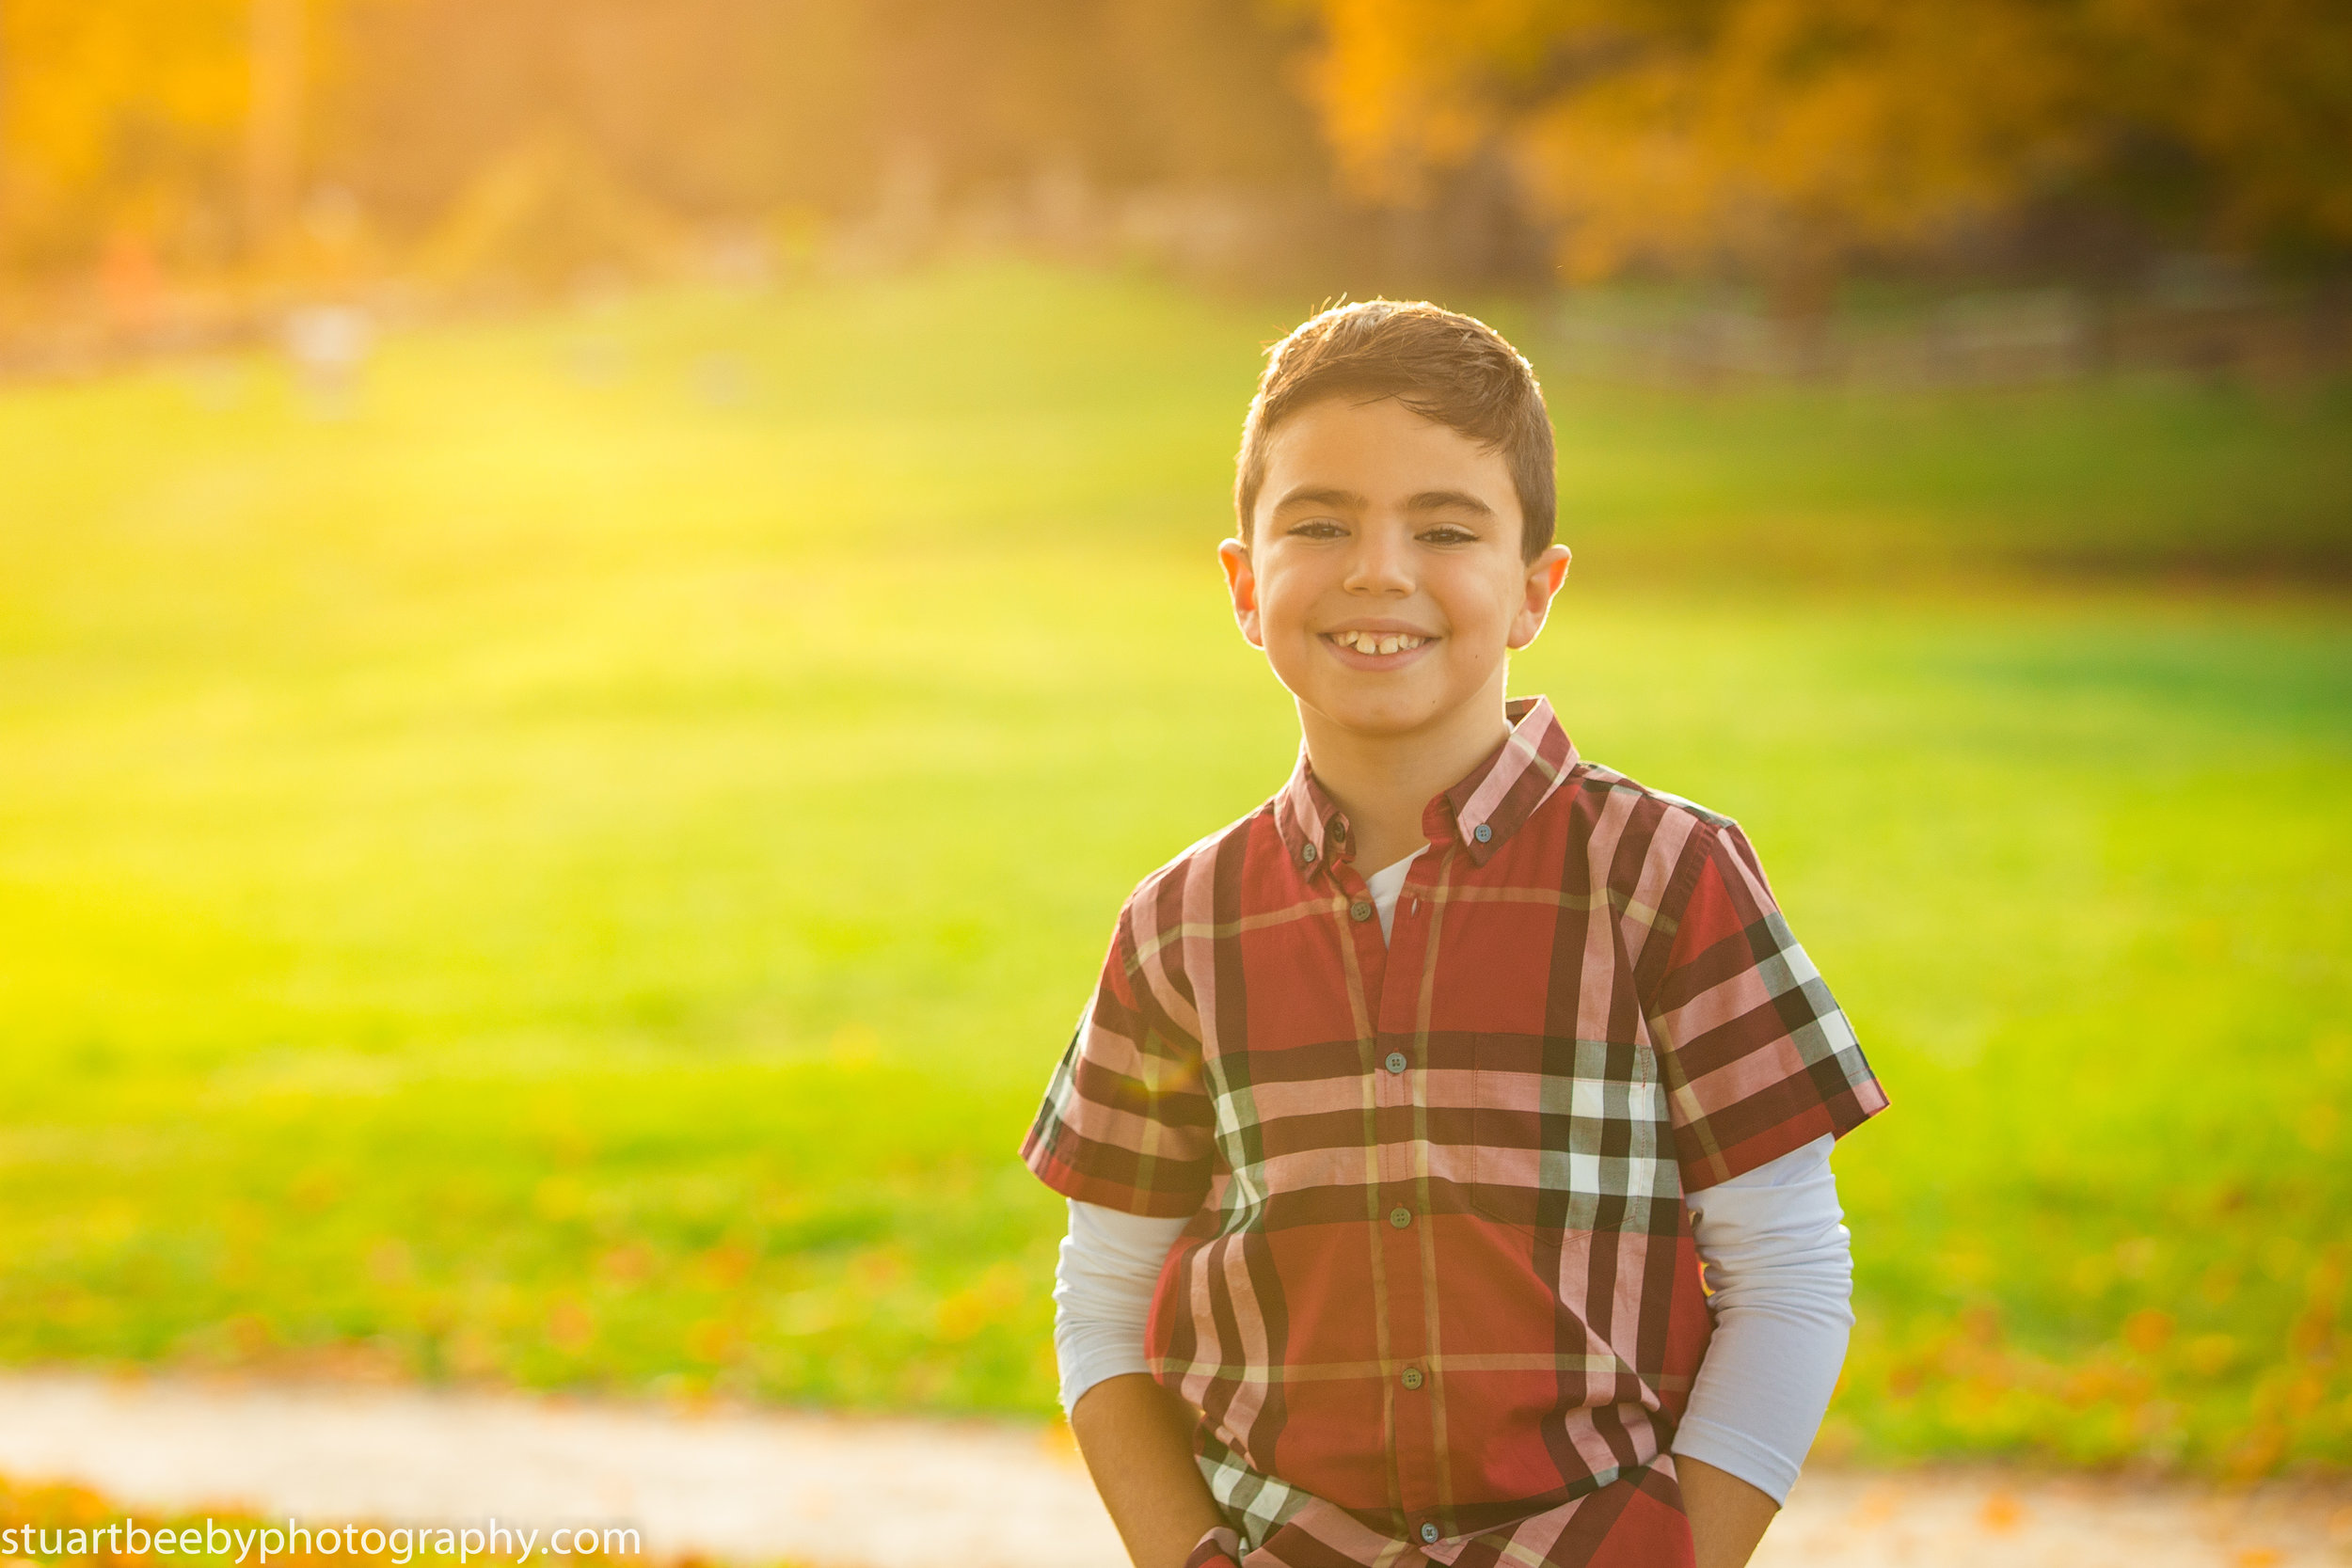
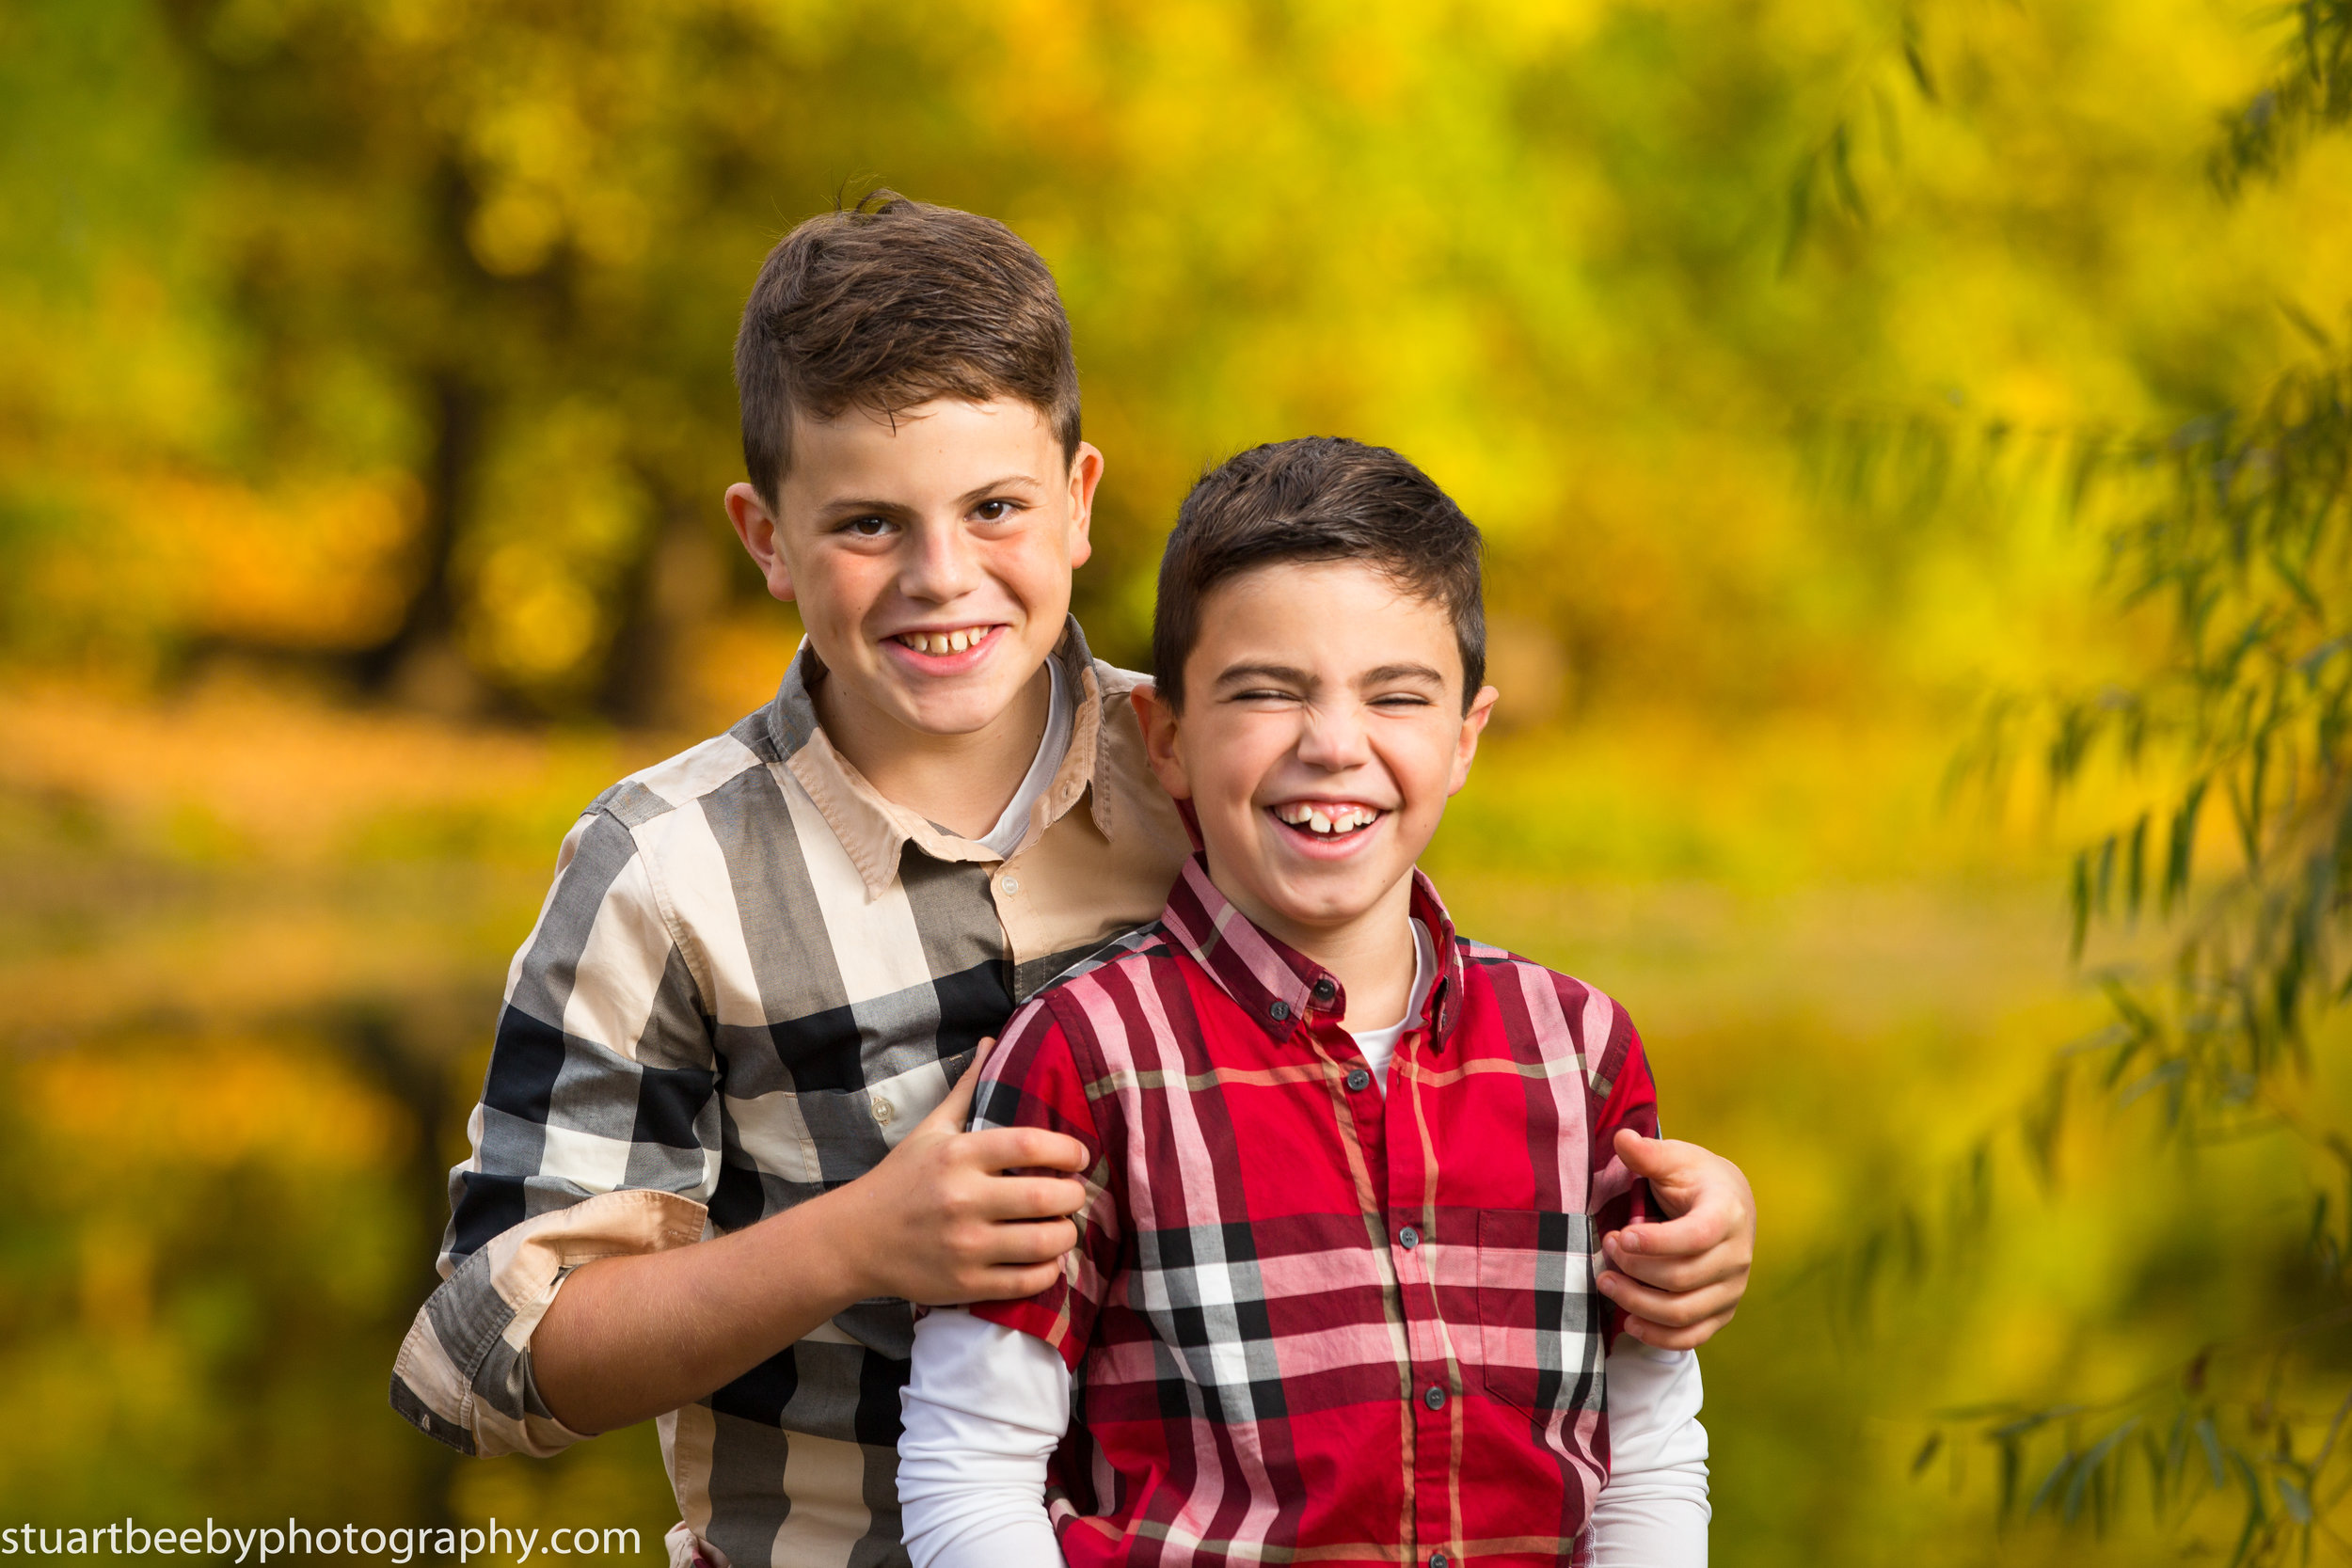
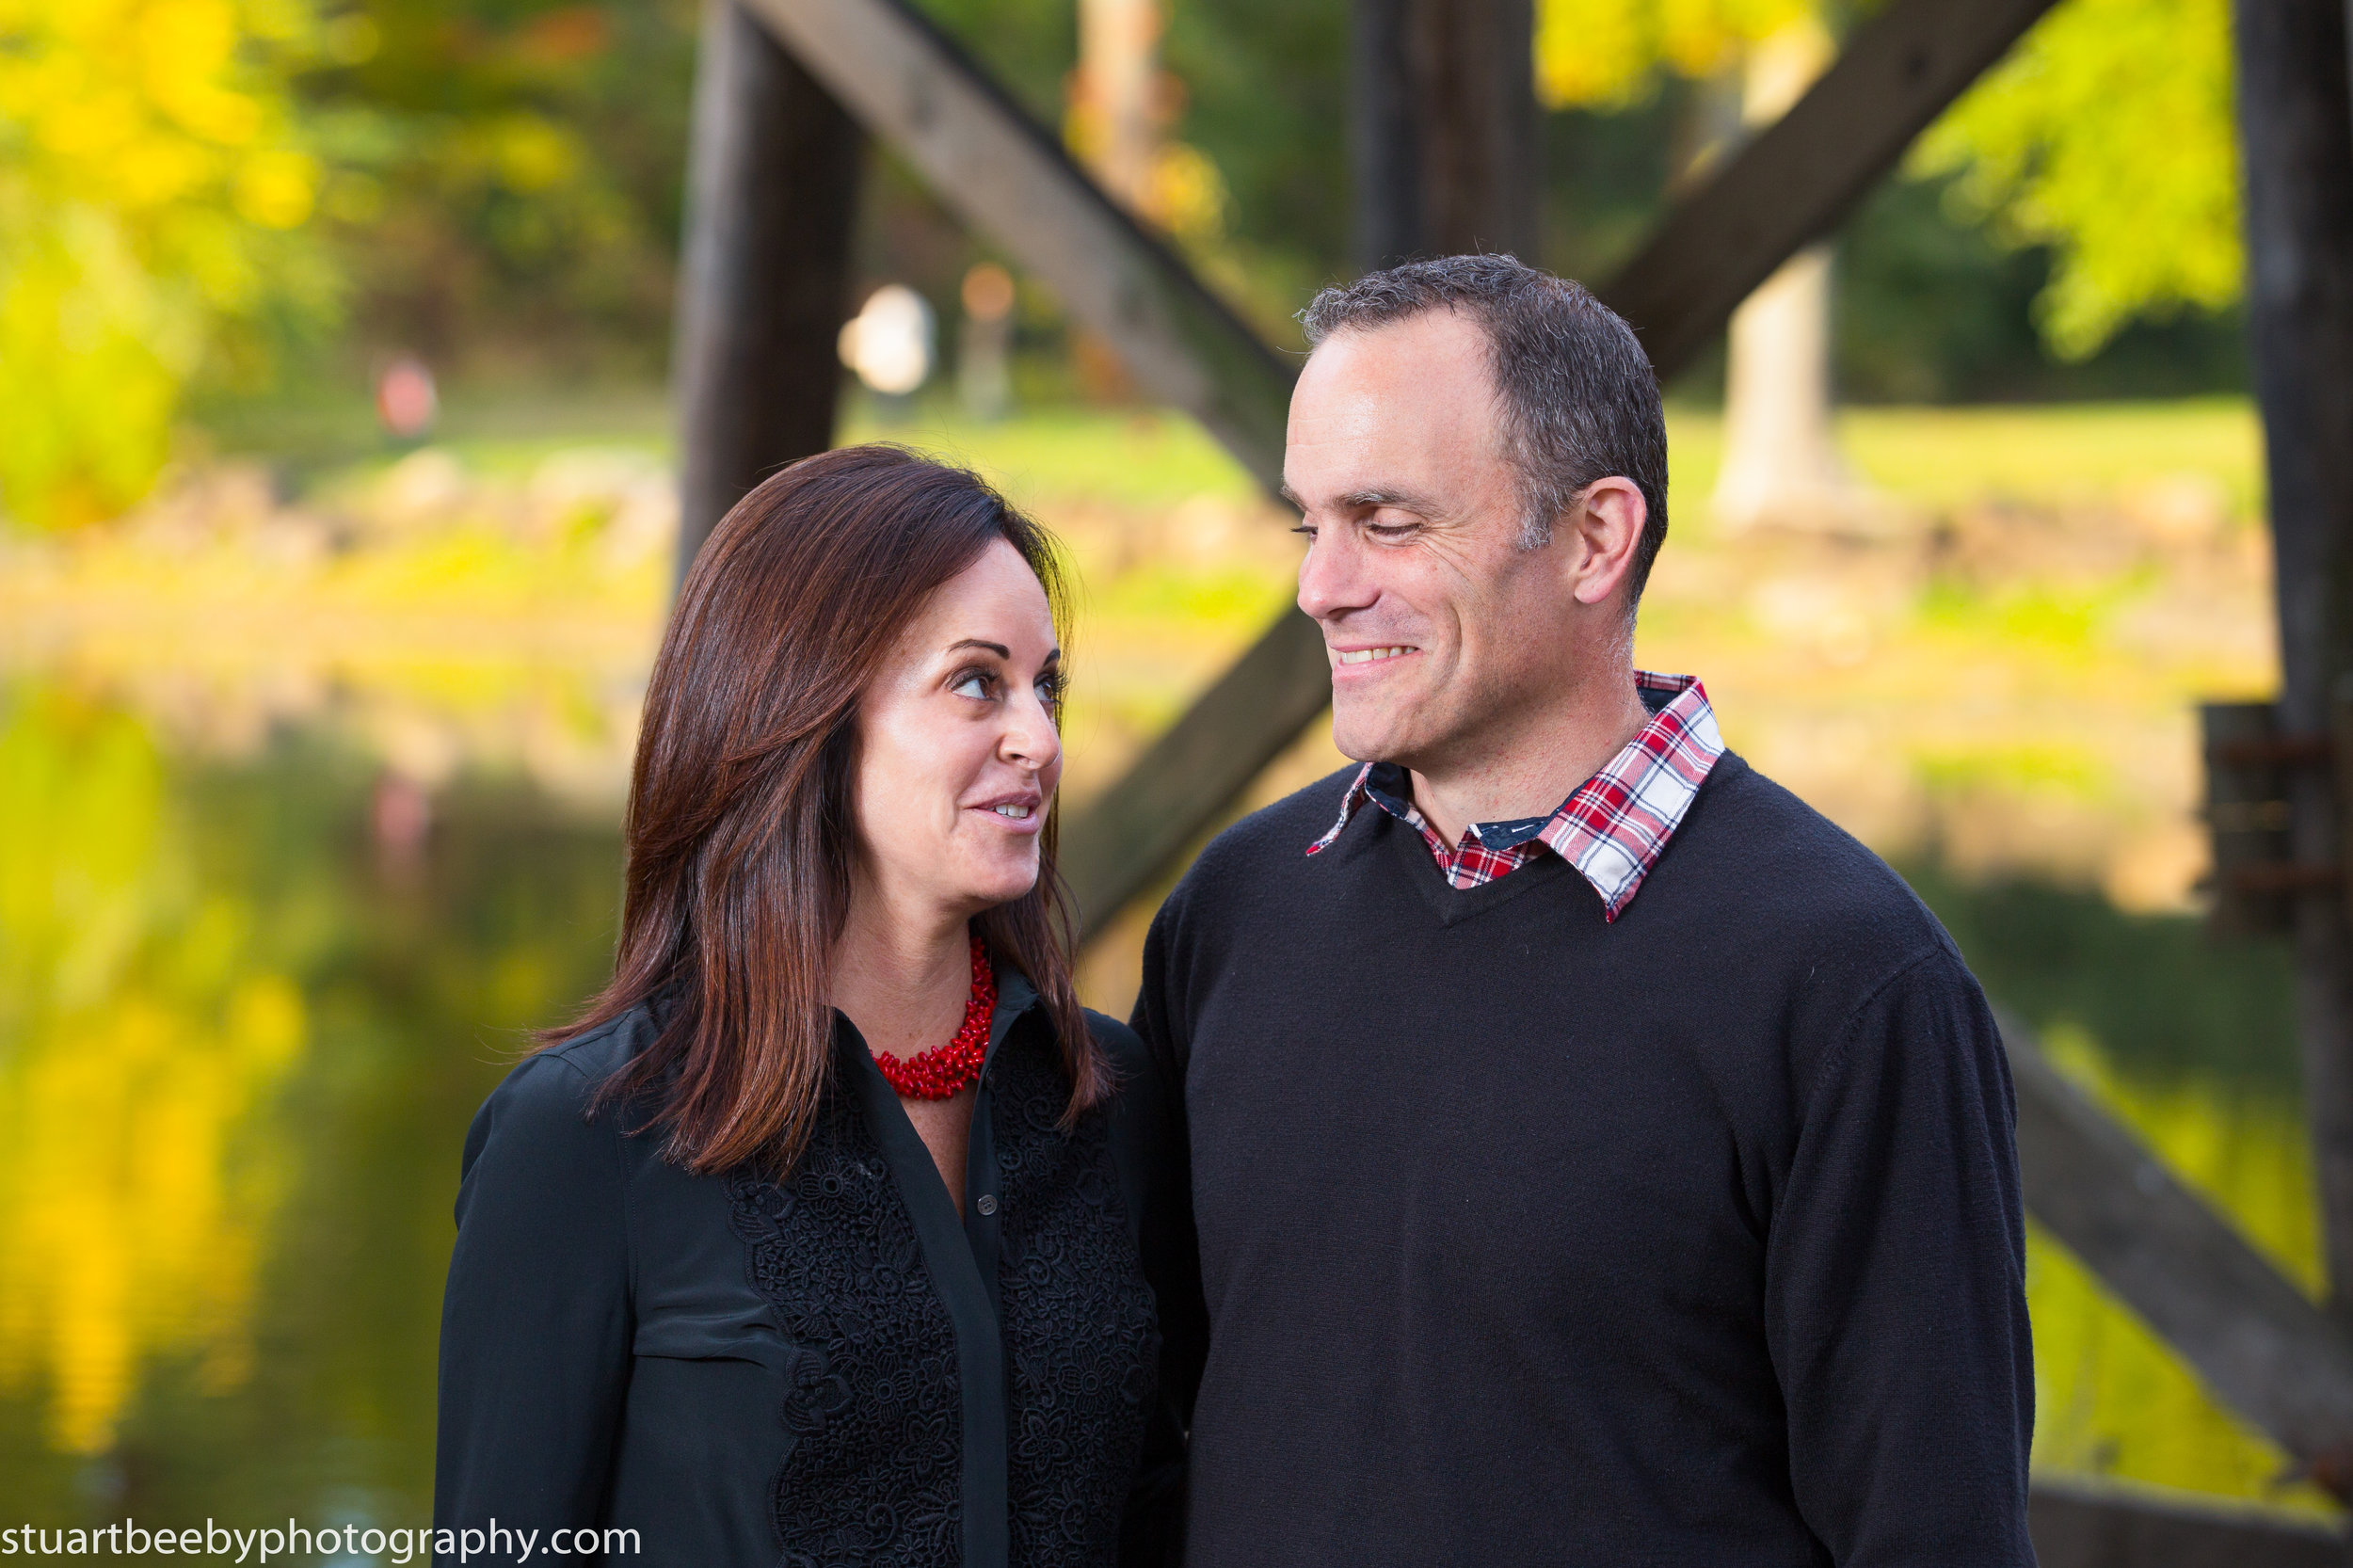

Like with many siblings, there is a healthy rivalry so I asked the boys who was the fastest runner. I suggested they have a race to see, who would win... But this one ended in a tie:
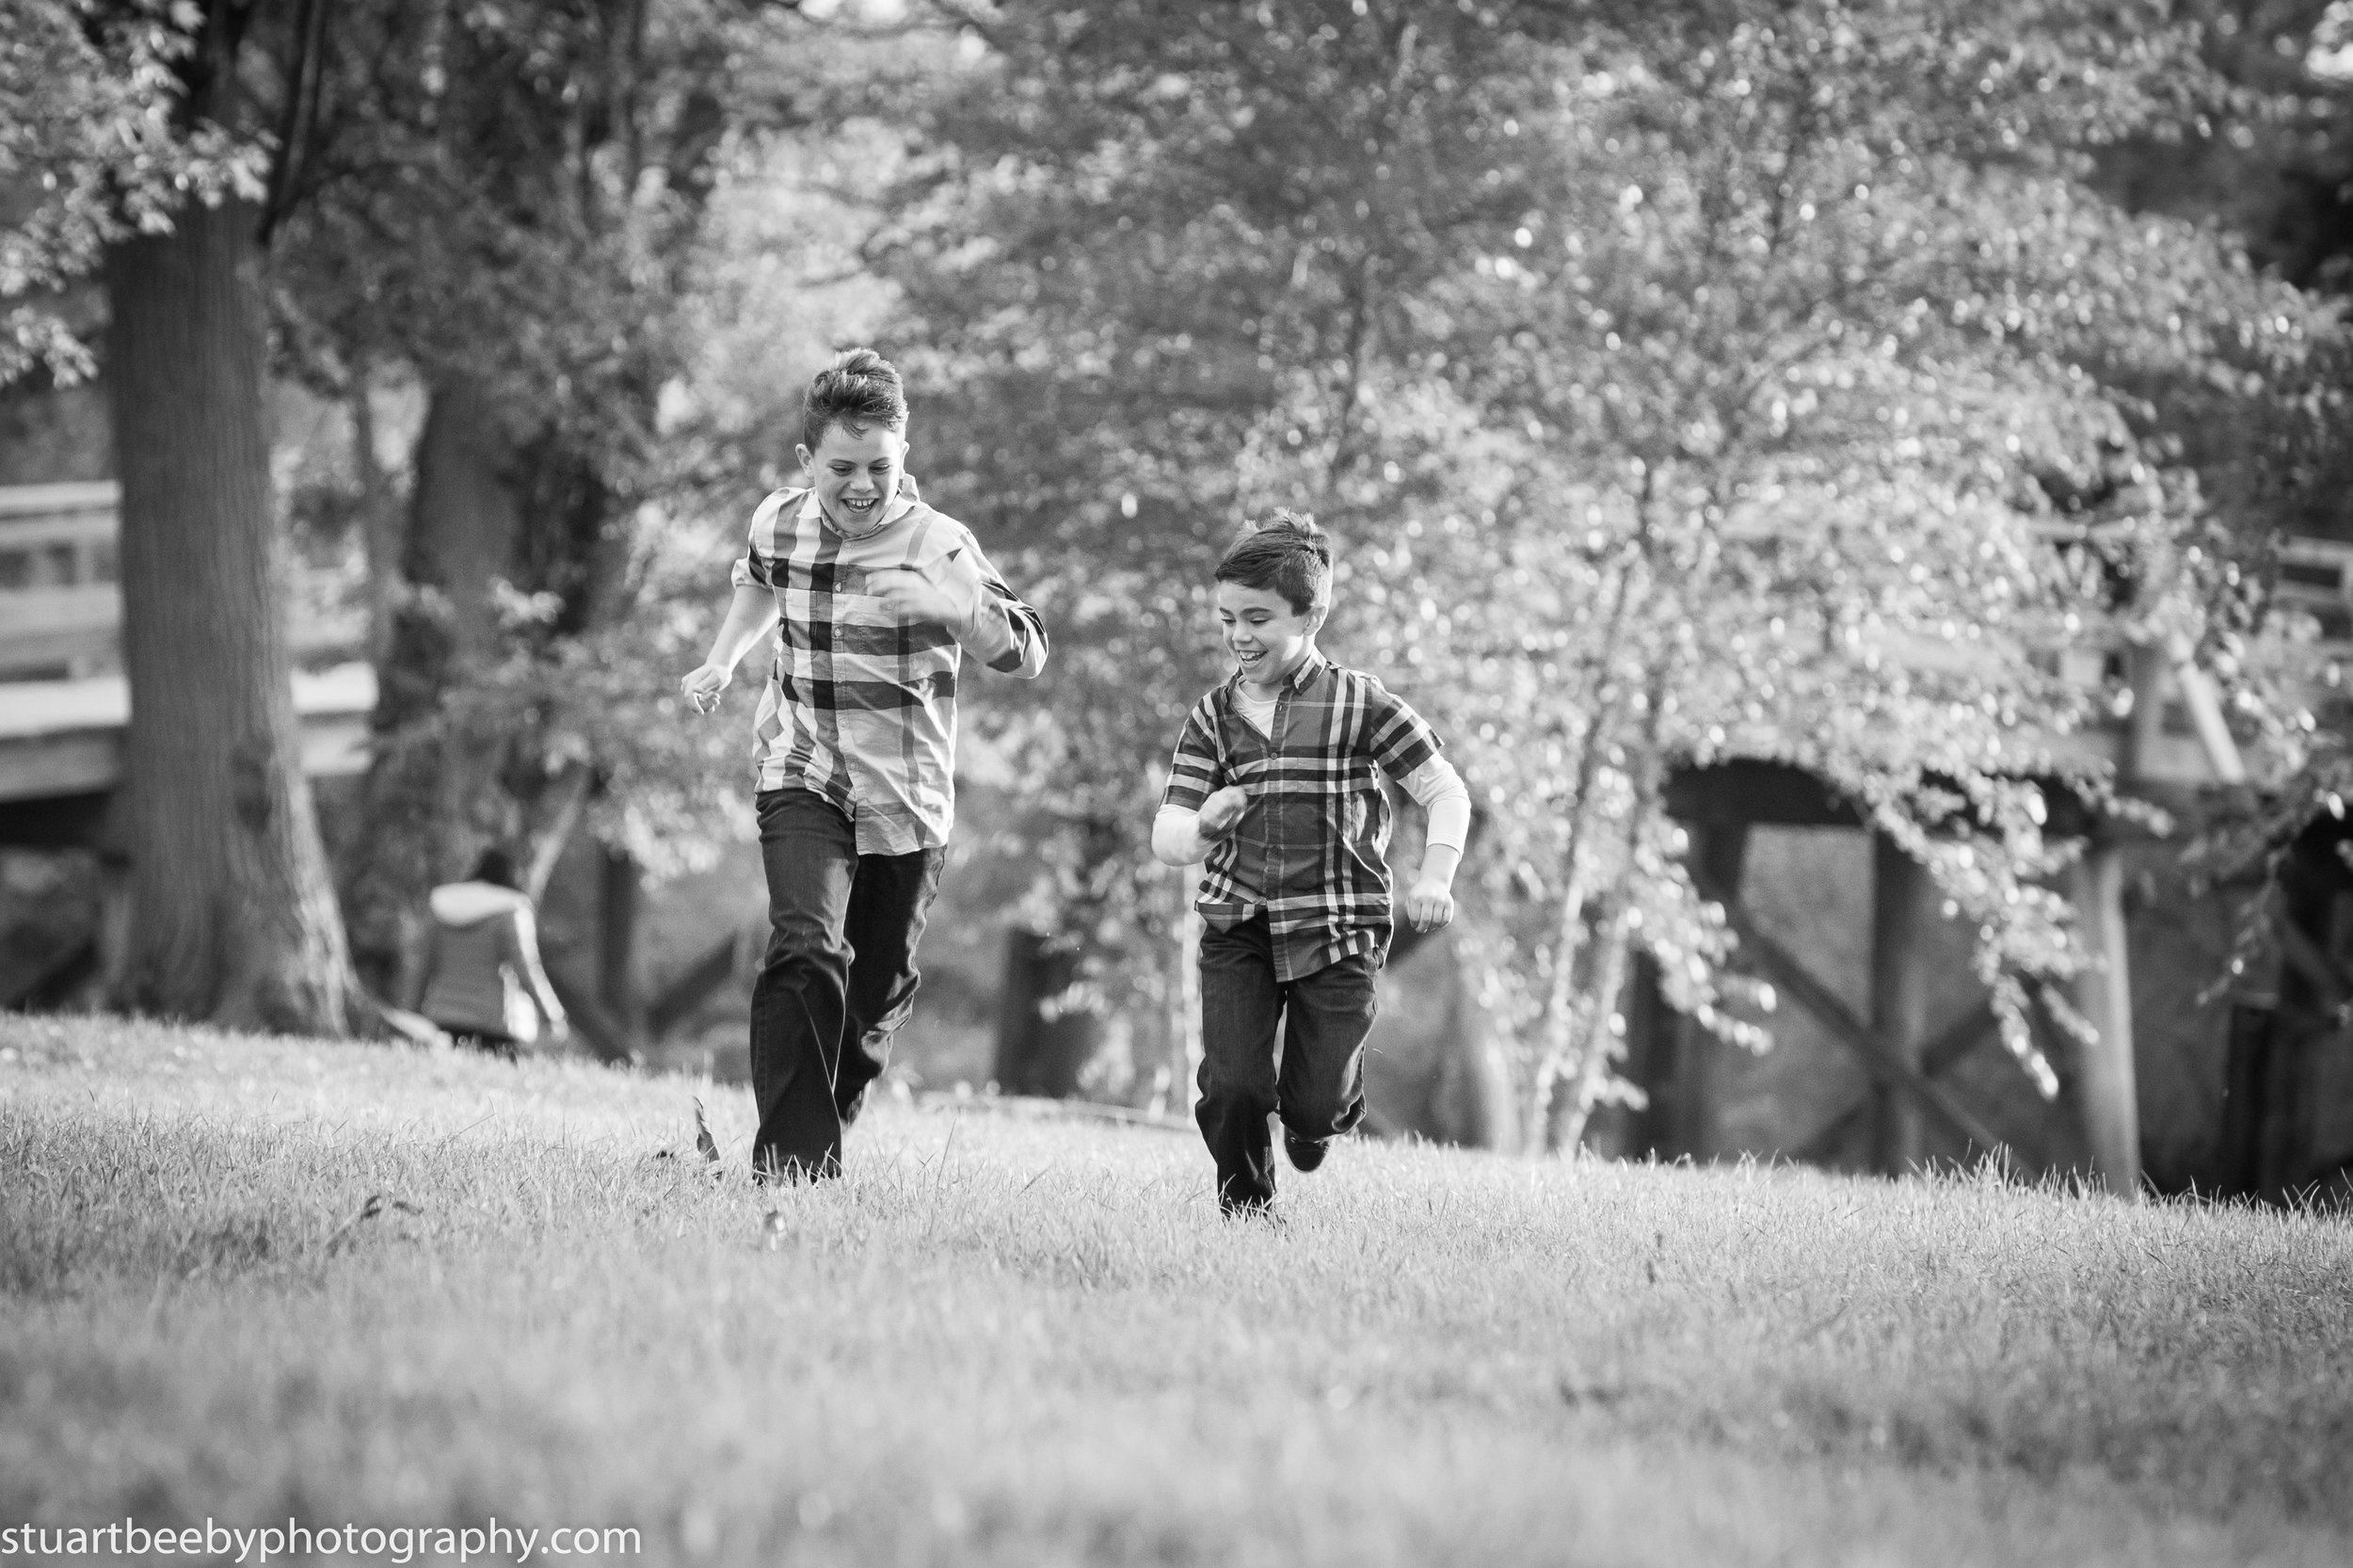
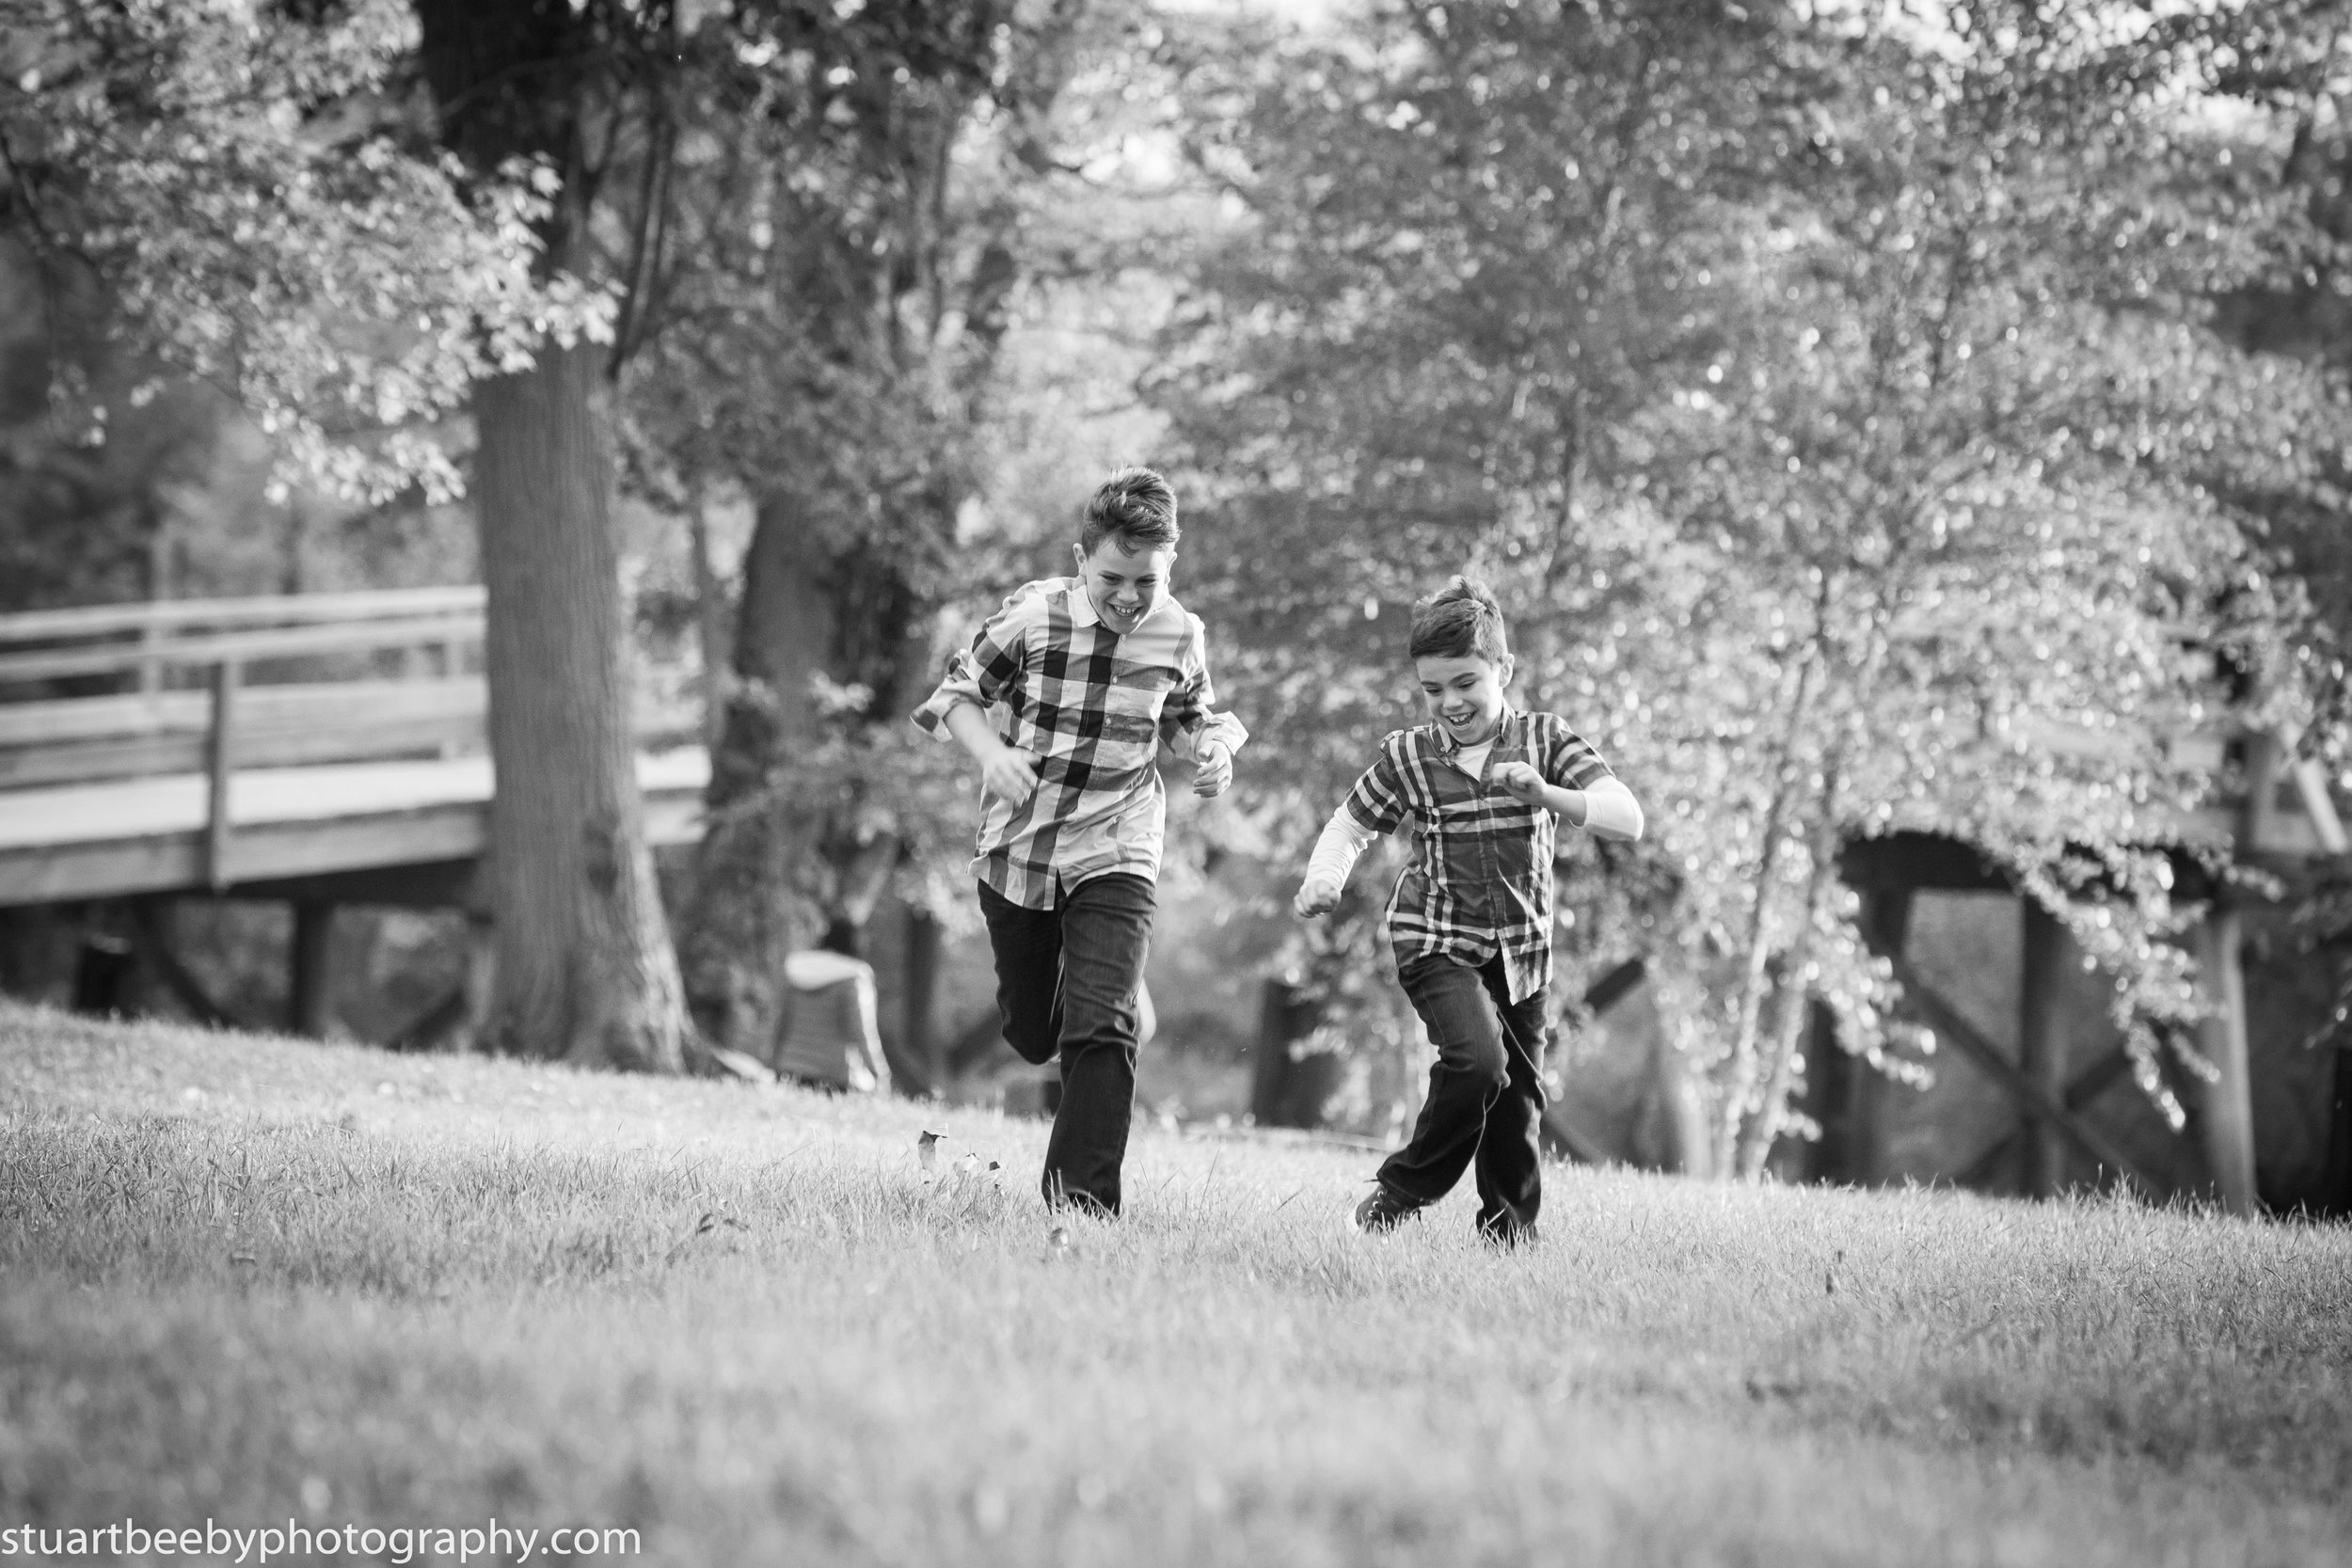
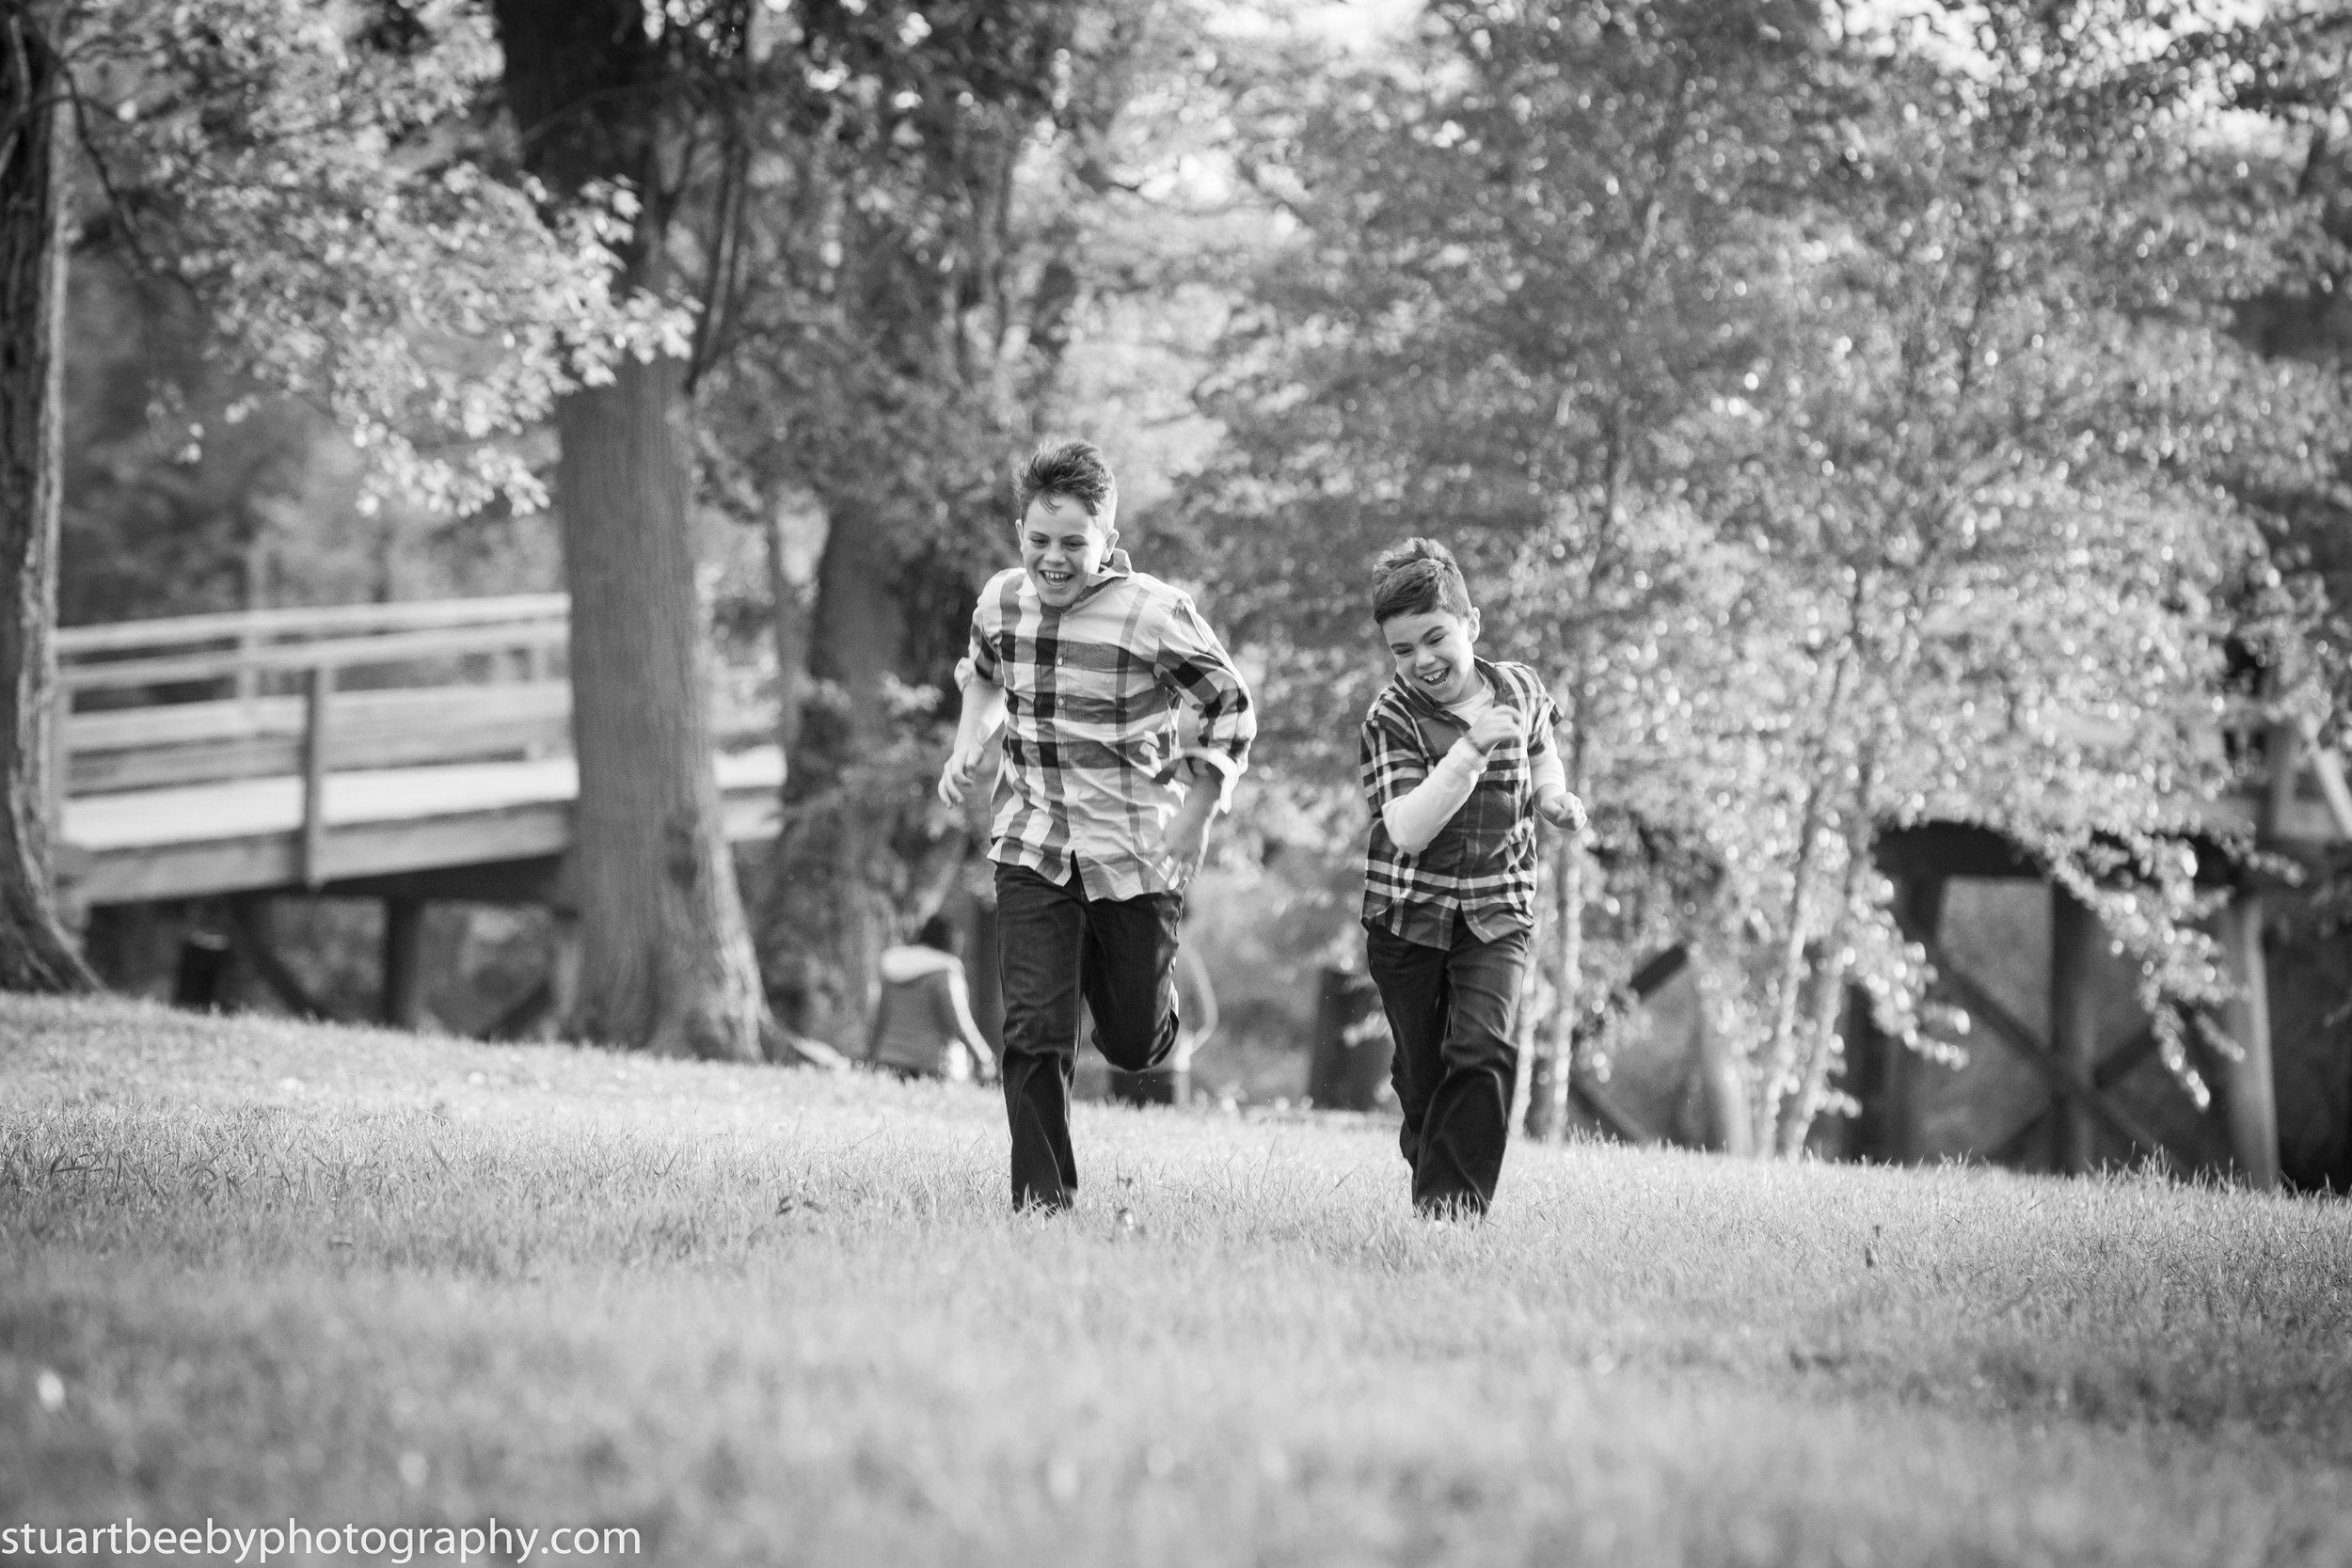
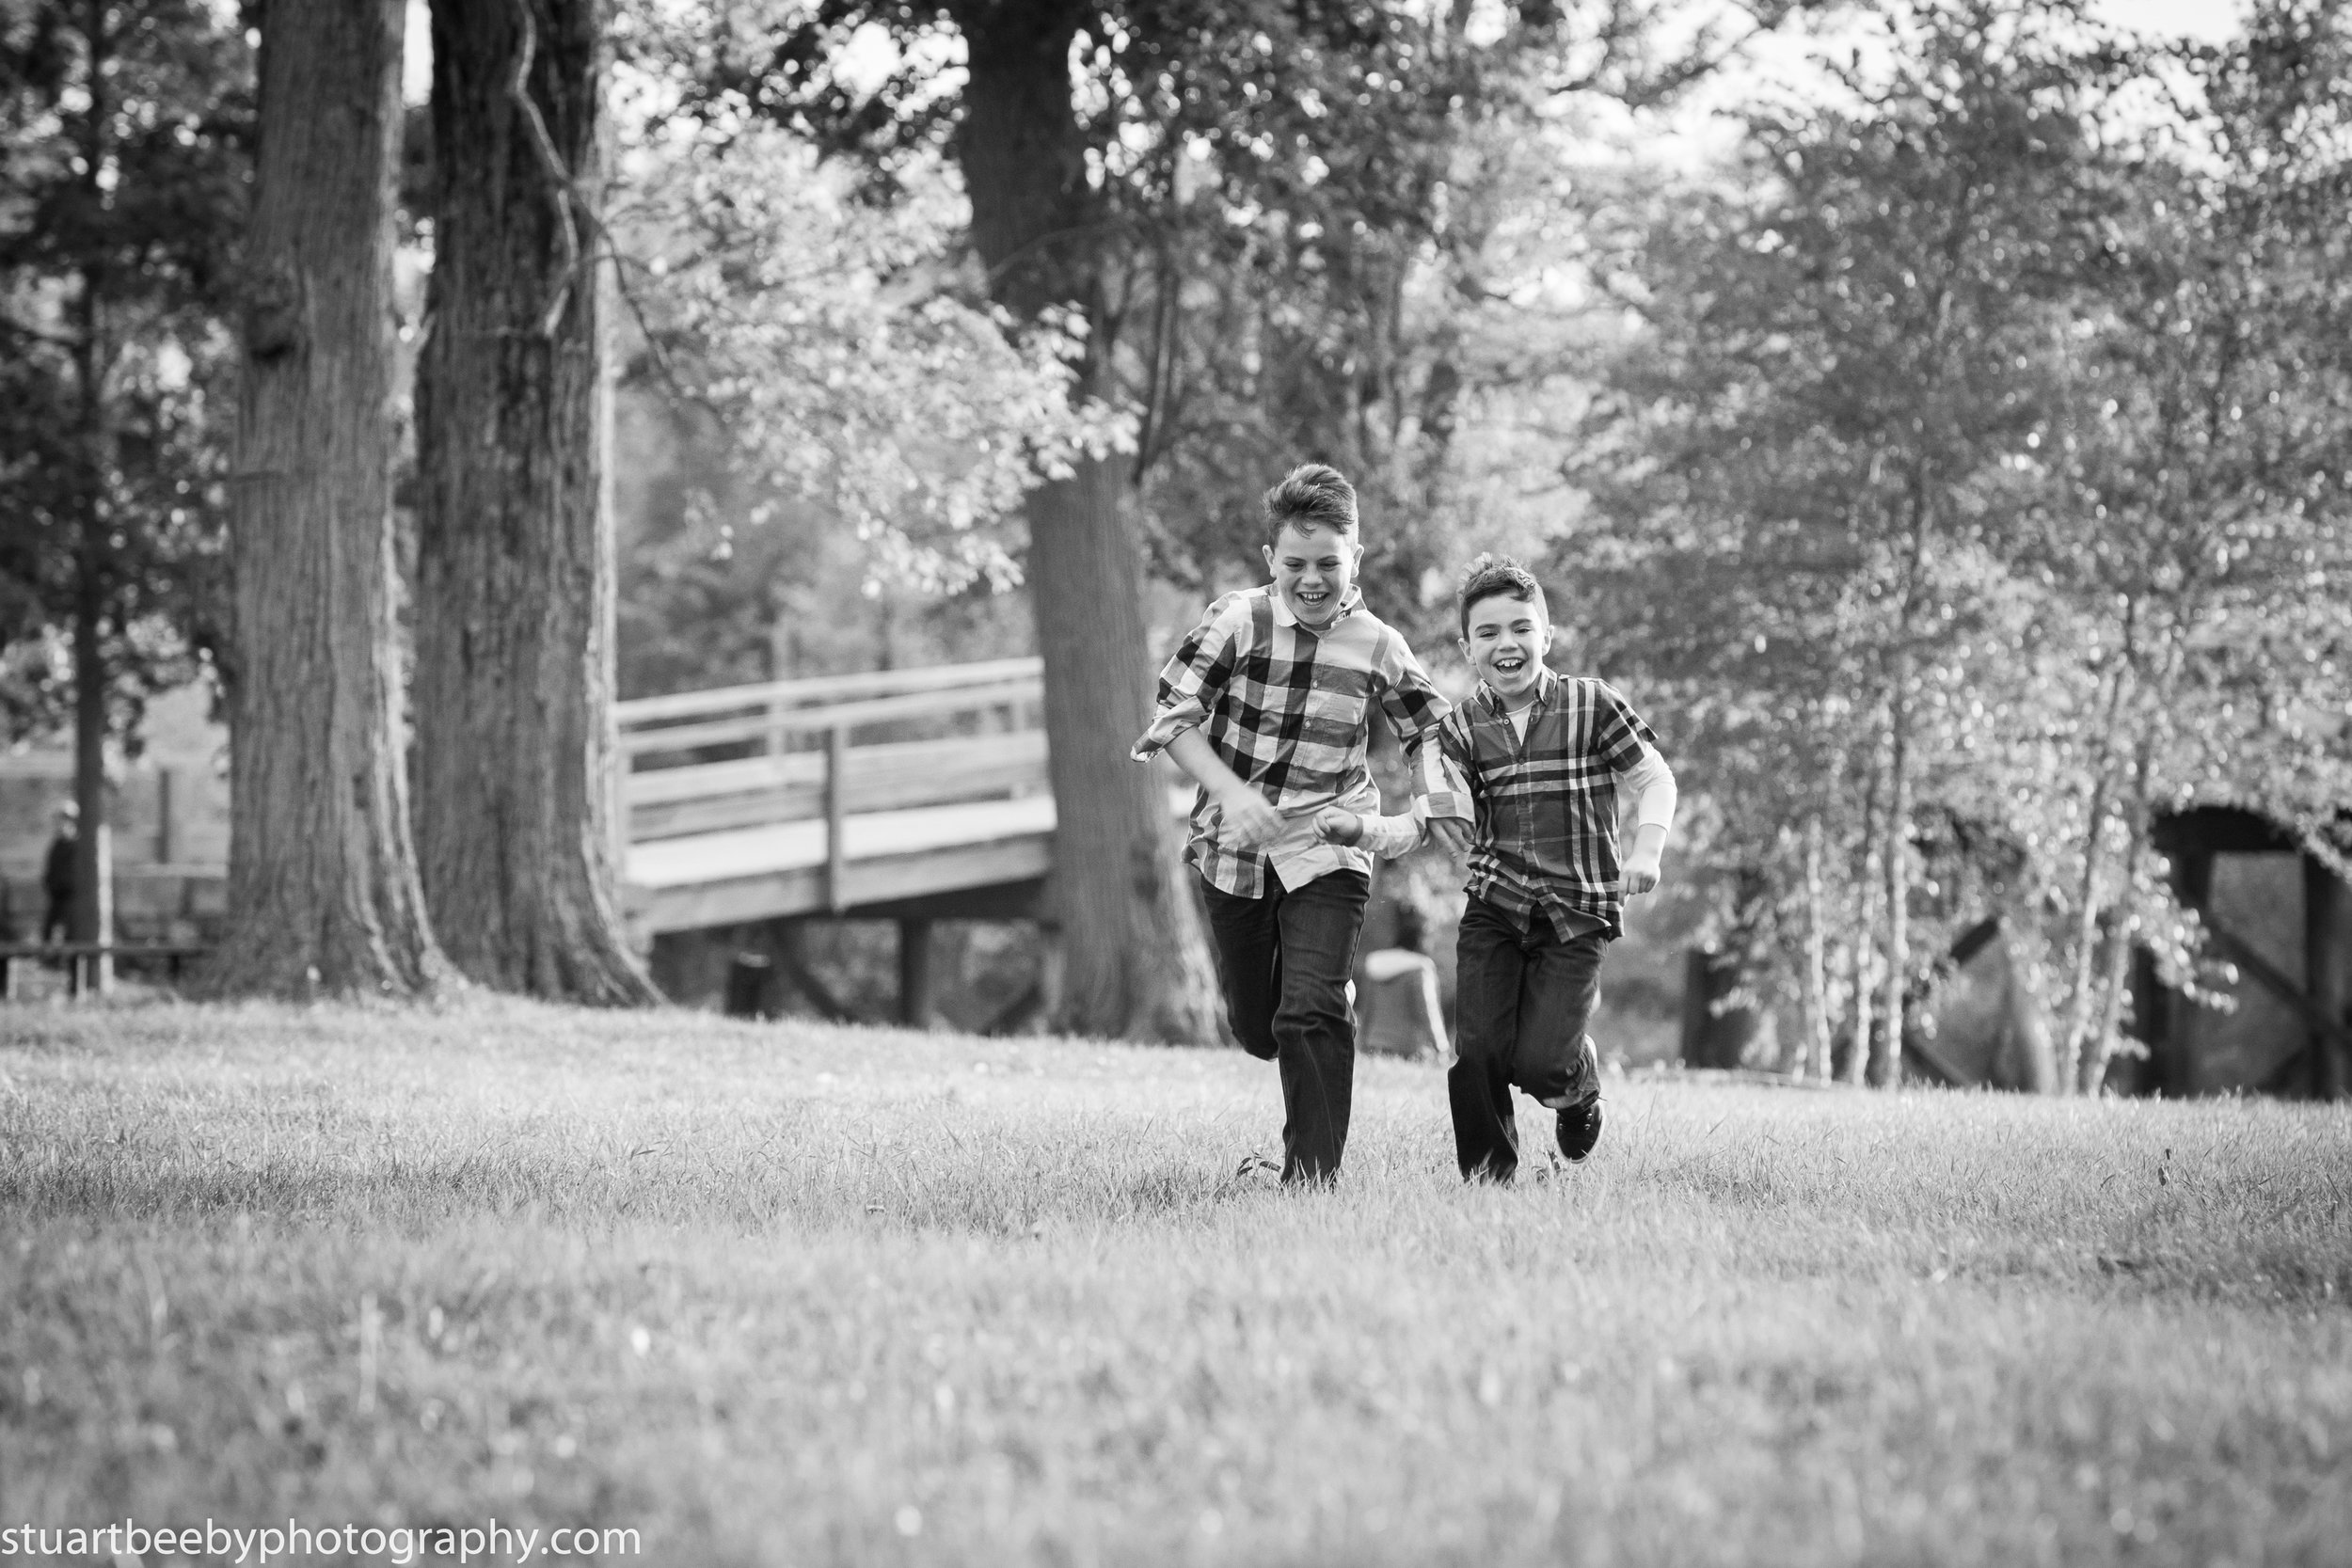

Towards the end of the photo session the sun had begun to set and the park had become much quieter, which allowed us to create a more dramatic, sporty look for both of the boys.


The Tarantino family were delighted with the way these photos turned out and I was grateful that they chose me to provide their photography and printing. They have now ordered their prints and they are looking forward to hanging them on their walls.

Wayside Inn Sudbury Family Photo Session
Columbus Day was beautiful and sunny and there was a slight autumnal chill in the air. It was photo day for the Crocker Family and we chose the quieter area behind the Historic Wayside Inn, Sudbury to have our fall photo session. The area behind the Wayside Inn is quite hidden away and even people who have lived in Sudbury for a number of years, don't realize it is there. If you enjoy fly fishing, the small pond has some nice size trout in it too!

This was the first time the family had booked a professional photography session. They were all very relaxed and enjoyed their first family shoot together. I don't think anyone would argue that they look great together.

The children's families outfits were really well matched, which always makes for great photos. We found this little spot by the pond where the late afternoon sunlight was streaming through the trees and the grey barn in the background balanced nicely with the color of the childrens clothing.

I always include candid photos during a family photo shoot. I like to capture the family walking together. Its a great opportunity for the family to relax away from the camera for a while too. I ran out ahead and had them walking toward me, while I used my long lens from a distance to capture these natural moments.

Their dog, Andy is such a sweet, friendly dog and really completes the family. I love how the picture above came out. It was exactly how I wanted to capture their special family bond.
Late afternoon is my favorite time to take photos. The light is at its best and at this time of the year, when sunlight streams through the autumnal colors, its spectacular...
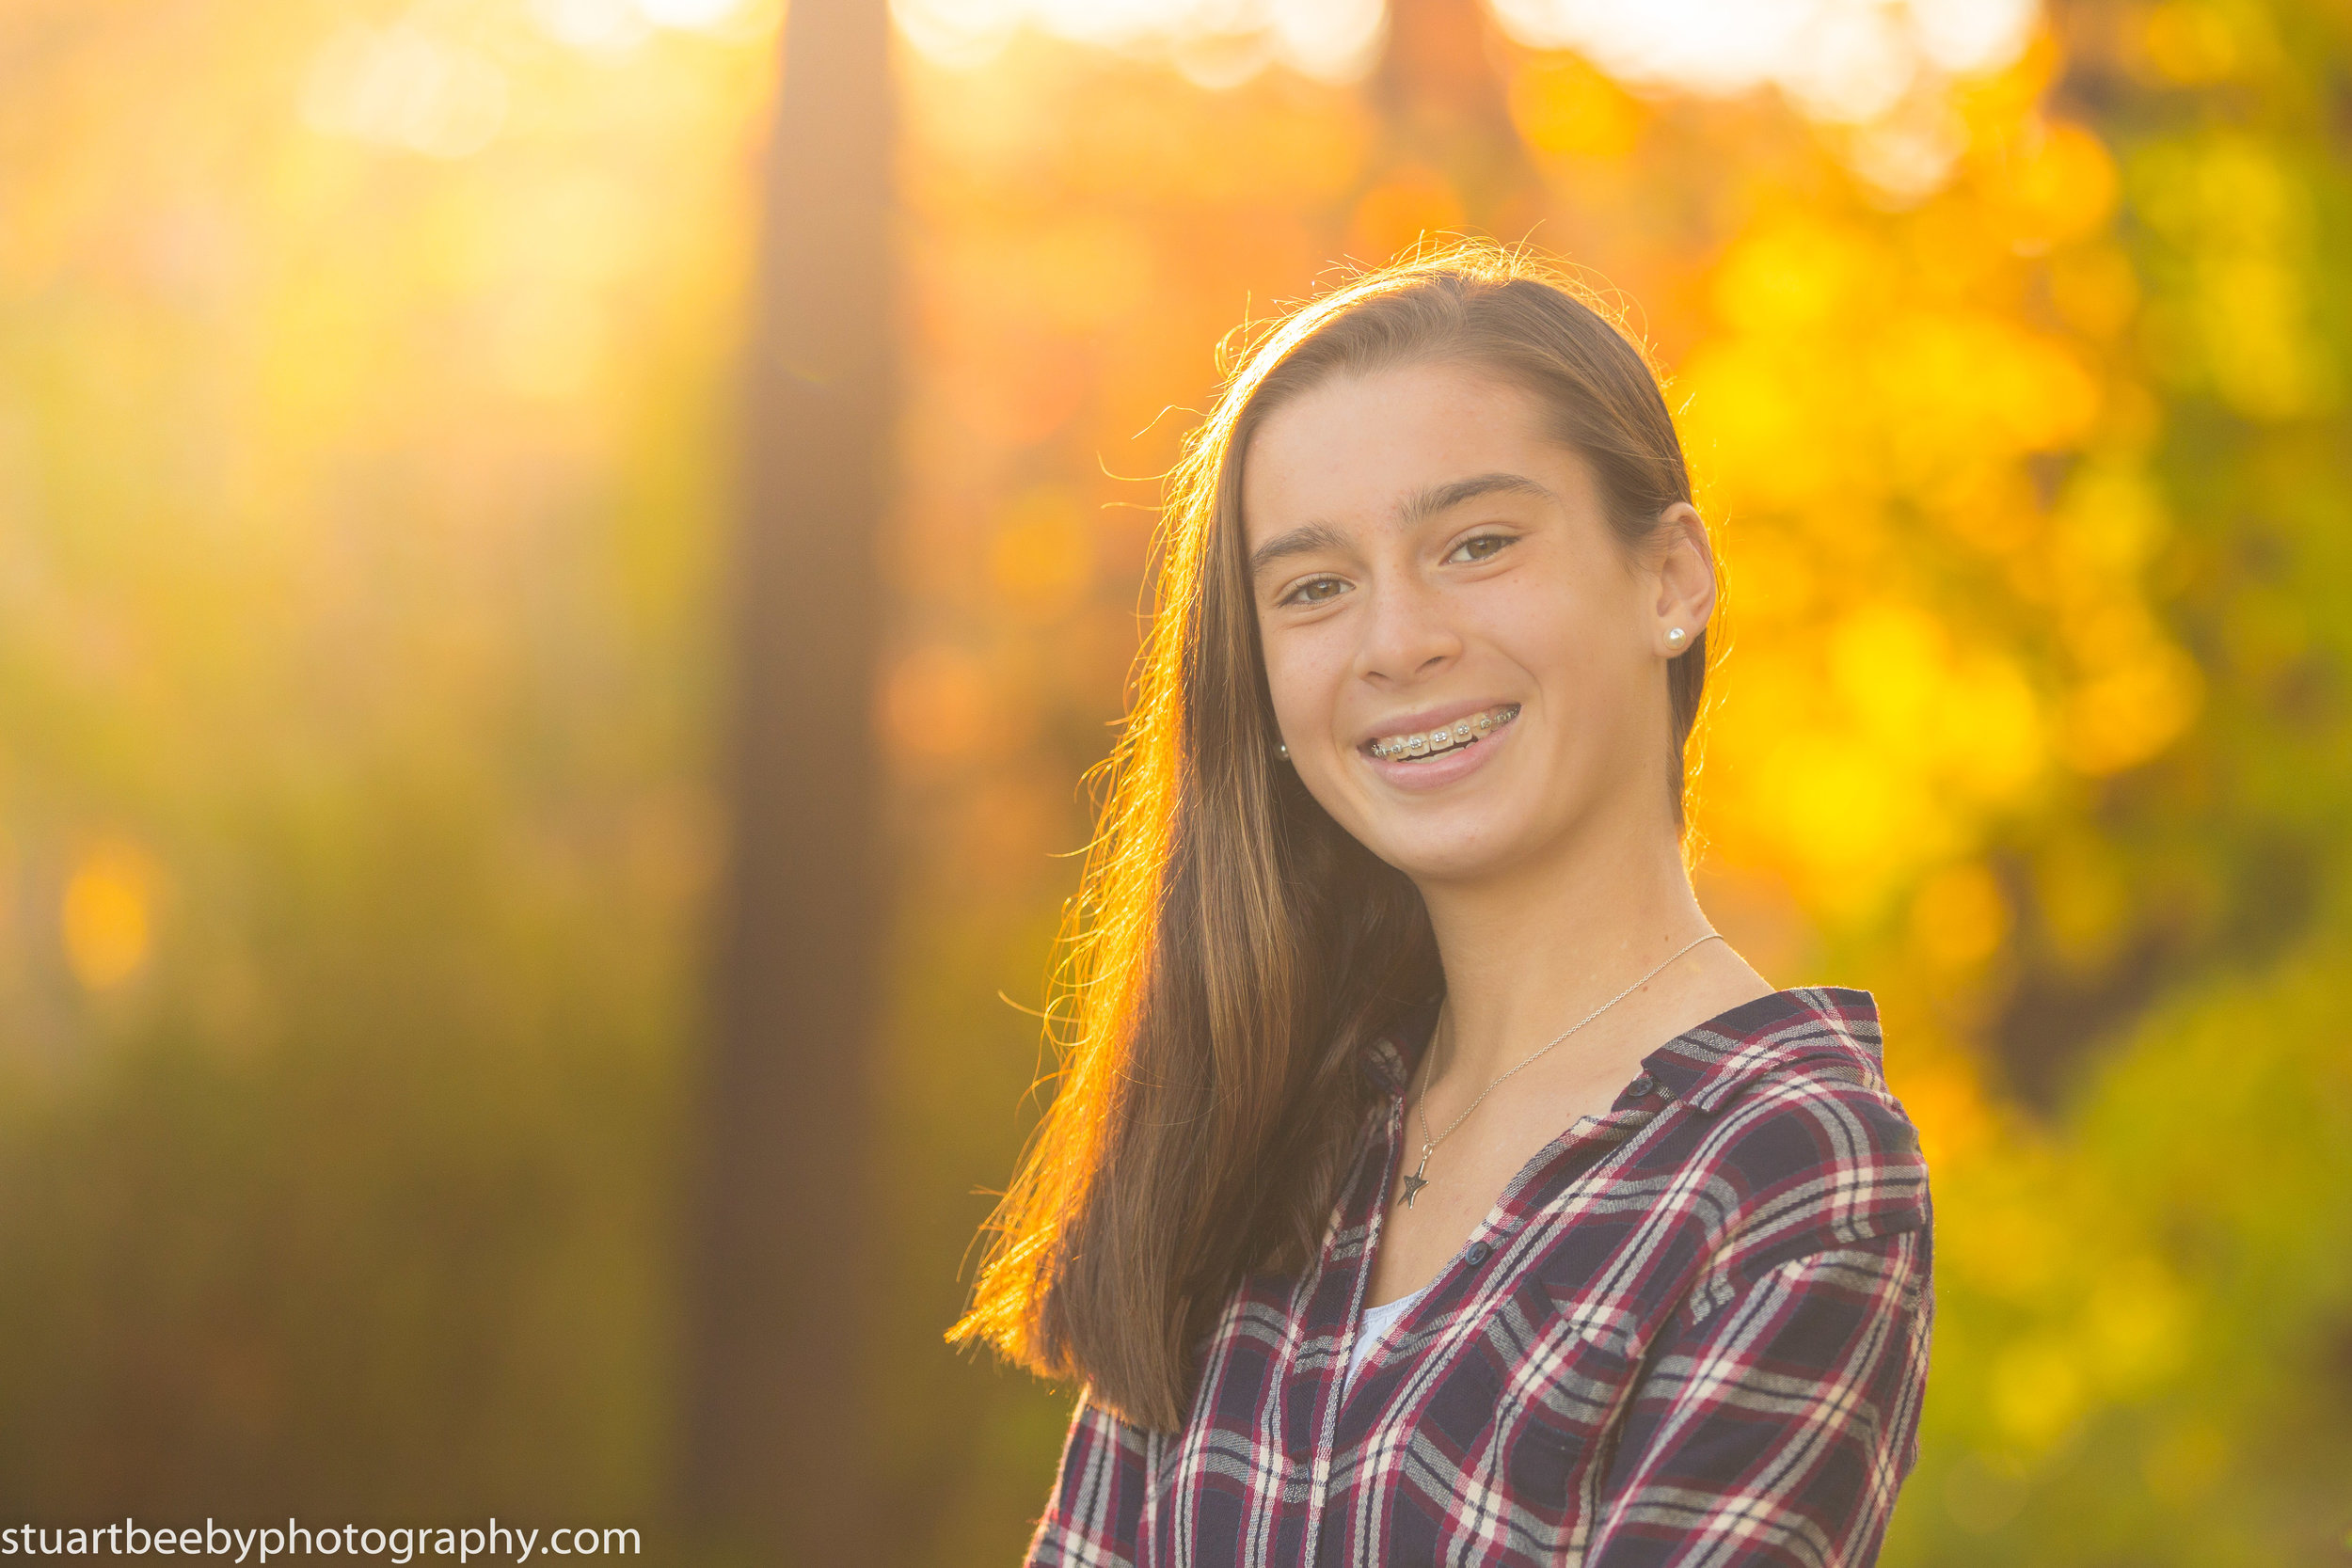
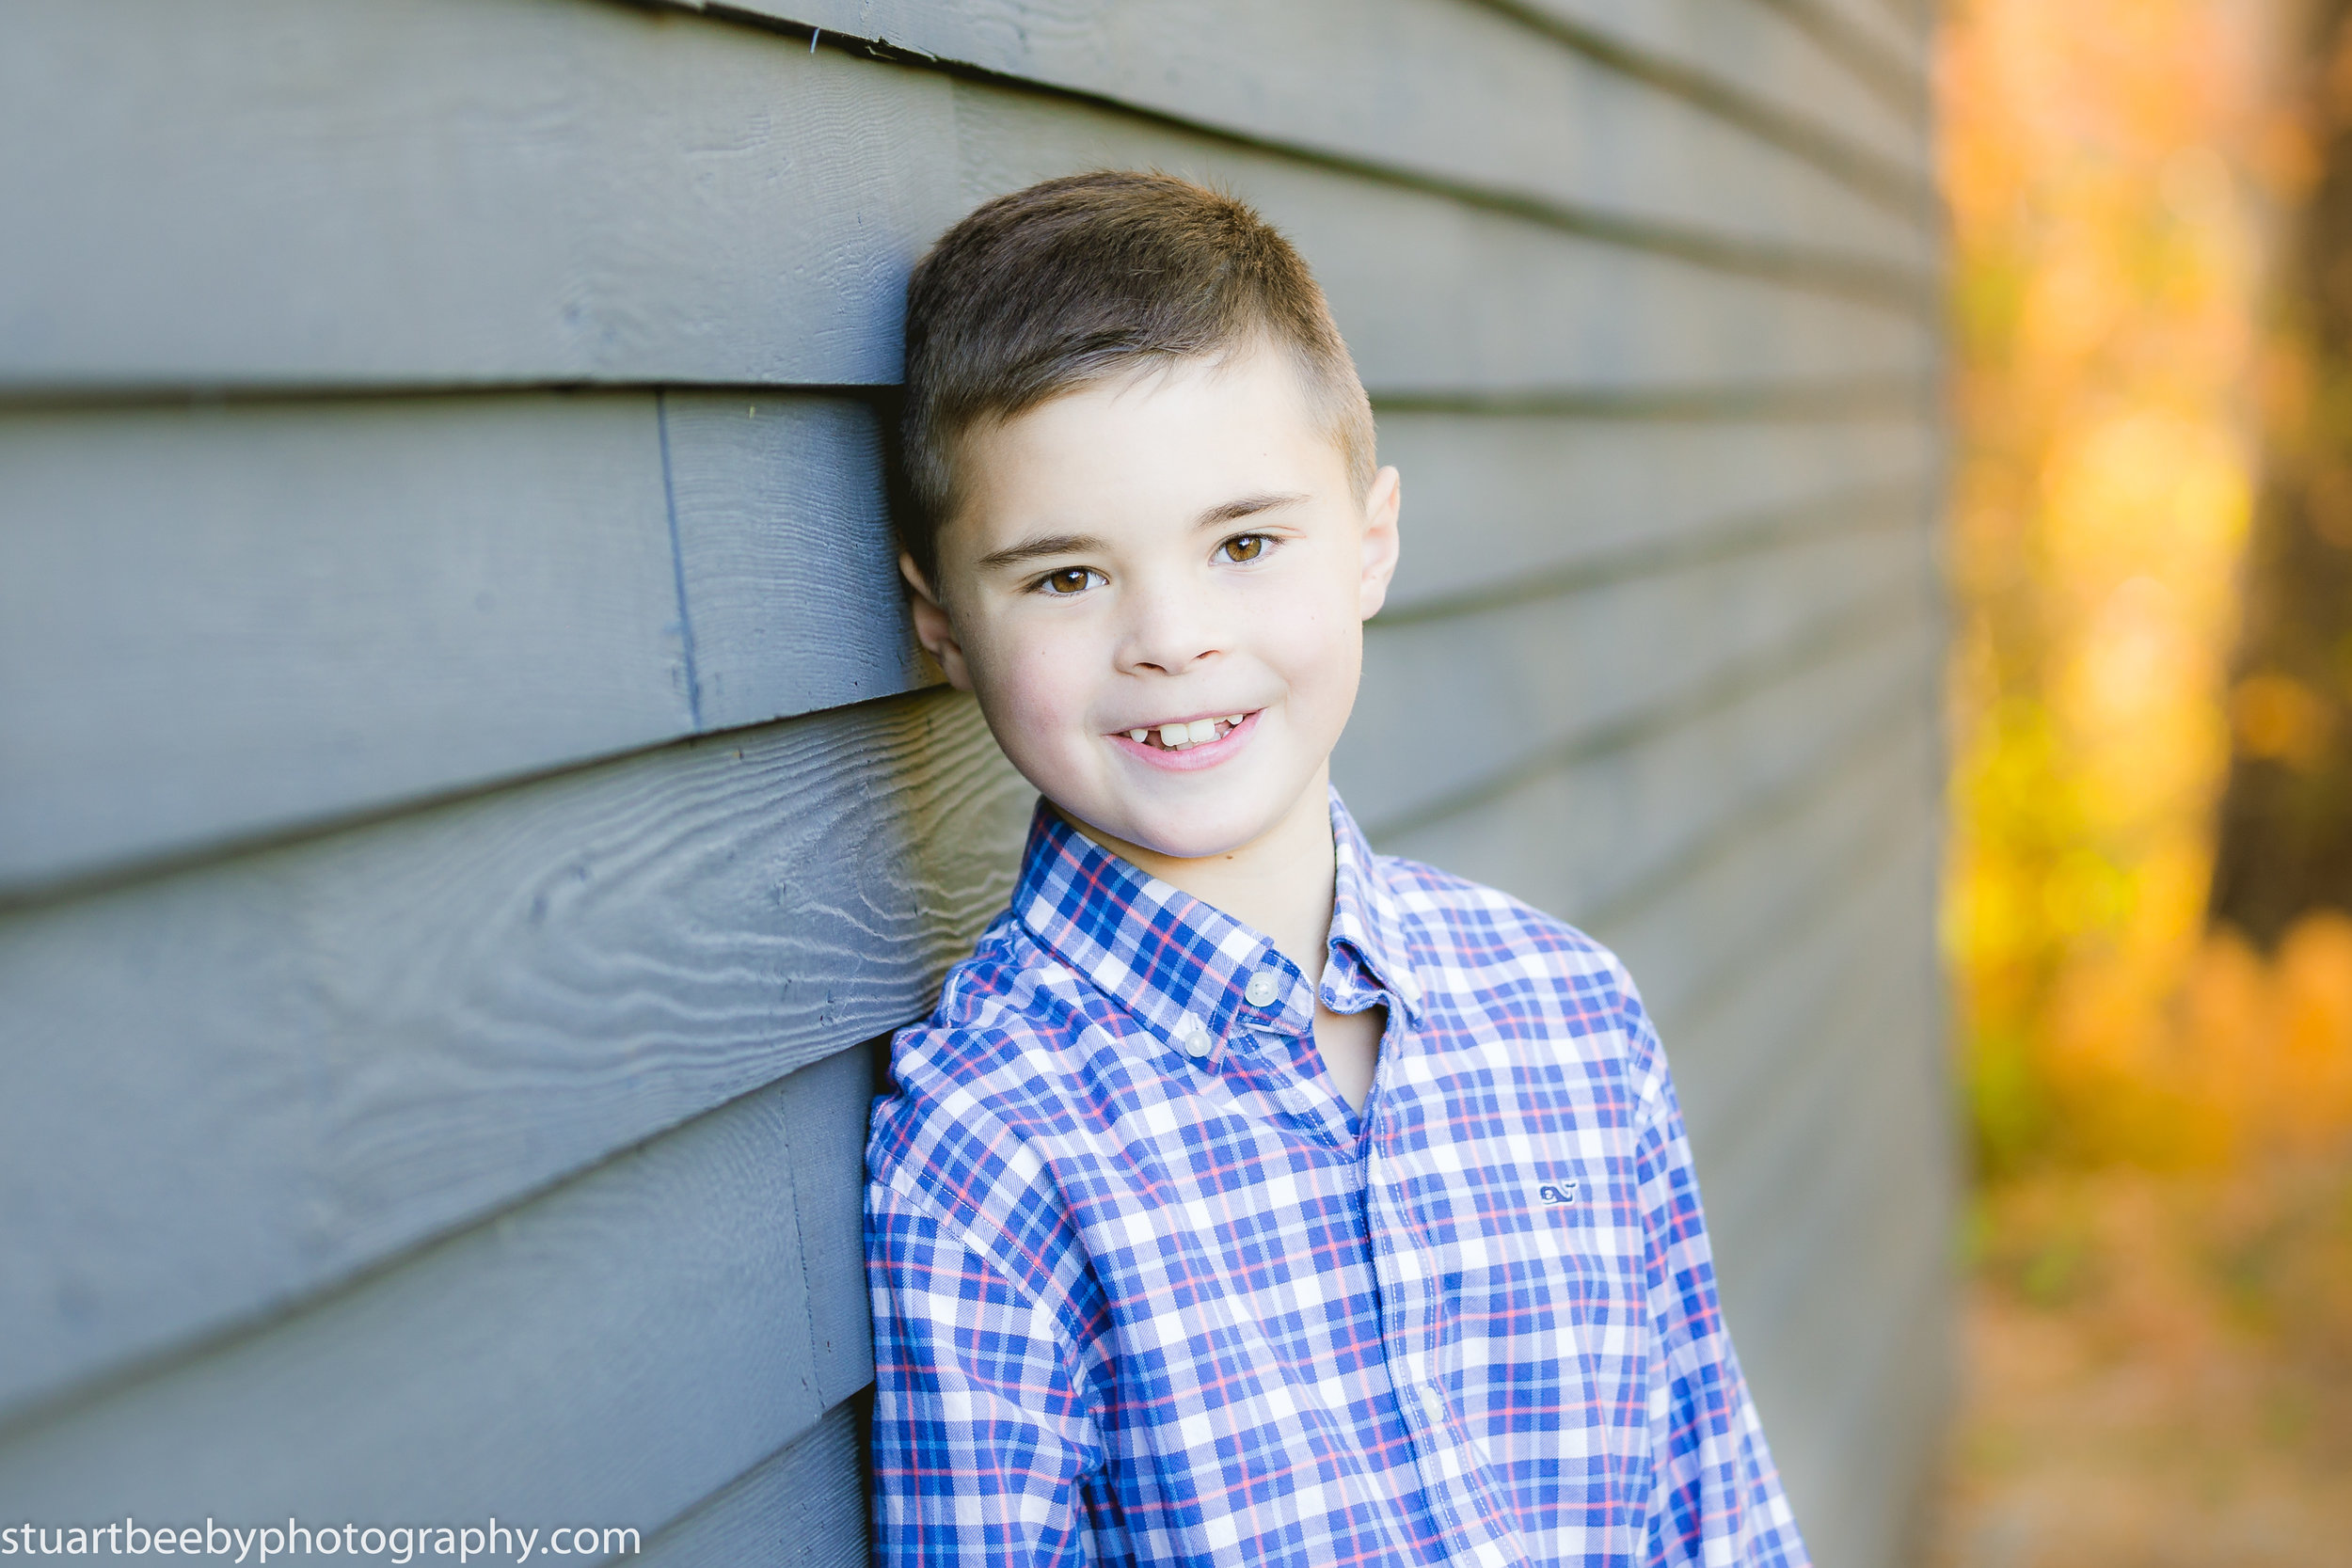
We are very lucky to live in such a beautiful area and the fall season in Sudbury MA offers great opportunities to have family photos taken. Wayside Inn is a very popular place to have photos too.

I really appreciated the opportunity to provide my photography services to this lovely family in Sudbury and we were all happy with the way the photos came out.

If you're still thinking about a family photo session and you live in or around the Sudbury MA area then please get in touch.

Bryant Family Photo Session at Grist Mill Sudbury
Grist Mill, Wayside Inn is one of the most photographed areas in the entire State of Massachusetts and its right on my door step. You can’t drive past on a Saturday afternoon without seeing at least one bridal party or a coach load of tourists, with cameras out and enjoying the beautiful surroundings.
Although, I took this picture on a quieter day...!

It was only to be expected when the Bryant family chose the Grist Mill to have their Fall family photos done on a Saturday afternoon in early October, the place was teaming with people.

Bryant Family Grist Mill Sudbury
It was an overcast afternoon which is actually often the best type of lighting to have photos taken because the light is soft and even. As it was so busy, we had to choose our moments to get the shots we wanted.
The Bryant Family are from Boston and their twin boys, Jackson and Shane are such fun. My son, Oliver was helping me on this shoot. He's a little comedian and entertainer so I brought him along and asked him to get the boys looking at him while he did a funny dance... He did a great job and helped me capture these two little cheeky personalities...

Bryant Family Photos Sudbury
The boys bounce of each other, I guess like most twins do but these little dudes are teasing each other one minute and then on a turn of a dime, they are giggling and hugging each other. Its fun to watch...
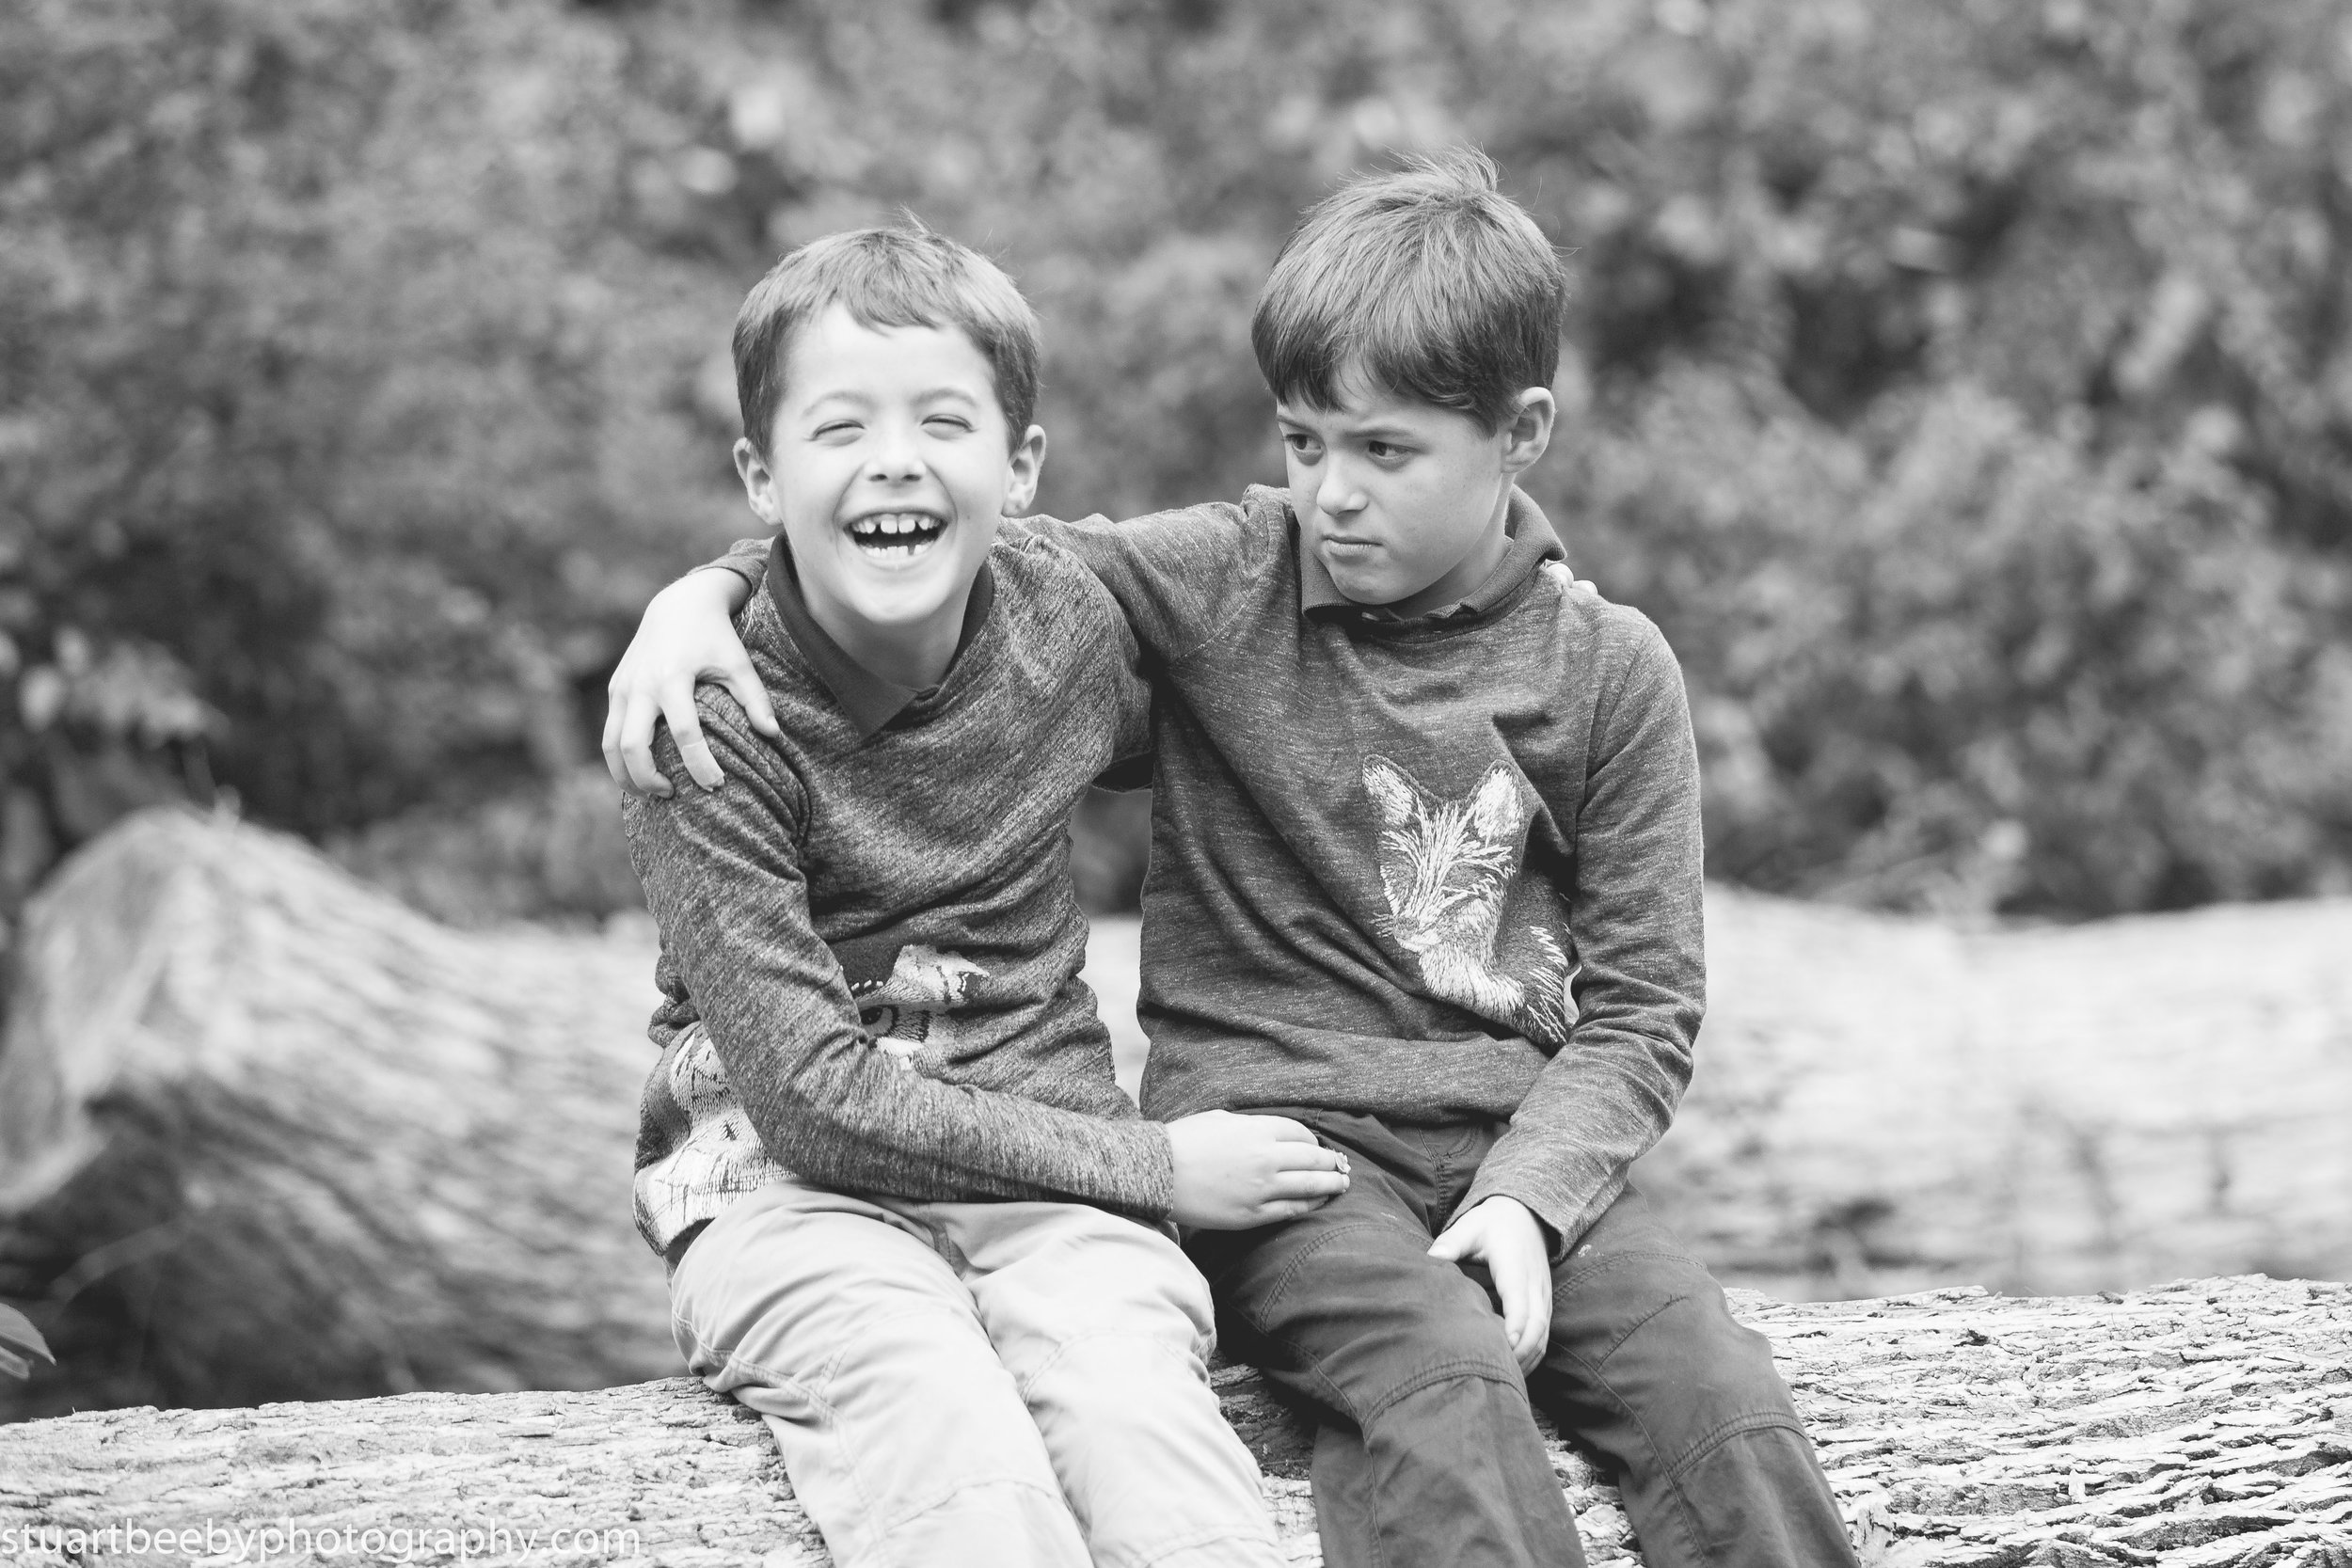
This was my personal favorite from the day. It makes me smile every time I look at this photo
Courtney and Keith are great together and so easy going. Keith has so many interesting stories to tell and Courtney also enjoys photography so we had a great afternoon and a lot of fun. They also chose their colors so well too.
Keith is a lot of fun and he was very comfortable in front of a camera so I took the opportunity to try a couple of different shots and landed on this one.

Grist Mill, Sudbury
The Grist Mill at Wayside Inn, Sudbury is a great place to have your family photos. There are so many great compositions to try out, which is why so many photographers like it. I'm very fortunate to practically have it on my doorstep.
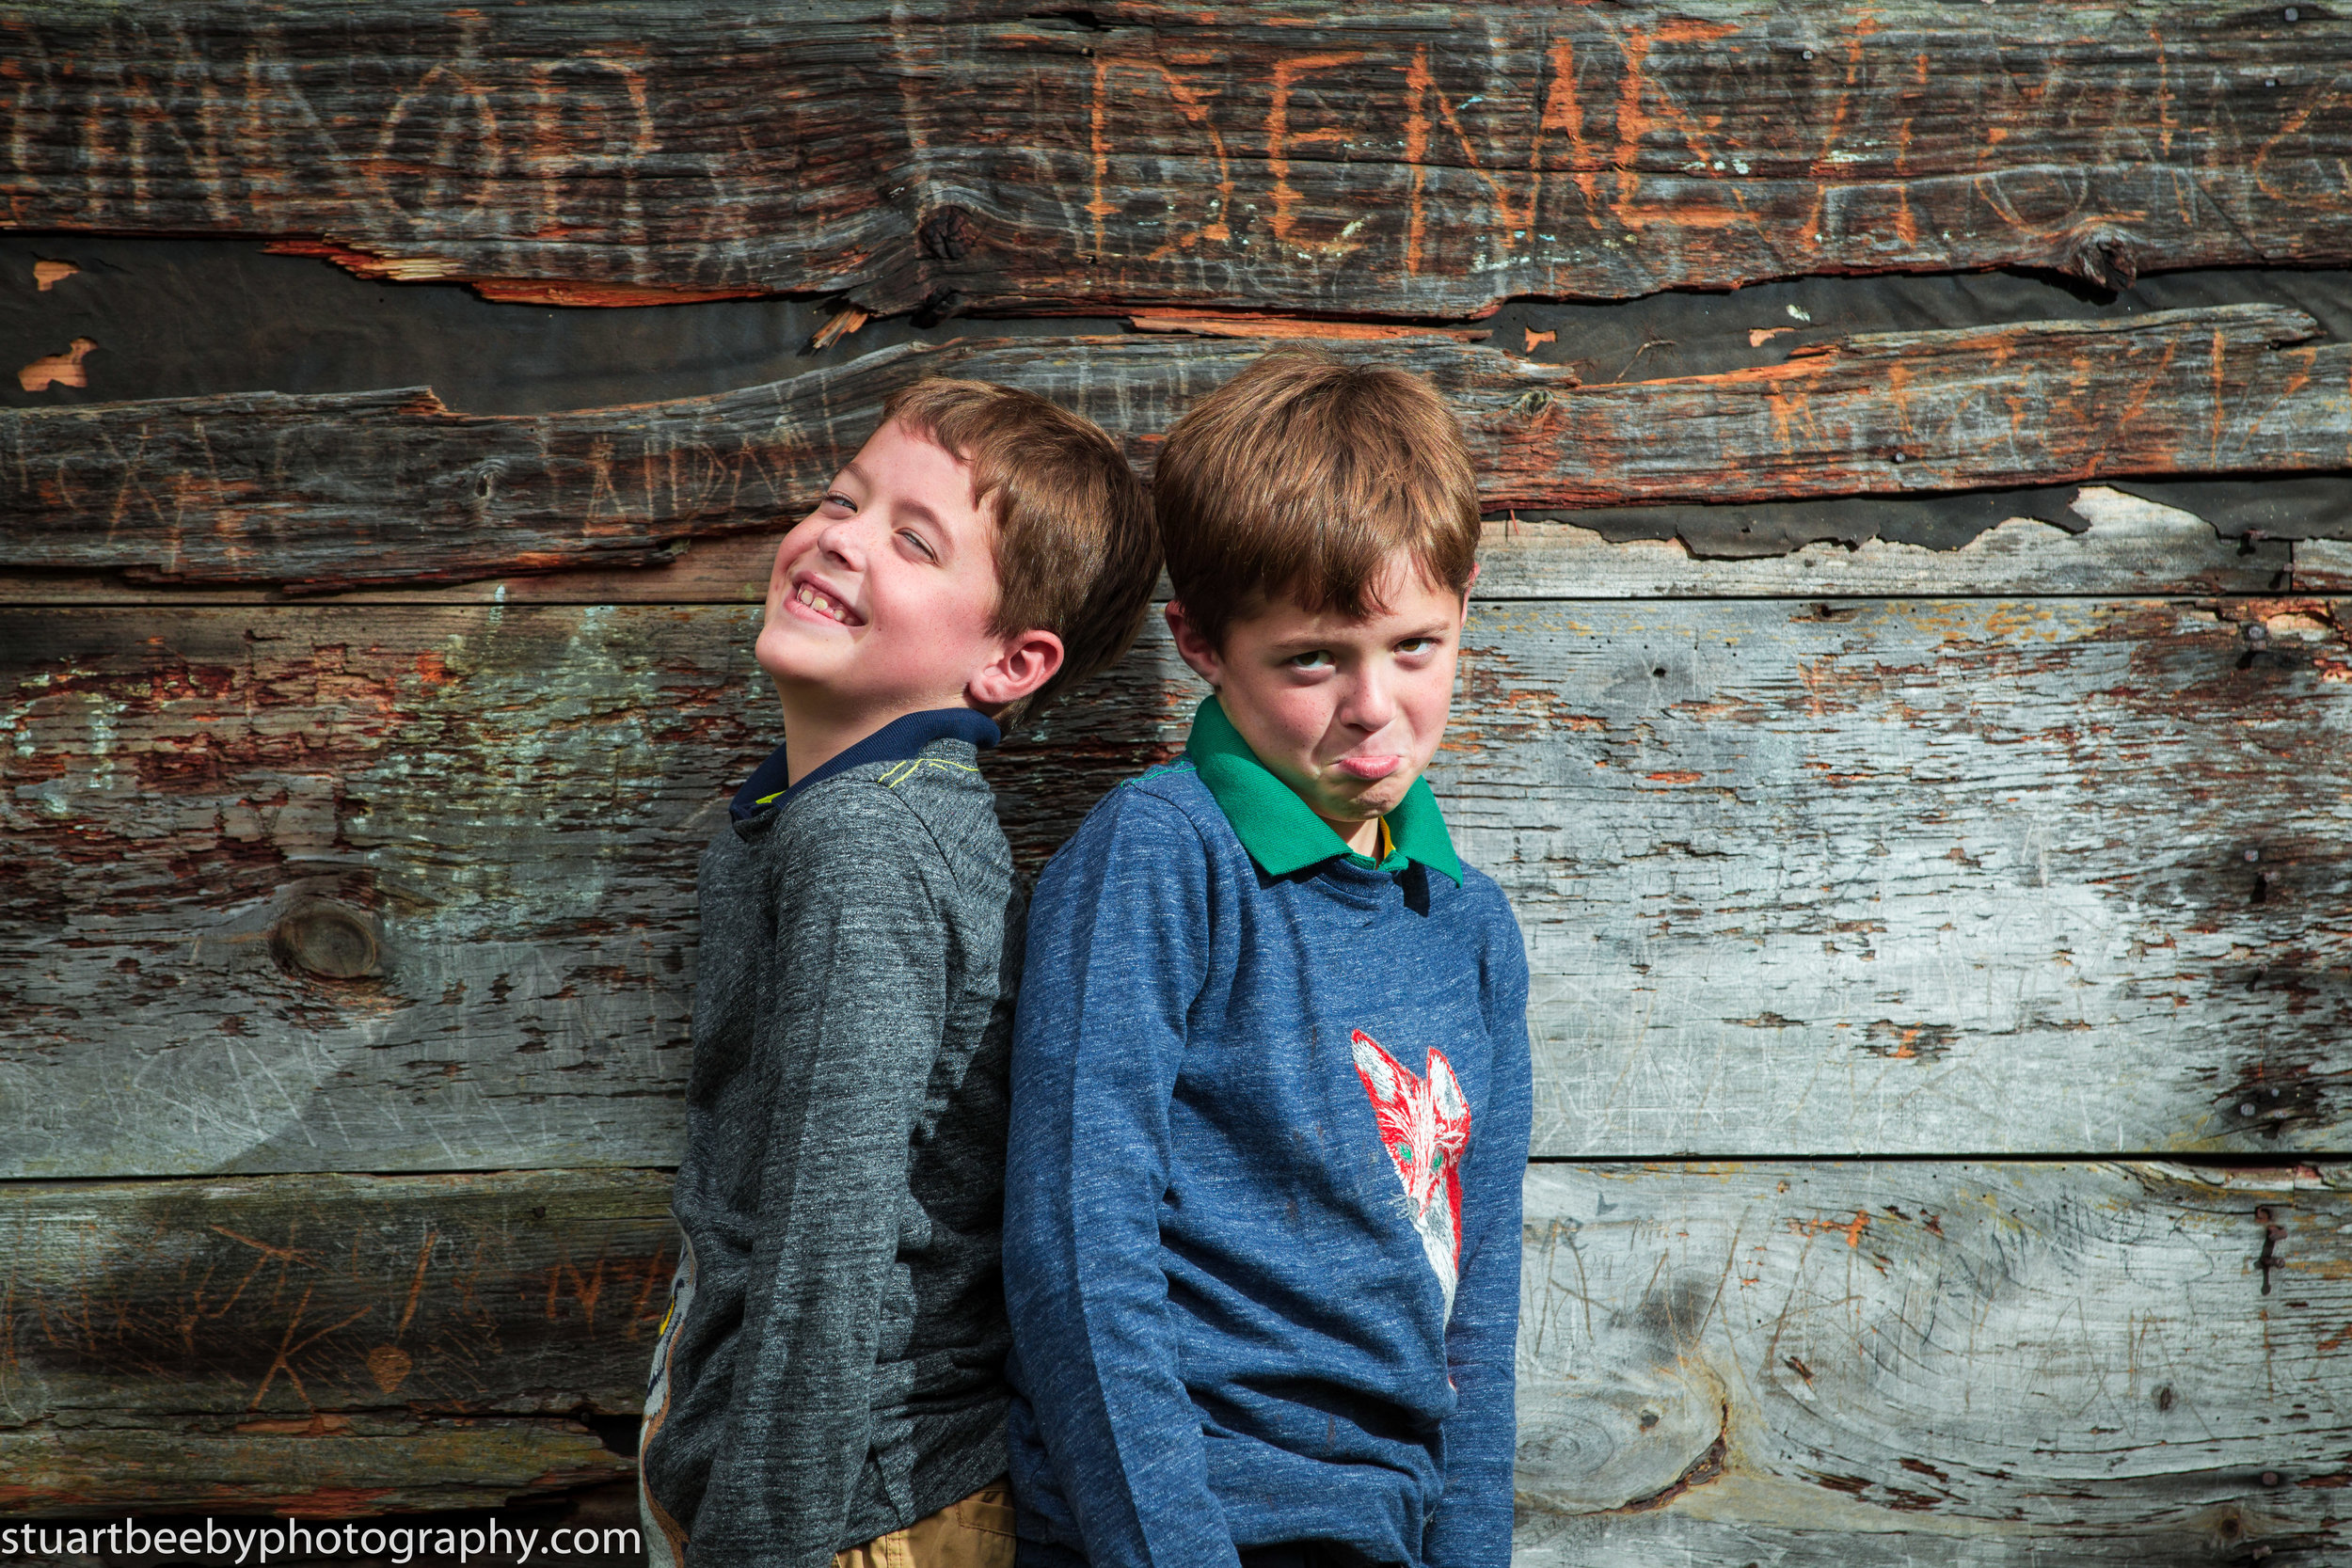
The Bryant Twins
Its been a busy period for family photos but I still have a couple of weekend dates available so please get in touch to schedule your family photo session in the most colorful season in New England and have your favorite made in to this years Holiday card!

North Bridge Concord Photo Session
Fall 2016 Family Photo Session
It was a crisp Mid-September Saturday morning and we chose the beautiful setting of the North Bridge in Concord to capture these moments for Jacob and Benjamin Dretler. Both have such a sweet and cheeky nature and even though it was early in the morning and the sun hadn’t been up long the boys were full of energy and we pretty much had the whole area to enjoy a lovely walk around the riverside and bridge. The light was great so we got straight into the photo session.
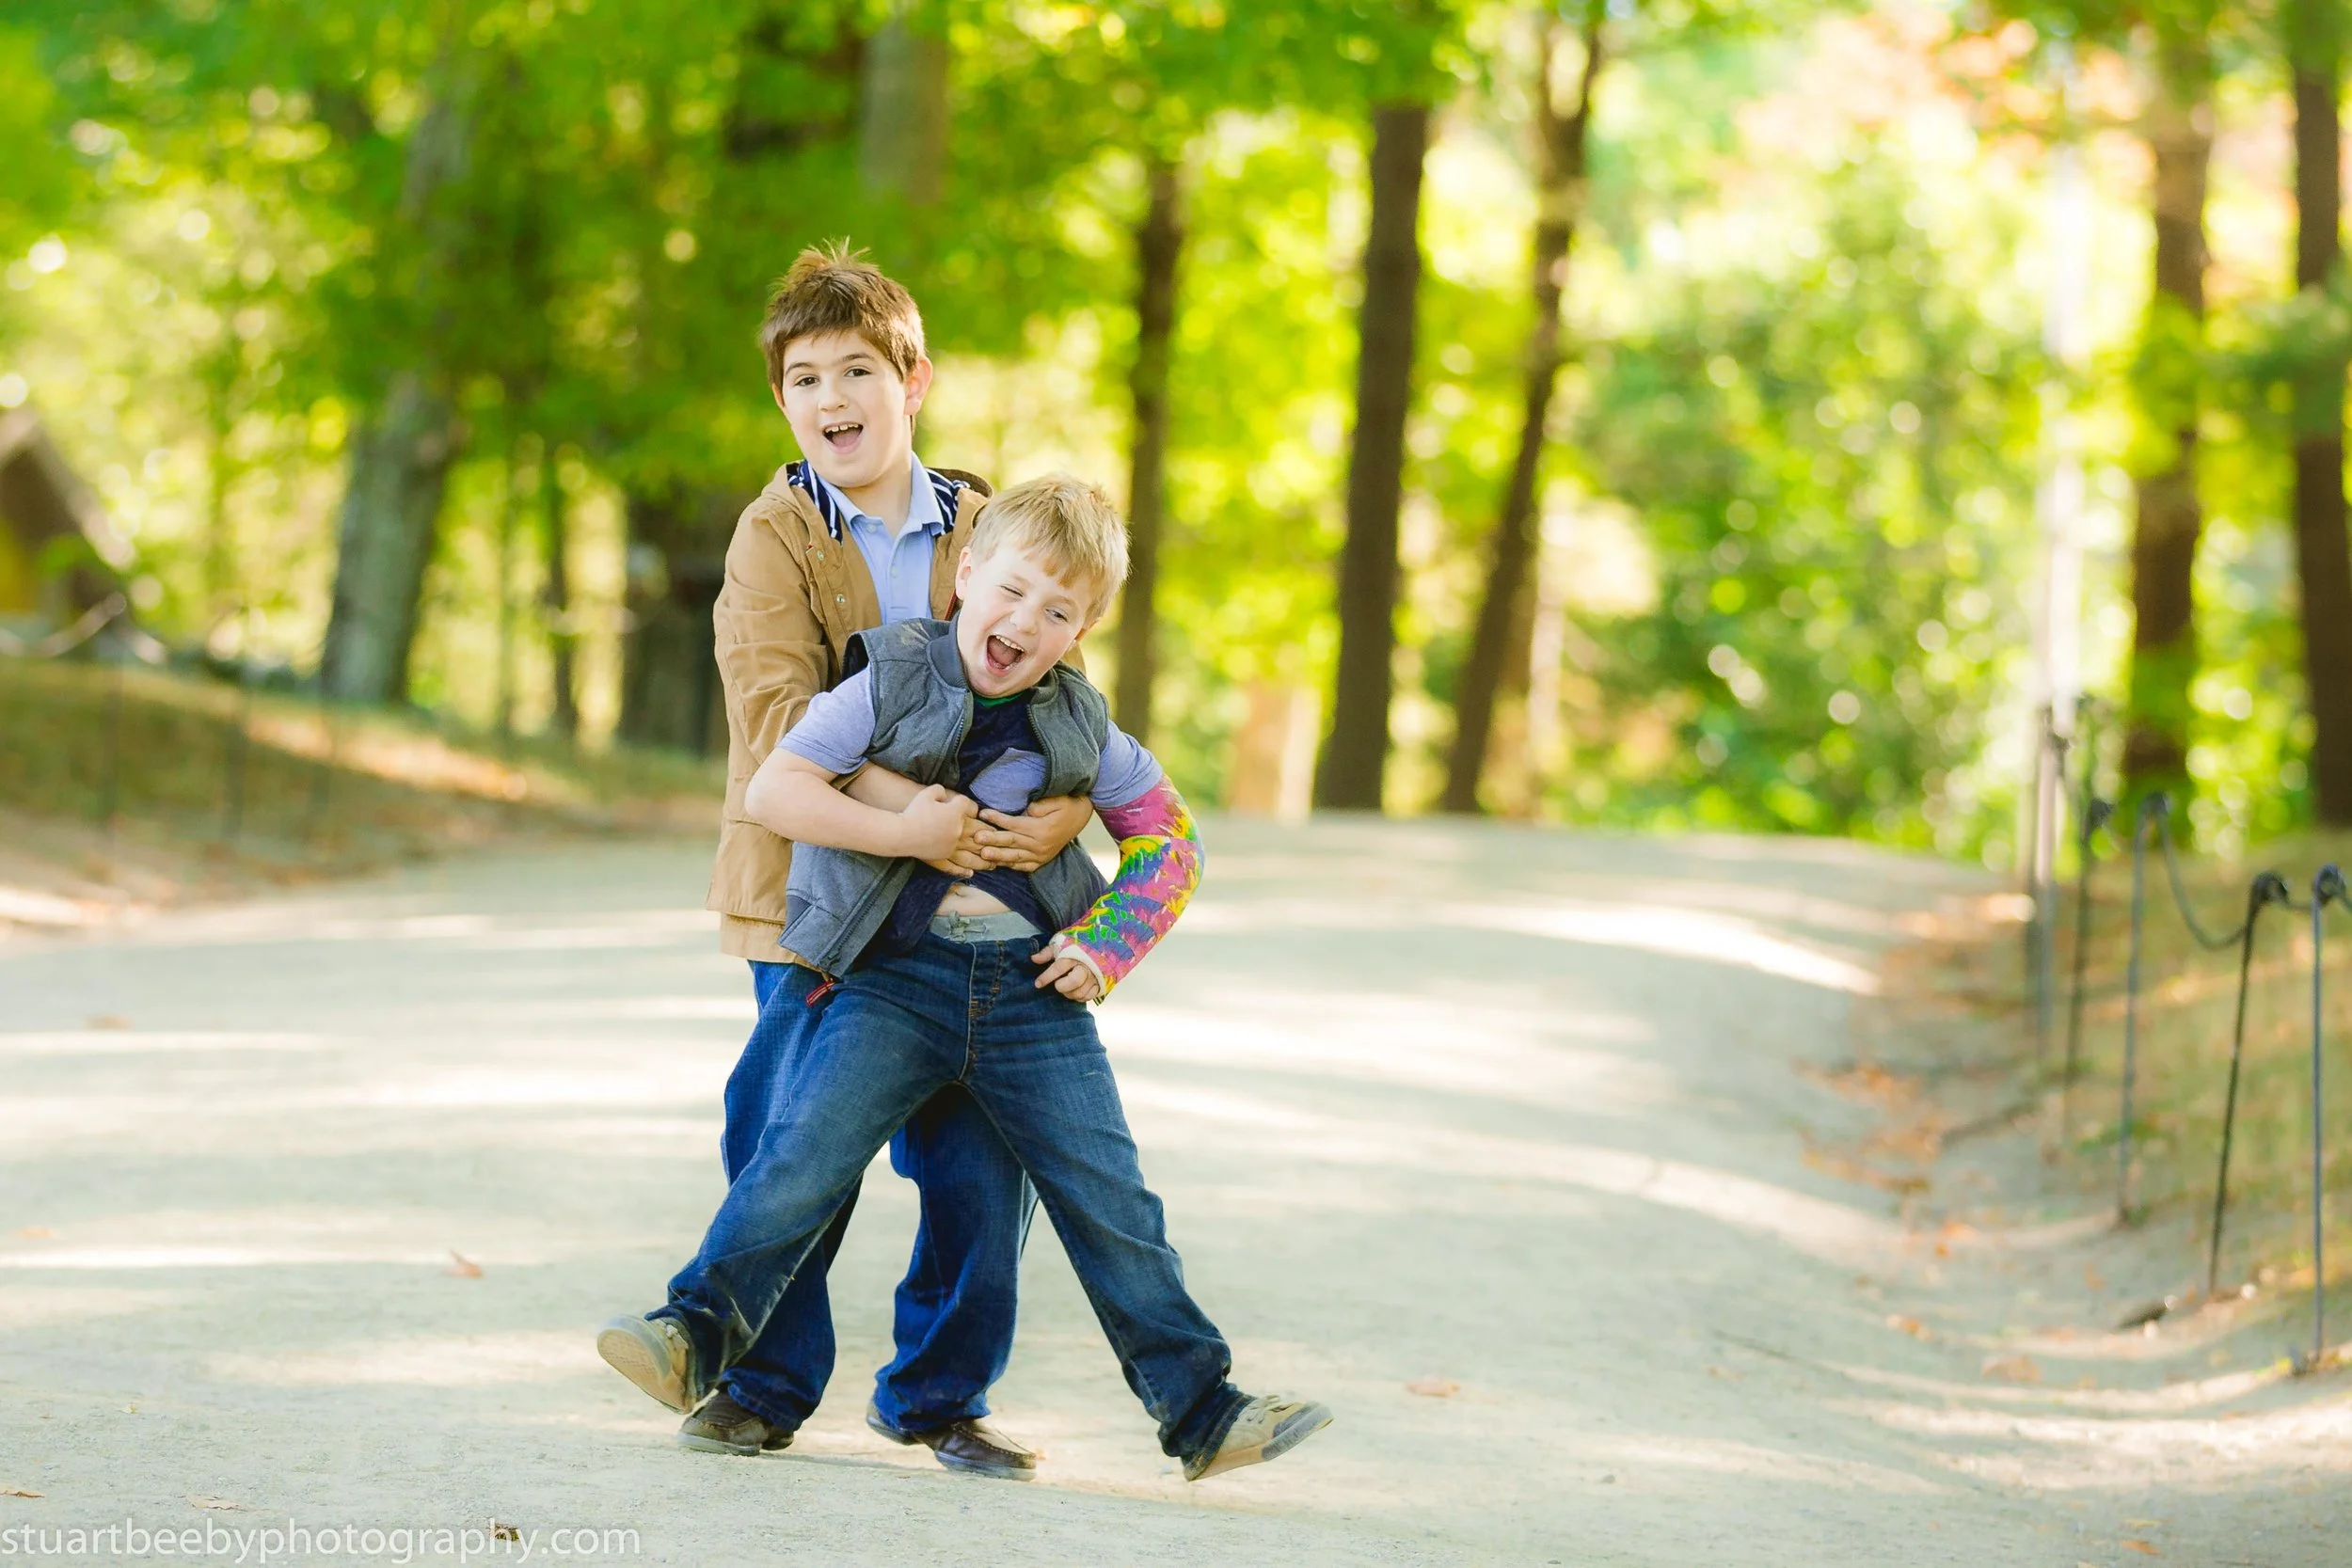
Both boys have such a sweet and cheeky nature
The boys listened and co-operated for the shoot and we were able to mix it up and give them both a rest from being photographed while I focused on the other.
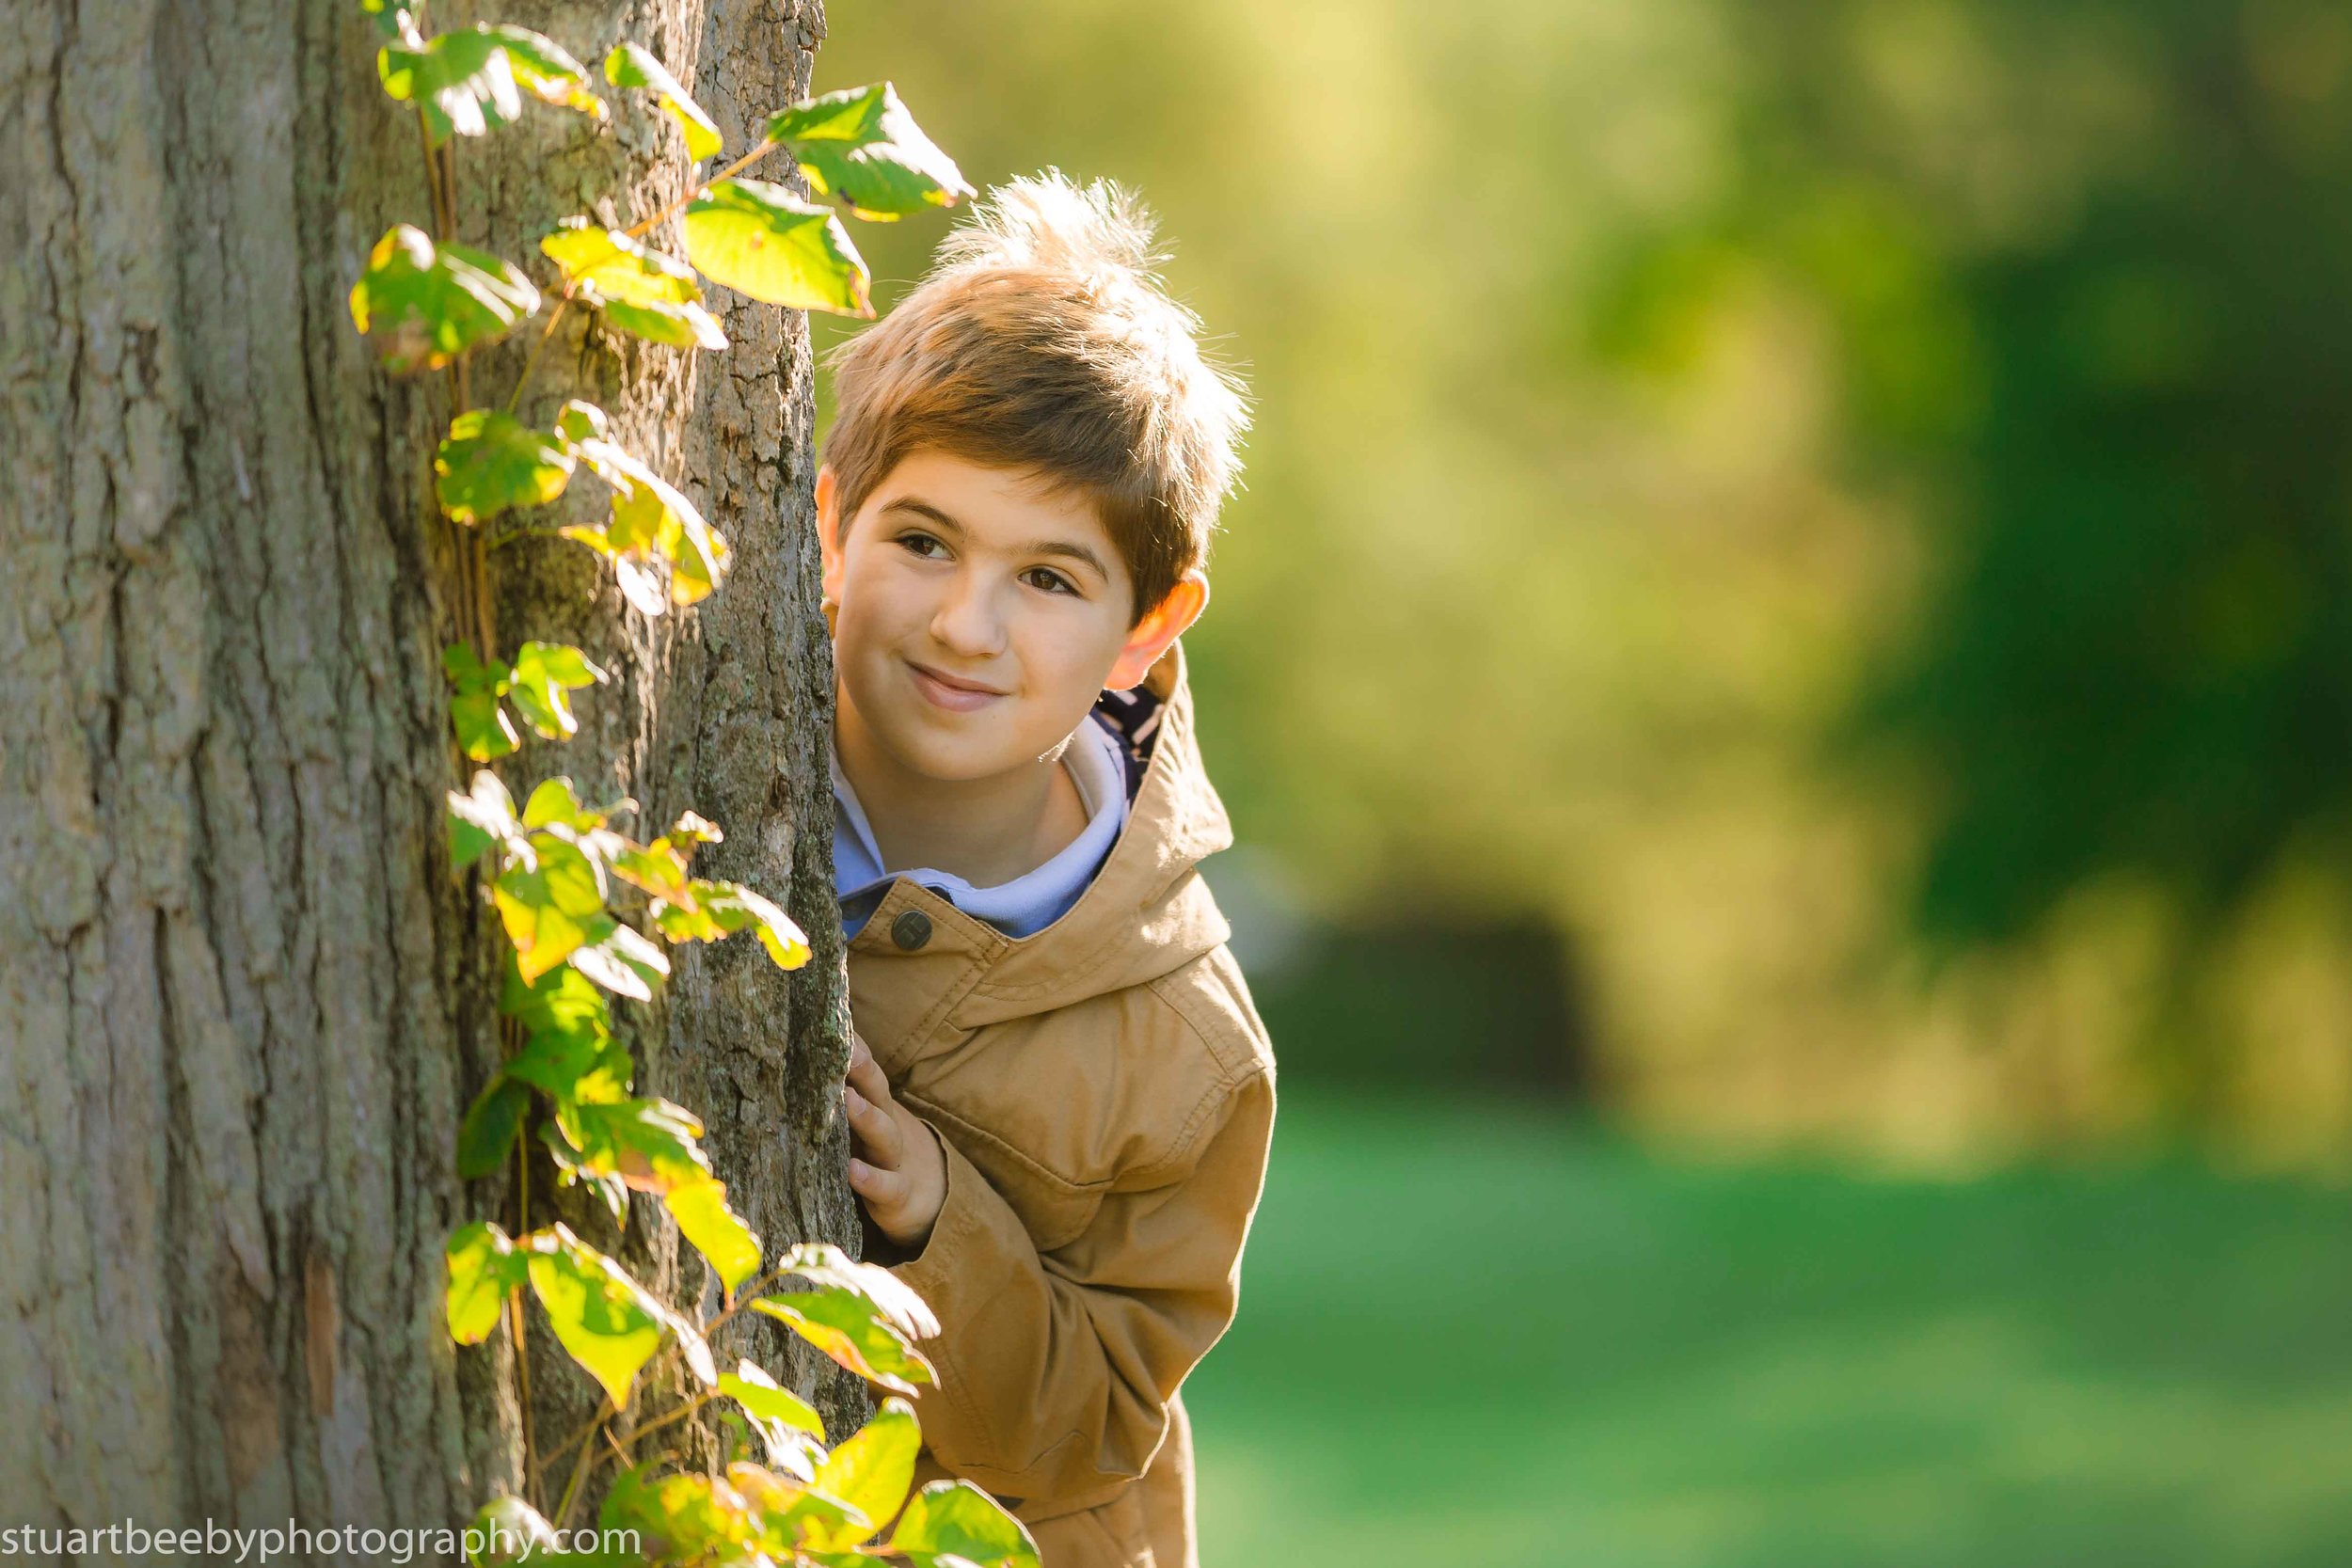
Family Photo Session

North Bridge Concord
Benjamin had a cast put on his arm just a few days before the shoot but nothing stopped him from having fun and running around. He’s clearly made of tough stuff and I couldn’t believe it when I heard from his mommy that he broke his other arm just a few days after these pictures were taken! Bless him!

This little guy is made of tough stuff

North Bridge Concord
I like to capture as many natural, candid and fun photos during a shoot because it’s those moments that we look back on and remember how we were. I don’t believe in staging and posing throughout the whole session. It can be hard work and boring for anyone if all they are asked to do is look into the camera and smile for an hour or more.

Brotherly love

The boys did great from start to finish in this early morning shoot and I was honored to have been picked to take their photos, especially as their mommy is also a very talented, professional photographer. They took advantage of my Fall 2016 offer, where I included 50 personalized Holiday Cards, which have already been printed and delivered… They turned out great!

This was the final image chosen by this lovely family for their holiday card.

Acadia National Park - Maine
If, like me, you enjoy the beauty and wonderment of sunrises, sunsets and clear night skies then you have to take a trip to Acadia National Park, Mount Dessert Island in Maine. As a photographer I was excited to see what it had to offer and it didn't disappoint!

Sunset on Cadillac Mountain
"..the first place in the United States to see sunrise"
In the center of Mount Dessert Island is Cadillac Mountain, which is the highest peak along the North Atlantic seaboard and is a sun chasers mecca. As far as mountains go though, its not particularly high at only 1,528 feet but during October and March, its the first place in the United States to see sunrise!
I've photographed many sunrises and sunsets before and its normally a solitary experience but its a very different experience in Acadia National Park and in particular on the peak of Cadillac Mountain.

the first place in the United States to see sunrise
"..we witnessed a group of people singing hymns at the top of Cadillac"
About an hour before sunrise and sunset, literally hundreds of people gather on top of the mountain to witness the celestial events. The closet thing that I've witnessed anything like it, is at Cafe Del Mar on the island of Ibiza but without the craziness!! However, we witnessed a group of people actually singing hymns at the top of Cadillac.... Each to their own I guess but it does conjure up what the atmosphere is like at the peak of this beautiful spot.

People gather and wait for sunrise
Its a place where the young, the old, families, couples, students, grads and even a drunk with a dog in toe unite for a few special minutes to watch and wait for the earth to spin to produce that magical moment in a day of either the first and last glimpse of the sun.
"..People actually cheer for joy"
Having experienced sunset and sunrise on Cadillac, I think sunrise was probably the more dramatic where some people actually cheer for joy as the very first rays pop over the North Atlantic horizon to light up the array of small islands just off the coast of Dessert Island, below.

Sunrise on Cadillac mountain lights up the array of small islands below
"..witness sunset, the Milky Way and sunrise"
Cadillac Mountain is a place which offers clear dark night skies so you could stay on the mountain peak to witness sunset, the Milky Way and sunrise from the same spot... Very cool!

Dawn awakens as the night fades away
"our son was so certain we would see whales"
We managed to tick off another bucket list item while we were in Maine by going on a whale watching trip, 20 miles off the coast of Bar Harbor, Dessert Island. Wendy and I were doubtful of spotting any but our son was so certain we would see whales. He wasn't wrong..

Oliver meets the captain

Whales put on a show

And got quite close
Another spot on the island that you have to see, especially on a clear night is Sand Beach, which is a small, quiet cove with tree covered cliffs on either side and the only sound is the waves gently rolling in and the millions of stars overhead create a perfect backdrop. Its pure heaven!!

Oliver star gazing on Sand Beach, Acadia National Park
We loved Acadia National Park and we cant wait to go back for the great food, great weather and amazing scenic and picturesque land and seascapes. We stayed in Bar Harbor Regency, which we totally recommend. The village of Bar Harbor is just a few minutes away and has great bars, restaurants and shops where you can pick up some souvenirs.

Adirondack Road Trip
I've been interested and fascinated by the natural world and the night sky for as long as I can remember. My landscape photography often features sunsets and sunrises which means when I'm out on location at either end of a day, I see lots of wildlife. So just by getting out with my camera to capture the beauty that surrounds us, I'm often treated with a nice little surprise and a glimpse of nature, which many people don't get to see.
I've been interested and fascinated by the natural world and the night sky for as long as I can remember. My landscape photography often features sunsets and sunrises which means when I'm out on location at either end of a day, I see lots of wildlife. So just by getting out with my camera to capture the beauty that surrounds us, I'm often treated with a nice little surprise and a glimpse of nature, which many people don't get to see. My 7 year old son will often ask me "how come you get to see all the cool stuff, daddy??
The truth is to see all the "cool stuff" takes a lot of effort, planning and commitment. When my son is a bit older and has learned patience, I hope to show him all the beauty that surrounds us, including the less obvious and how through photography, we are able to capture it.
At 7 years old he is already showing an interest in the night sky and can point out Venus and Jupiter but at that age its difficult to comprehend the magnitude and I'm looking forward to asking him, if he has ever stopped and wondered how big the universe is or even how big our galaxy, the Milky Way is?
I would explain to him that a beam of light can travel around the circumference of the Earth 7.5 times in just 1 second....

Stuart Beeby: Canon 6D, 100mm, ISO 100, F16, 4 seconds
.. Yet it would take that same beam of light, 100,000 years to travel from one side of our galaxy to the other. And that our galaxy is just one of more than 100 Billion other galaxies!
But thats still difficult to comprehend, even for adults. So maybe to help him put it into context I will ask him to look at a music CD, to hold it in his hand . Now imagine if he could place our entire solar system on that CD, with the sun in the middle and the 8 planets in orbit around it. And then at that scale, our Earth would represent the actual size of the Milky Way galaxy.!!
That's how big our own galaxy is!! It contains more than 100 Billion stars. How can anyone not feel humbled by the shear scale of what surrounds us?

I've always been fascinated with the night sky ever since my dad got me to look up on a very clear night when I was 7 years old. My dad pointed out a faint milky white strip of light arching overhead and he explained to me that we were looking at the Milky Way. I was fascinated but I didn't really understand or appreciate what I was looking at, at the time.
Now at almost 44 years old, I wanted to once again look up and see that faint milky white strip but this time I wanted to take a picture of it. But what exactly is that strip of light that arches over the sky? The ancient Romans named it Via Lactea, which translates to The Road of Milk. Now, with centuries of collective knowledge and modern technology we not only know what we are looking at, we can capture it in a way that the ancient Romans would never have even dreamed of. Essentially, we are looking into our own galaxy and the milky white strip is the collective light from the billions of distant stars that make up the center of the Milky Way- The Galactic Center.
In order to photograph it, I knew that I needed really dark skies, away from all the street lights, buildings and traffic but where could I get the dark skies? I discovered a very useful website called https://darksitefinder.com/ which shows a map of the world and how light or dark an area of the map is at night. The map showed me that the Adirondack mountain range in the State of New York would provide the dark skies I was looking for. So I packed my car and set off on the 5 hour drive in search of dark skies.
I needed to make sure I had the right camera gear with me . I use a Canon 6D for my camera body and I own a few different lenses but none that would give me the shot I was planning, so I rented a Canon 14 mm 2.8 prime lens from my local camera gear rental shop: Lens Pro to Go
I wasn't sure exactly where I was going but I knew that I needed to find somewhere before it got too dark in order to set up my camera. Setting up a camera in the dark isn't fun and its very easy to lose something in the process! I looked for somewhere that had big skies in a more open area of the landscape, away from all the tree cover. I also wanted a foreground element which would give some interest and scale to my night shot.
It was the end of June and the fireflies were dancing everywhere around me. It was impressive to see so many. In fact you can just make some out in the image below. I knew that I had to take two exposures to give me the finished photo. I would have to take one shot for the sky and the other for the tree in the foreground which I lit up with my torch or flash light. I then combined the two images to give me my first ever photo of the Milky Way Galactic Center:

Stuart Beeby: Canon 6D, 14mm, ISO 2000, F2.8, 15 seconds
Aside from man made light pollution, the biggest source of light in any night sky is more often, the Moon! As part of my research and planning I had to check out timeanddate.com which tells you the times of moon rise and moon set.
After I got my first shot, I kept driving north and I came to a highway which was quiet and dark. I looked out of the car window and I could still make out the Milky Way with my naked eye. I could also see a faint yellowish moon rising over the mountains in the distance. I knew I didn't have long before the moon overpowered the sky with its reflective light so I had to move fast. I stopped the car and framed up the composition I wanted, which was to capture the moon rise and the Milky Way overhead in the same shot. It was very tricky to get the right exposure because the moon is so bright compared to the faint Milky Way. I was pleased the way the final image turned out though.

Stuart Beeby: Canon 6D, 14mm, ISO 2000, F2.8, 15 seconds
I had planned to really rough it on this short trip to the mountains so I didn't stay in any fancy hotels in comfortable beds with room service. I slept on a foam mattress in my car. And of course in mid summer, the days are long and the nights are short so I only had a few hours between this last photo of the night sky before I would have to get up to capture a sunrise.
After a very uncomfortable few hours "sleep" I got up about 20 minutes before the sun rose, feeling exhausted but just in time to set my camera up. I've learned that taking pictures of sun rise is really difficult and it takes a lot of effort! Not only does it mean an early start but getting the exposure right is tough. To shoot into the sun often creates unwanted flaring in the lens and the difference between the light of the sun and the areas in shadow is vast. Time is against you too. The sun rises pretty fast so you don't have the luxury of trying lots of different shots but I end up with this panoramic:

Stuart Beeby: Canon 6D, 105mm, ISO 100, F9.0, 1/100 sec
To capture the sunrise was great but to get this image meant walking over some train tracks and as I was taking the photos, I could hear a train in the distance. I was literally a few feet away from the track and then the train showed up. I was stuck between a drop into the lake below me and the train tracks. I braced myself as the train thundered passed me. It was quite a scary moment...

Stuart Beeby" Canon 6D, 32mm, ISO 100, F4.0, 1/80 sec
After a cheeky McDonald breakfast (well, I was only holiday), I found a waterfall. I'd not taken pictures of waterfalls before but I knew that wanted to show the movement of the water falling over the rocks. By now though, the sun was up and it was pretty light. To show movement of water requires a slower shutter speed, which in turn lets more light into the camera which over expose your shot so I had to use an ND Filter on the front of the lens to let a lot less light into the camera, which allowed me to slow the shutter speed enough to give the effect of silky soft flowing water:
Stuart Beeby: Canon 6D, 21mm, ISO 100, F5.6, 13.0 seconds
I drove up into the Keene valley area of the Adirondacks and I was taken back with its beauty. Its such a lovely area and I recommend to anyone that they check it out. White Face Mountain is one of the, if not the only mountain you can drive your car close to the summit.. Its not that I'm a lazy, unfit person but time was against me on this trip and I didn't have the time to hike a full mountain.
I really wanted to get another shot of the Milky Way from the top of the mountain but sadly, they close the summit even before sunset so I was only able to take a few daytime shots along with all the other tourists. Of course, I had to get a mountain summit selfie with my dog, Daisy looking over East Lake.

I did manage to find a nice panoramic composition from near to the summit with the mountain road, snaking up the mountain below me:

Stuart Beeby: Canon 6D, 33mm, ISO 100, F16, 1/80 sec
I noticed that the clouds had really started to build up and I wondered how I would get a other night sky photo with so much cloud around. So I checked my phone for weather and worked out that if I headed back towards home but staying in the mountains in southern Vermont, I would get clearer skies.
Before I headed out though, I wanted to get another waterfall so I drove to an area nearby where I knew there was a waterfall. But as I walked through the woods towards the falls, I noticed something on the path up ahead of me. You remember earlier, I said that my son always asks me how come I got to see all the cool stuff:

Stuart Beeby: Canon 6D, 100mm, ISO 1600, F.4.0, 1/200 sec

Stuart Beeby: Canon 6D, 100mm, ISO 1600, F.4.0, 1/200 sec

Stuart Beeby: Canon 6D, 100mm, ISO 1600, F.4.0, 1/200 sec
Now its at this point, I remembered telling my wife that I had planned to go and get lost in the mountains with the camera fro the weekend and she jokingly said "well don't get and get yourself mauled by a bear or anything will you". laughing it off, I said "yeah right". But even though I knew there were bears in the area, I had never thought I would actually come face to face with one and her two cubs!
When I saw the cubs I really had to be careful because I knew she would be extra sensitive and protective. I just wish I had a longer lens with me so that I could have got closer in but it was still a special moment.

Stuart Beeby" Canon 6D, 100mm, ISO 1600, F4.0, 1/50 sec
I set out on this trip to photograph the Milky Way but to see a wild bear with her two cubs in the woods was the icing on the cake for me.
I reached my last destination just as the sun had set behind the mountains. It was getting dark and I spotted this old, weather beaten barn, which I thought would make for a good foreground for my final Milky Way shot on this trip.

Stuart Beeby: Canon 6D, 14mm, ISO 2500, F2.8, 15 seconds
I liked the way this last image ended up because the red faded color of the barn matches the glow from the galactic center.
My road trip to the Adirondacks was so memorable for me and I'm looking forward to going back with my son one day and to show him how to capture it for others to see and to show him what is possible with some planning, a lot of commitment and a passion for photographing the World around us.
Stuart Beeby